78
Drives
b
For the Vostro 220s
, lift the release latch that secures both the optical
drive and the 3.5-inch device in their respective drive cages.
c
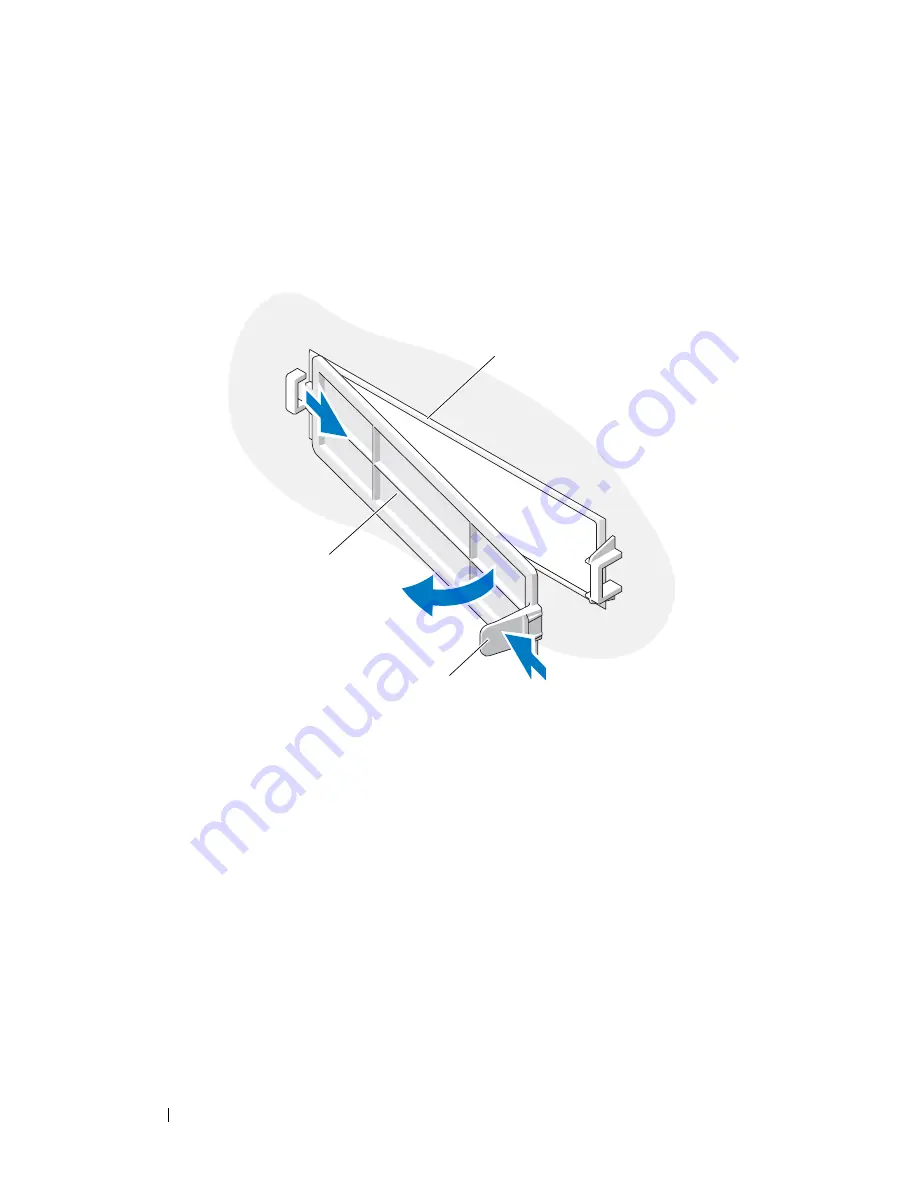
Remove the empty-bay cover from the bezel: From the inside of the
bezel, press the release latch on the cover, and lift the cover from the
bezel.
5
Remove the media card reader from its packaging.
6
For the Vostro 220s, install two screws on each side of the media card
reader.
7
Gently slide the device into the bay from the front of the computer.
8
For the Vostro 420 and Vostro 220:
a
Align the screw holes in the device with the screw hole and slot in the
drive cage.
b
Replace and tighten the two screws to secure the device in the drive
cage.
1
inside of bezel
2
release latch
3
cover for empty bay
1
3
2
Summary of Contents for Vostro 220 - Vostro 220 Slim Desktop Computer
Page 50: ...50 Computer Cover ...
Page 52: ...52 Bezel 1 clips 4 2 bezel 1 2 ...
Page 54: ...54 Bezel ...
Page 64: ...64 PCI and PCI Express Cards ...
Page 87: ...Drives 87 Vostro 220s 1 3 5 inch bay break away metal plate 1 ...
Page 88: ...88 Drives ...
Page 94: ...94 Fan Vostro 420 1 chassis fan 2 system board power connector 3 screws 4 2 1 3 ...
Page 95: ...Fan 95 Vostro 220 1 chassis fan 2 system board power connector 3 screws 4 2 1 3 ...
Page 96: ...96 Fan Vostro 220s 1 system board power connector 2 chassis fan 3 screw 1 2 3 ...
Page 98: ...98 Fan ...
Page 111: ...Power Supply 111 Vostro 220 ...
Page 116: ...116 Power Supply ...
Page 124: ...124 System Board ...
Page 138: ...138 Contacting Dell ...


