118
Installing System Components
1
Turn off the system, including any attached peripherals, and disconnect
the system from the electrical outlet.
2
Open the system. See "Opening the System" on page 67.
3
Remove the PEM. See "Removing the PEM or PEM Shell" on page 75.
4
Remove the cooling shroud assembly. See "Removing the Cooling Shroud
Assembly" on page 71.
5
Locate the battery socket. See Figure 6-1.
NOTICE:
If you pry the battery out of its socket with a blunt object, be careful not to
touch the system board with the object. Ensure that the object is inserted between
the battery and the socket before you attempt to pry out the battery. Otherwise, you
may damage the system board by prying off the socket or by breaking circuit traces
on the system board.
NOTICE:
To avoid damage to the battery connector, you must firmly support the
connector while installing or removing a battery.
6
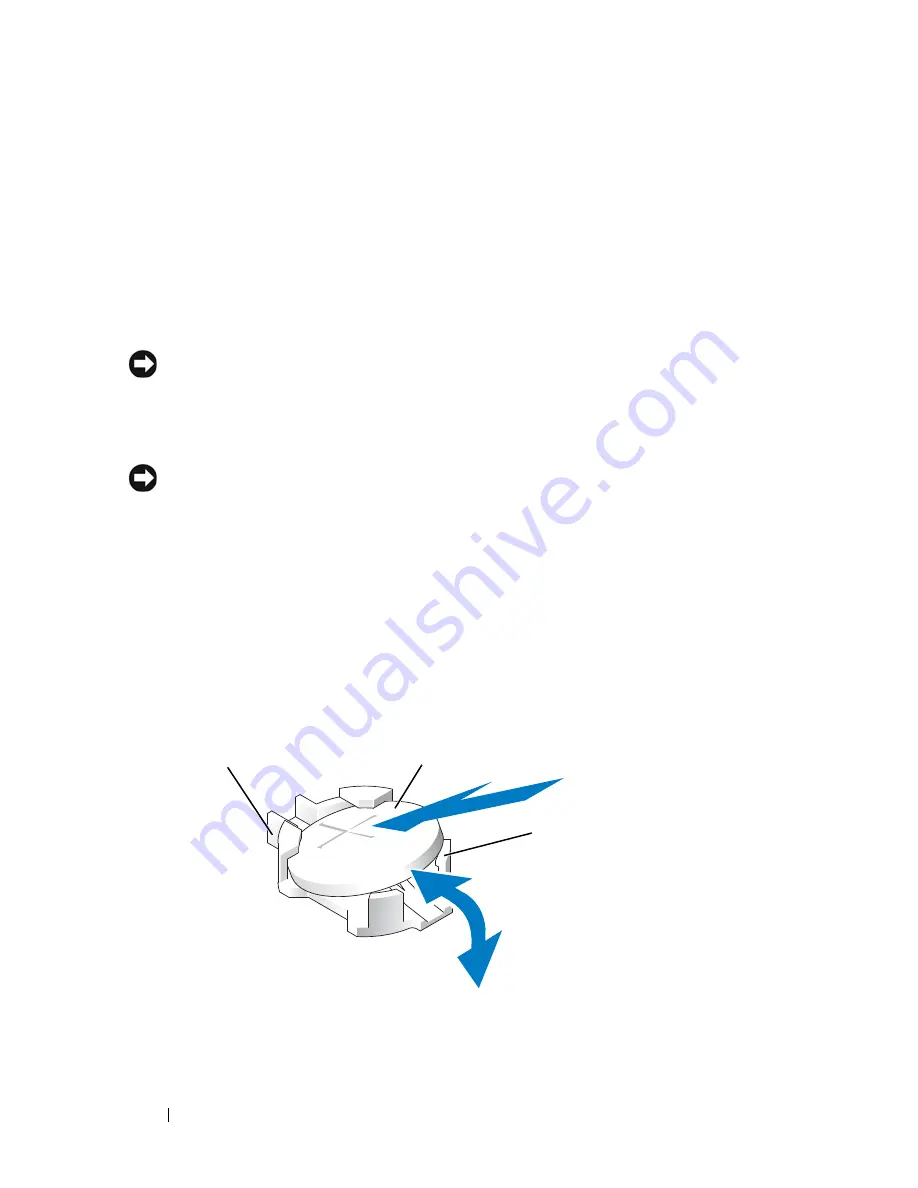
Remove the system battery. See Figure 3-26.
a
Support the battery connector by pressing down firmly on the positive
side of the connector.
b
While supporting the battery connector, press the battery toward the
positive side of the connector and pry it up out of the securing tabs at
the negative side of the connector.
Figure 3-26.
Replacing the System Battery
1
positive side of battery connector
2
system battery
3
negative side of battery connector
2
3
1
Summary of Contents for PowerEdge HX574
Page 1: ...Dell PowerEdge R905 Hardware Owner s Manual ...
Page 10: ...10 Contents 7 Getting Help 181 Contacting Dell 181 Glossary 183 Index 195 ...
Page 44: ...44 About Your System ...
Page 62: ...62 Using the System Setup Program ...
Page 144: ...144 Installing System Components ...
Page 182: ...182 Getting Help ...
Page 194: ...194 Glossary ...


