Diagnostic aids
3-19
To set print registration:
1.
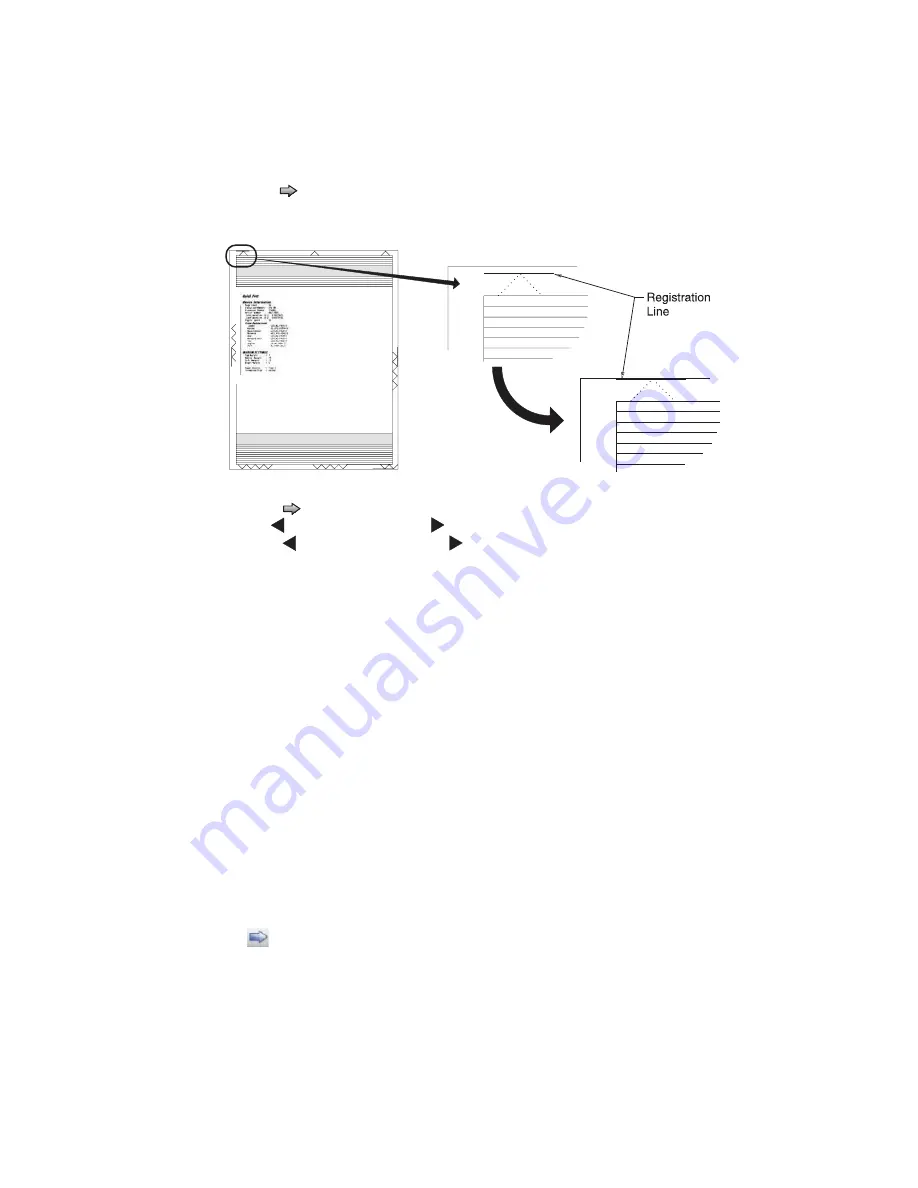
Print the Quick Test page.
a.
Touch
REGISTRATION
from the Diagnostics Menu.
b.
Touch
to select Quick Test. You may need to scroll to the next page.
Retain this page to determine the changes you need to make to the margins settings. The diamonds in the
margins should touch the margins of the page.
2.
To change the value of any of the margin settings:
•
Touch
to the right of the appropriate margin setting. The panel displays the setting's name in the
header and
[
setting's current value
]
in a menu below the header row.
•
Touch
to decrease the value or
to increase the value.
•
Touch
Submit
to save the change, or Touch
Back
to cancel and return to the Diagnostics Menu.
•
Touch
Submit
to save all changed values.
The device prints a Quick Test page from the appropriate paper tray. While the Quick Test page prints,
Printing Alignment Page
appears on the LCD.
Quick Test page
The Quick Test contains the following information:
•
Device information
•
Printer margin settings
•
Scanner margin settings
•
Alignment diamonds at the top, bottom, and each side.
•
Horizontal lines for skew adjustment
•
General printer information, including current page count, installed memory, processor speed, serial
number, Engine ID, and system card ID.
To print the Quick Test page:
Note:
Print the Quick Test Page on letter or A4 paper.
1.
Touch
REGISTRATION
from the Diagnostics Menu.
2.
Touch
to select Quick Test.
The message
Quick Test Printing…
appears on the display.
Once the Quick Test Page completes printing, the Registration screen displays again.
3.
Touch
Back
to return to the Diagnostics Menu.
Summary of Contents for 3333DN
Page 1: ... 02 Nov 2009 ...
Page 2: ... ...
Page 10: ...x Service Manual ...
Page 15: ...Notices and safety information xv ...
Page 16: ...xvi Service Manual ...
Page 28: ...1 8 Service Manual ...
Page 31: ...General information 1 11 Reduce Enlarge 25 to 400 Copy only ...
Page 160: ...3 56 Service Manual ...
Page 172: ...4 12 2 Remove the three screws B securing the top of the controller shield B ...
Page 182: ...4 22 6 Remove the screw D from the gear E 7 Remove the plastic bushing F ...
Page 192: ...4 32 2 Carefully pull the scanner front cover away from the tub assembly ...
Page 205: ...Repair information 4 45 5 Remove the three screws B from the left door mount B ...
Page 208: ...4 48 8 Use a screwdriver to pop the inner shaft lock B loose 9 Remove the inner shaft lock C ...
Page 211: ...Repair information 4 51 5 Remove the e clip B 6 Remove the media feed clutch with cable C ...
Page 217: ...Repair information 4 57 7 Open the front access door and remove the lower paper guide B ...
Page 219: ...Repair information 4 59 5 Remove the three screws B from the left side of the printer B ...
Page 250: ...4 90 12 Disconnect LSU HSYNC extension cable at the connector in the middle of the cable ...
Page 251: ...Repair information 4 91 13 Remove the three screws A from the left rear frame assembly A A A ...
Page 252: ...4 92 14 Remove the three screws B from the right rear frame assembly B B B ...
Page 282: ...6 2 Service Manual ...
Page 284: ...7 2 Service Manual Assembly 1 Covers 3 11 7 13 5 16 9 15 2 10 6 17 4 12 8 14 1 17 18 ...
Page 286: ...7 4 Service Manual Assembly 2 Imaging 3 11 7 13 5 16 9 15 2 10 6 4 12 8 14 1 ...
Page 288: ...7 6 Service Manual Assembly 3 Tray assemblies 3 2 1 5 4 ...
Page 296: ...7 14 Service Manual ...
Page 304: ...I 8 Service Manual ...


