User's Manual
88
●
Number: The proportion of the number of added face images in the face databases and
passerby databases to the allowed face images in total.
●
Space: The proportion of the space occupied by the face databases and passerby
databases to the allowed space in total.
Step 4
Click Register Face or Save and close.
●
Click Register face, and then add human face on the newly created human database.
●
Click Save and close to create a human face database with no data.
Related Operations
●
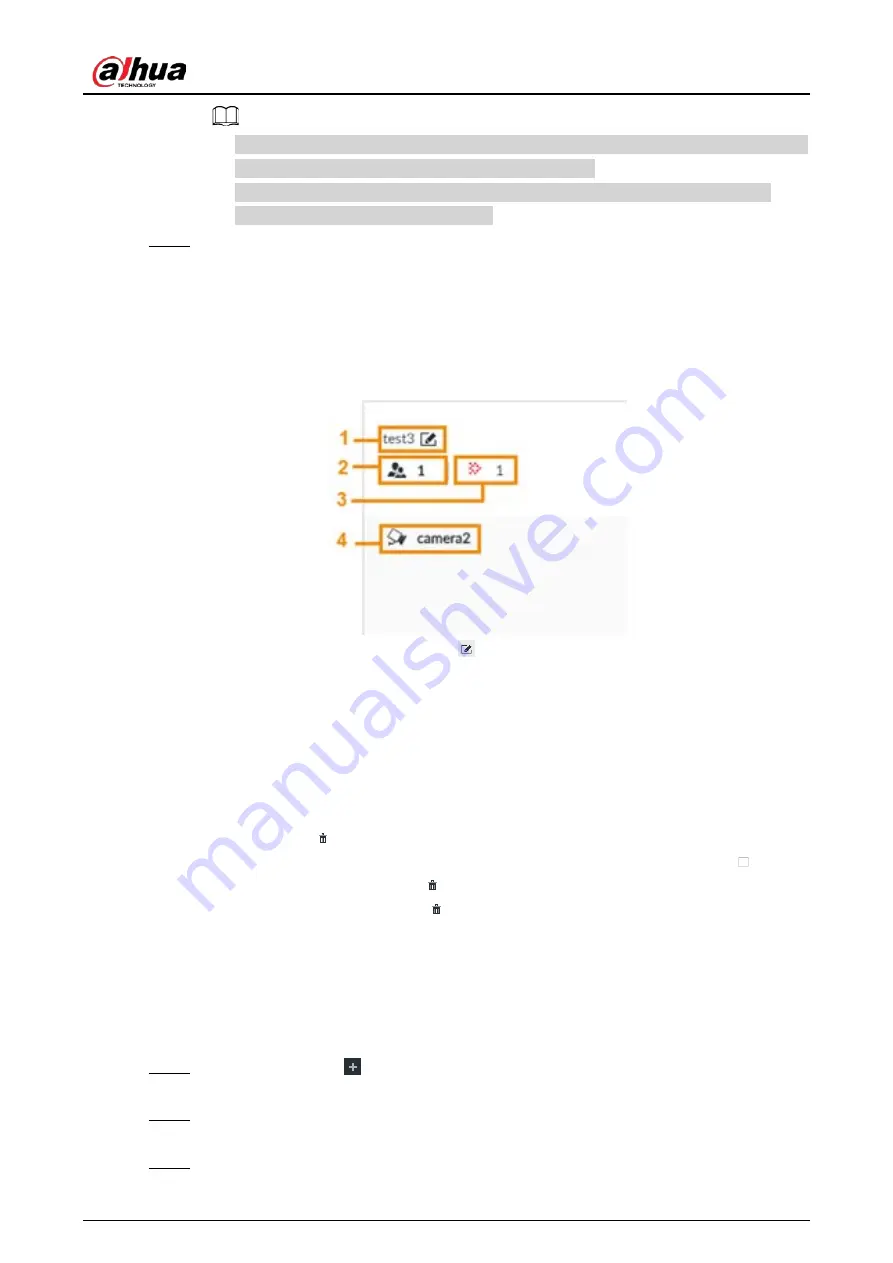
View face database details and status.
Figure 6-41 Face database
◇
1: Face database name. To modify, click
.
◇
2: Number of face images in the face database.
◇
3: Number of face images that failed to abstract. For details about face abstracting, see
"6.3.3.4.5 Human Face Abstract".
◇
4: Face recognition devices associated to this face database.
●
To manage face images, double-click the face database.
●
To arm the face database, see "6.3.3.5 Configuring Face Recognition (by Device)".
●
To delete face databases:
◇
One by one: Click
.
◇
In batches: Hover over the face database, and then select the database by clicking
. After
selecting multiple databases, click
.
◇
Delete all: Select All, and then click
.
●
To clear a face database, select the face database, and then click Clear.
6.3.3.4.2 Exporting Face Database
You can export a bin file of face images from the current device into another device so that the face
database can be shared among devices. The exported file is encrypted for better security.
Step 1
On LIVE page, click
, and then select FILE > Face Management > Face Database >
Local.
Step 2
Select one or more face databases from which you want to export face images, and then
click Bin Export.
Step 3
Enter the file Path and Password, and then click OK.


