User's Manual
77
Item
Description
Birthday
Enter number in the format of yyyymmdd or yyyy-mm-dd. For example,
20181123.
Region
Enter the corresponding abbreviation of the region.
Province
Enter the corresponding spelling or English name of the province.
ID type
Enter the corresponding number. 1. ID card, 2. Passport, 3. Others.
ID number
Fill in the corresponding ID number.
Address
Enter the detailed address.
1. On the LIVE page, click
, and then select FILE > Face Management > Face Database >
Remote.
2. Double-click a face database.
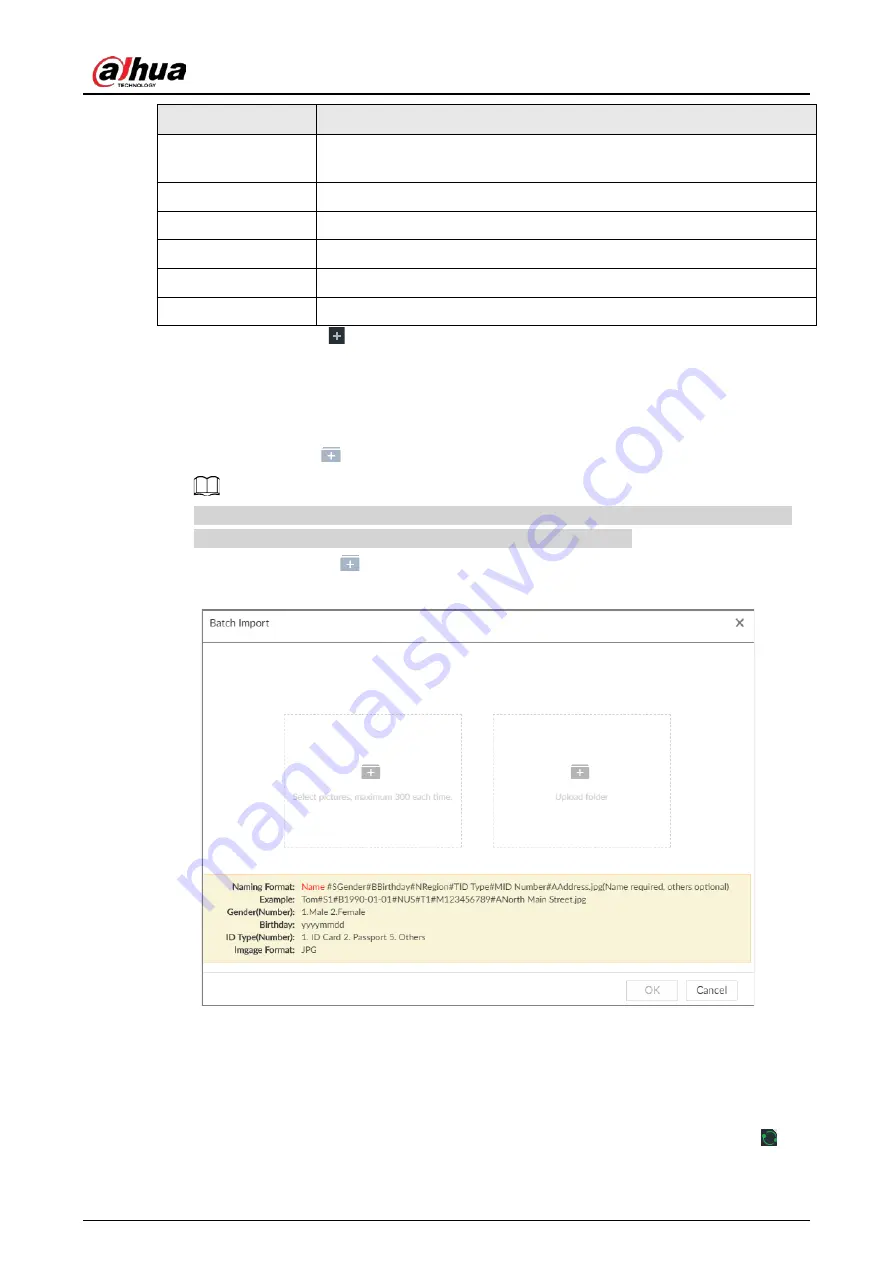
3. Click Batch Import.
4. Import face image.
●
Upload a file: Click
, select multiple face images, and then click Open.
You can select multiple face images by holding Shift and then clicking the first and the last
face images, or holding Ctrl and then click the images one by one.
●
Upload a folder: Click
, select the folder with face images, and then click Upload.
Figure 6-26 Batch import
5. Click OK.
6. Click Save and continue to add or OK.
●
Click Save and Continue to add to save current face image information and add another
human face image.
●
Click OK to save current face image information and complete registration.
After adding the image, at the lower-left corner of the human face image, there is an icon
. It
means device that face abstracting in process.


