Upgrading The Computer
Upgrading the Hard Disk Drive 6 - 5
6
5.
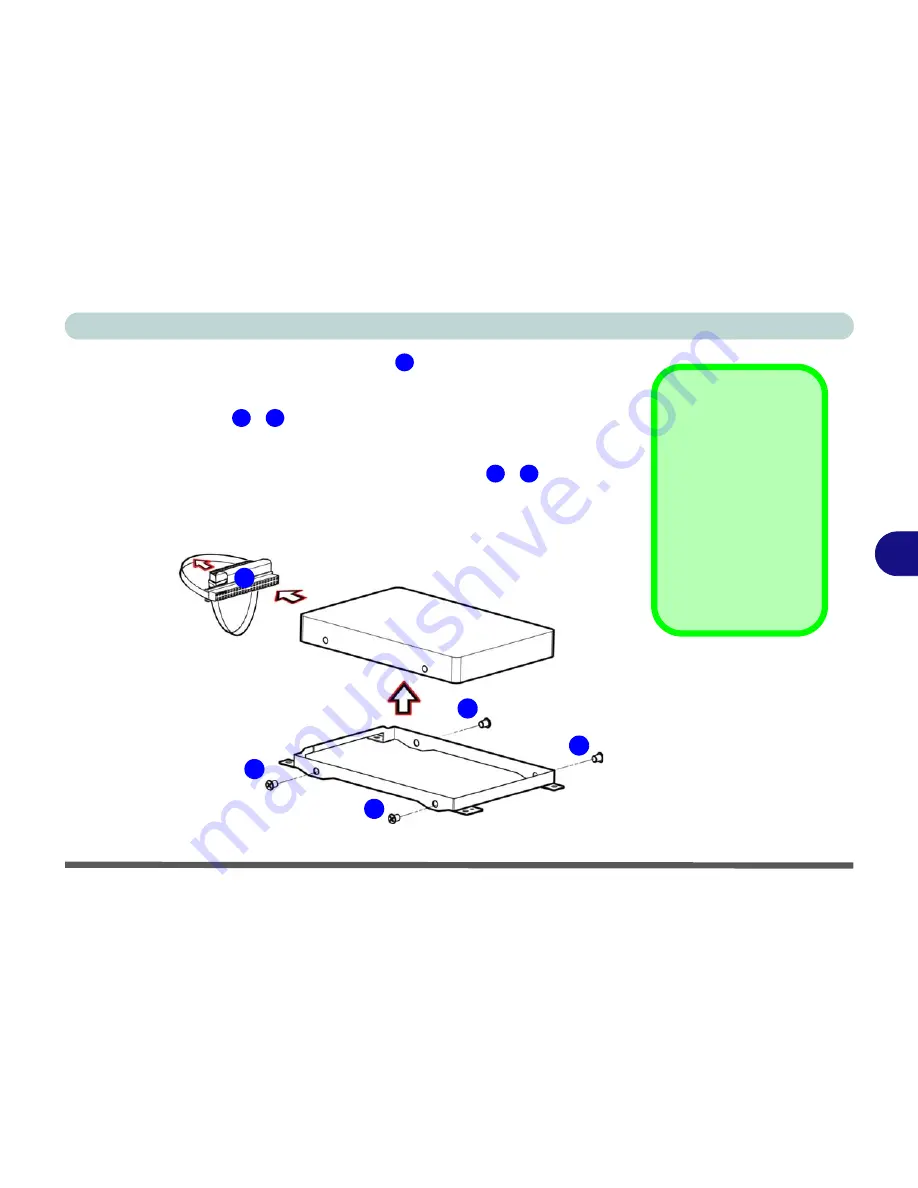
Carefully disconnect the hard disk cable
from the rear of the hard disk
assembly, and pay careful attention to which end of the cable connects to
the hard disk (
see sidebar
).
6.
Remove screws
-
from the hard disk assembly.
7.
Take the HDD out of the case, and pay careful attention to the orientation of
the disk in the case.
8.
Insert the new HDD into the case and replace screws
-
.
9.
Reconnect the HDD connector cable (
see sidebar
).
10. Reverse the removal procedure to install the new HDD assembly.
1
2
5
2
5
HDD Cable
The hard disk cable
connects to the hard
disk in one way only.
The letters
HD
on the
cable should be on the
side which connects to
the hard disk (not the
side which connects to
the computer’s main-
board).
Figure 6 - 3
HDD Case
Screws &
Connector Cable
1
2
3
4
5
Summary of Contents for D4F
Page 1: ......
Page 2: ......
Page 20: ...XVIII Preface Optional A 6 ...
Page 94: ...Advanced Controls 3 30 3 ...
Page 130: ...BIOS Utilities 5 20 5 ...
Page 174: ...Troubleshooting 8 18 8 ...


