


Operation
Roadster & Mirage S+/HD User Manual
3-19
020-100002-04 Rev. 1 (12-2008)
SIGNAL TYPE —
Either channel list, whether the
Chan
key list or the
Channel Setup
menu, identifies signal types in a shortened form as defined below. These descriptors
indicate what signal information the projector uses to identify a match for a given
channel, and are preceded by either an “i” (interlaced signals) or “p” (progressive
signal“). See Table 3.2.
Table 3.2. Abbreviations for Signal Type
Abbrev.
Signal Type
4WH
Composite (4 wire) on HC input
4WV
Composite (4 wire) on V input
SG
Sync-on-green
5W
Separate H,V
5WR
Separate H,V swapped
SVid
S-Video
CVid
Composite Video
Dig
Digital
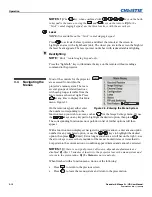
FUNCTIONS WITHIN THE CHANNEL SETUP MENU —
To copy, delete or edit a channel,
highlight the desired channel in the
Channel Setup
menu and do one of two things:
•
Press
Func
if you want to copy the selected channel or delete this or other
channels. See
Copying or Deleting a Channel
below.
•
Press
Enter
if you want to edit channel setups (i.e., non-image related parameters)
for the selected channel. See
Editing a Channel Setup
, below.
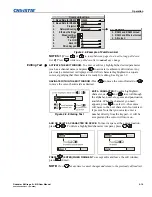
TO COPY A CHANNEL
, highlight the desired channel in the
Channel Setup
menu, then
press
Func
to go to the
Channel Copy/Delete
submenu. Select “Copy” and press
Enter
—a new channel will be created. It is identical to original, which still remains,
but it is identified with the next available number from 01-50 (Figure 3.11). If you
change your mind and do
not
want to copy the current channel, press
Exit
to cancel
and return to the previous menu. Copying channels is a quick method for creating
numerous channels, each of which can then be edited and adjusted for a variety of
presentations in the future.
Figure 3.11. Copying a Channel
TO DELETE A CHANNEL
, highlight the desired channel in the
Channel Setup
menu,
then press
Func
to activate the
Channel Copy/Delete
submenu. Select “Delete” and
press
Enter
—a confirmation window will appear to confirm that you want to delete
this channel. See Figure 3.12.
Copying
or
Deleting Channels


