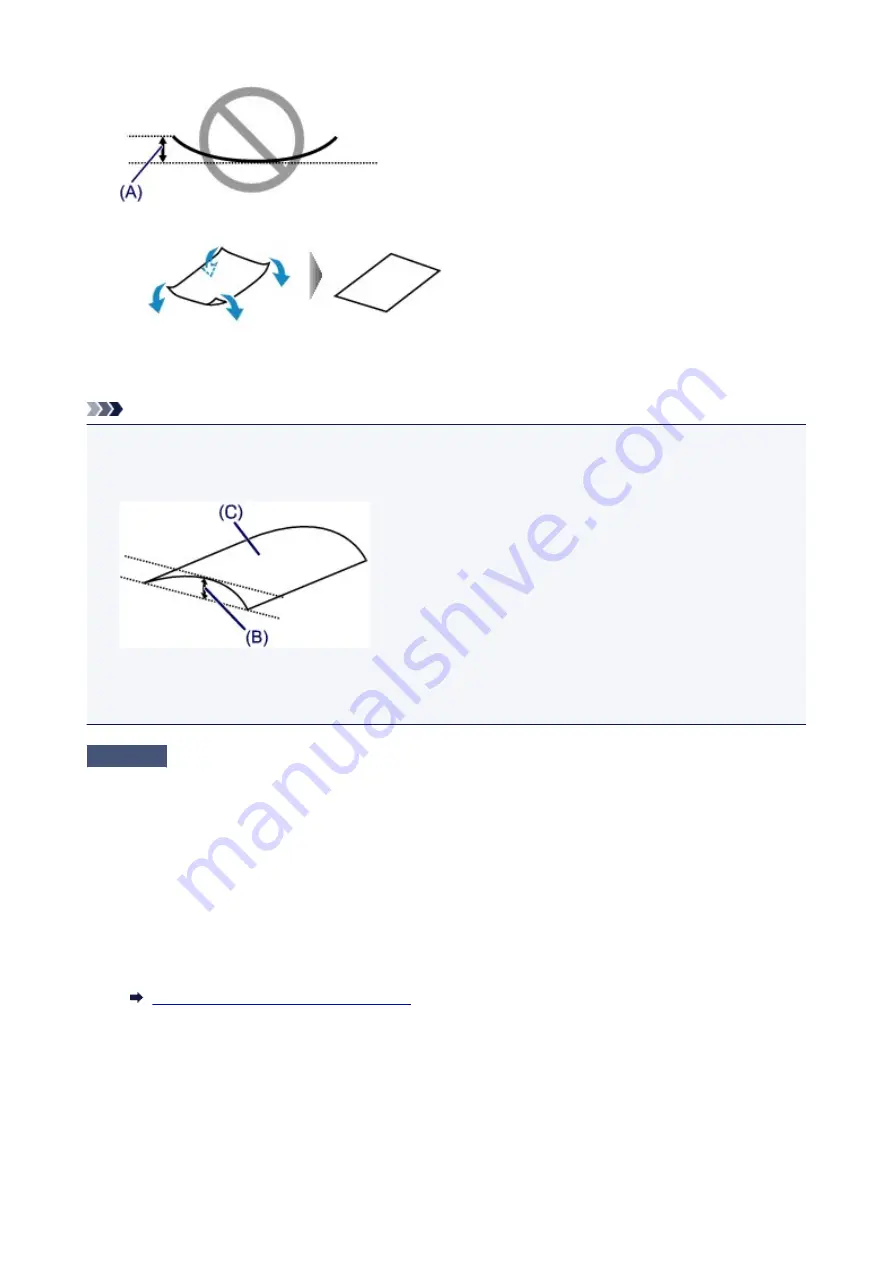
1. Roll up paper in opposite direction to paper curl as shown below.
2. Check that paper is now flat.
We recommend printing curl-corrected paper one sheet at a time.
Note
• Depending on paper type, the paper may smudge or may not feed properly even if it is not curled inward.
Follow the instructions below to curl the paper outward up to 0.1 inch / 3 mm (B) in height before printing.
This may improve the print result.
(C) Print side
We recommend feeding paper that has been curled outward one sheet at a time.
Check4
Set printer to prevent paper abrasion.
Adjusting the setting to prevent paper abrasion will widen the clearance between the print head and the paper. If
you notice abrasion even with the media type set correctly to match the paper, set the printer to prevent paper
abrasion using the operation panel or the computer.
This may reduce the print speed.
* Once you have finished printing, undo this setting. Otherwise, it will apply to subsequent print jobs.
• From operation panel
Press the
Setup
button, and then select
Device settings
and
Output settings
in this order and set
Prevent abrasion
to
ON
.
Changing Settings from Operation Panel
• From computer
◦ For Windows:
Open the printer driver setup window, select
Custom Settings
in
Maintenance
sheet, select
Prevent
paper abrasion
check box, and then click
OK
.
To open the printer driver setup window, see How to Open the Printer Driver Setup Window.
511
Summary of Contents for MAXIFY iB4140
Page 1: ...iB4100 series Online Manual Printer Functions Overview Printing Troubleshooting English ...
Page 102: ...All registered users can register and delete apps freely 102 ...
Page 137: ...Loading Paper Paper Sources Loading Plain Paper Photo Paper Loading Envelopes 137 ...
Page 140: ...140 ...
Page 152: ...Replacing Ink Tanks Replacing Ink Tanks Checking Ink Status on the LCD 152 ...
Page 168: ...Aligning the Print Head Position Manually Mac OS 168 ...
Page 187: ...Safety Safety Precautions Regulatory Information WEEE EU EEA 187 ...
Page 191: ...191 ...
Page 202: ...Main Components and Their Use Main Components Power Supply LCD and Operation Panel 202 ...
Page 203: ...Main Components Front View Rear View Inside View Operation Panel 203 ...
Page 259: ...The resending setting is completed 259 ...
Page 260: ...Network Connection Network Connection Tips 260 ...
Page 297: ...Network Communication Tips Using Card Slot over Network Technical Terms Restrictions 297 ...
Page 327: ...Print Area Print Area Standard Sizes Envelopes 327 ...
Page 332: ...Administrator Settings Sharing the Printer on a Network 332 ...
Page 339: ...Printing Printing from Computer Printing from Smartphone Tablet Paper Settings 339 ...
Page 360: ...Related Topic Changing the Printer Operation Mode 360 ...
Page 374: ...Adjusting Color Balance Adjusting Brightness Adjusting Intensity Adjusting Contrast 374 ...
Page 462: ...Perform setup following the instructions on the screen 462 ...
Page 491: ...Problems while Printing from Smartphone Tablet Cannot Print from Smartphone Tablet 491 ...
Page 538: ...Errors and Messages An Error Occurs Message Appears 538 ...
Page 540: ...To resolve errors that do not have support codes see An Error Occurs 540 ...
Page 571: ...1660 Cause An ink tank is not installed What to Do Install the ink tank 571 ...


