7
Using
the
Express
Copy
Basic
Features
Screen
7-110 Selecting an Output Device (Select Output Device)
Selecting an Output Device (Select Output Device)
For instructions on this procedure using the Regular Copy Basic Features screen, see "Selecting an
Output Device (Select Output Device)(p.1-16)."
Remark
If you specify the Form Composition mode with the
Cascade Copy mode, it is necessary to assign the
same name to the stored image form in both this
machine and the remote copy printer beforehand. If the
assigned image form name in this machine is not set in
the remote copy printer, the job is cancelled.If multiple
image forms with the same assigned name are stored
in the remote copy printer, different images may be
used for Form Composition.
If you turn the remote copy printer back ON or reattach
the finisher, you need to refresh the settings of the
remote copy printer in Register Remote Device in Copy
Settings (from the Additional Functions screen). (See
"Confirming a Remote Device(p.8-23).")
If <Use IPv4> in [IPv4 Settings] in [TCP/IP Settings] in
Network Settings in System Settings (from the
Additional Functions screen) is set to 'Off', you cannot
register a remote copy printer. (See the Network
Guide.)
If you connect the machine directly to other remote
copy printers using a crossover patch cord, you must
configure the Ethernet driver as shown below. (See the
Network Guide.)
Auto Detect: Off
Communication Mode: Full Duplex
Ethernet Type: 100 Base-TX
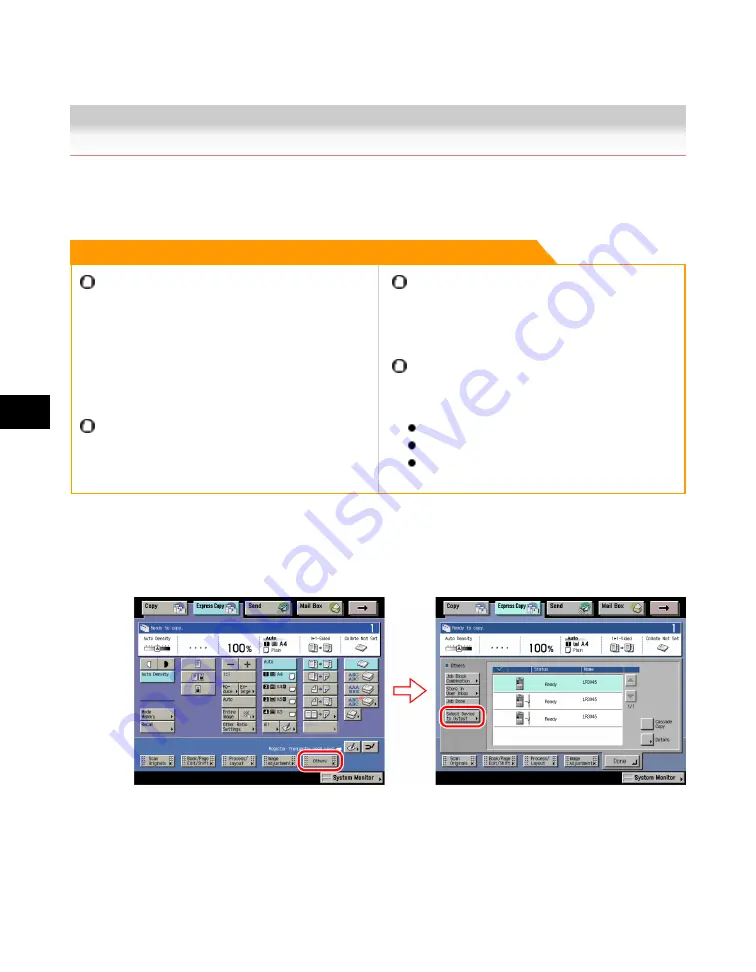
1. Press [Others]
→
[Select Device to Output].
2. Select the output device.
●
If you want to perform Cascade Copy:
Acesst 1.0 6251194
Summary of Contents for iR3245
Page 2: ......
Page 13: ...chapter 1 Introduction to the Copy Functions ...
Page 43: ...1 Introduction to the Copy Functions Cancelling a Copy Job 1 31 Cancelling a Copy Job ...
Page 67: ...chapter 2 Introduction to the Mail Box Functions ...
Page 70: ...2 Introduction to the Mail Box Functions 2 4 Various Mail Box Functions ...
Page 104: ...2 Introduction to the Mail Box Functions 2 38 While Scanning While Scanning ...
Page 107: ...2 Introduction to the Mail Box Functions While Printing 2 41 While Printing ...
Page 135: ...2 Introduction to the Mail Box Functions Erasing a Document 2 69 3 Press Done ...
Page 150: ...2 Introduction to the Mail Box Functions 2 84 Erasing Part of a Document ...
Page 151: ...chapter 3 Basic Copying and Mail Box Features ...
Page 166: ...3 Basic Copying and Mail Box Features 3 16 Entire Image 2 Press Entire Image Done 3 Press ...
Page 255: ...chapter 4 Special Copying and Mail Box Features ...
Page 307: ...4 Special Copying and Mail Box Features Image Repeat 4 53 6 Press OK ...
Page 428: ...4 Special Copying and Mail Box Features 4 174 Date Printing ...
Page 429: ...chapter 5 Memory Features ...
Page 439: ...5 Memory Features Storing Scan Print Settings 5 11 Storing Scan Print Settings ...
Page 444: ...5 Memory Features 5 16 Naming a Memory Key Naming a Memory Key ...
Page 447: ...5 Memory Features Recalling Scan Print Settings 5 19 Recalling Scan Print Settings ...
Page 450: ...5 Memory Features 5 22 Erasing Scan Print Settings Erasing Scan Print Settings ...
Page 453: ...chapter 6 Sending and Receiving Documents Using the Inboxes ...
Page 469: ...chapter 7 Using the Express Copy Basic Features Screen ...
Page 581: ...chapter 8 Customizing Settings ...
Page 585: ...8 Customizing Settings Customizing Copy Settings 8 5 Customizing Copy Settings ...
Page 609: ...8 Customizing Settings Customizing Mail Box Settings 8 29 Customizing Mail Box Settings ...
Page 621: ...chapter 9 Appendix ...
Page 633: ......


