2
Introduction
to
the
Box
Functions
Inserting a Document into Another Document
2-79
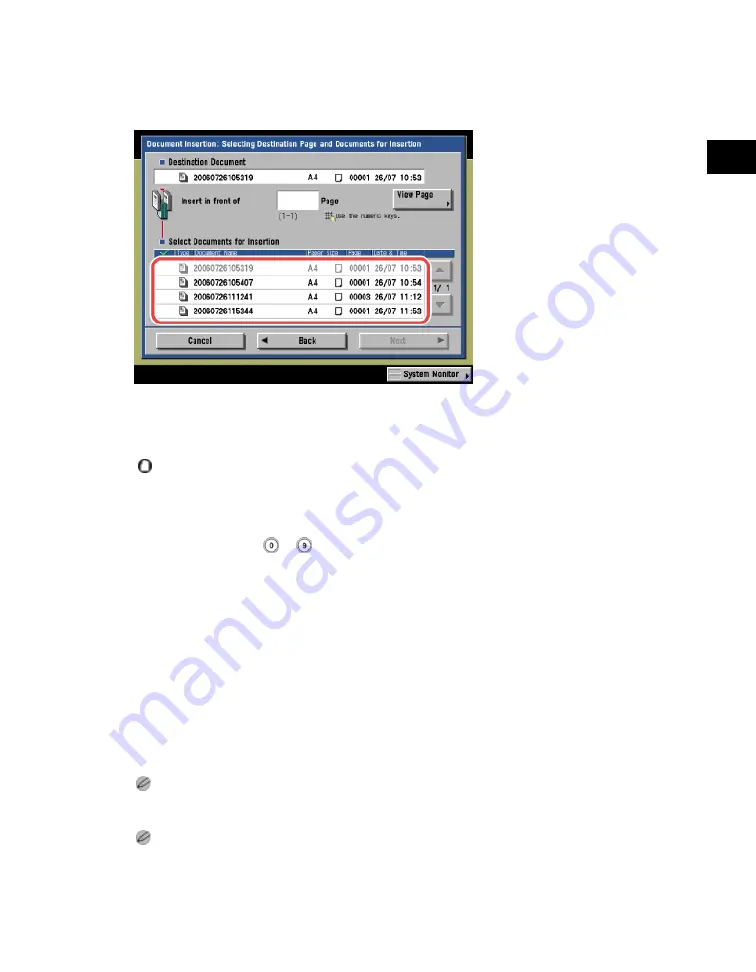
2. Select the document you want to insert.
A checkmark is displayed to the left of the selected document.
You can cancel a selection by selecting the document again.
You cannot select multiple documents.
3. Enter the number of the page before which you want to insert the selected
document using
-
(numeric keys)
→
press [Next].
You can check images stored in the document in which you are inserting by pressing [View
Page]. (See "Checking an Image in a Document(p.2-74).")
4. Press [Doc. Name after Insert.]
→
enter the name of the document
→
press [OK]
→
[Start].
If memory is insufficient while you are using the Document Insertion mode, a message
appears to inform you that you cannot insert the document.
If you create a document without giving it a name, the machine automatically assigns the document a
name using the year, month, day, and time the document was created. For example, if a document is
created at 1:35 PM, 41 seconds, on January 15, 2006, its name will be <20060115133541>.
If print settings have been stored for the selected documents, the settings are not carried over to the new
document.
Acesst 1.0 6251194
Summary of Contents for iR3245
Page 2: ......
Page 13: ...chapter 1 Introduction to the Copy Functions ...
Page 43: ...1 Introduction to the Copy Functions Cancelling a Copy Job 1 31 Cancelling a Copy Job ...
Page 67: ...chapter 2 Introduction to the Mail Box Functions ...
Page 70: ...2 Introduction to the Mail Box Functions 2 4 Various Mail Box Functions ...
Page 104: ...2 Introduction to the Mail Box Functions 2 38 While Scanning While Scanning ...
Page 107: ...2 Introduction to the Mail Box Functions While Printing 2 41 While Printing ...
Page 135: ...2 Introduction to the Mail Box Functions Erasing a Document 2 69 3 Press Done ...
Page 150: ...2 Introduction to the Mail Box Functions 2 84 Erasing Part of a Document ...
Page 151: ...chapter 3 Basic Copying and Mail Box Features ...
Page 166: ...3 Basic Copying and Mail Box Features 3 16 Entire Image 2 Press Entire Image Done 3 Press ...
Page 255: ...chapter 4 Special Copying and Mail Box Features ...
Page 307: ...4 Special Copying and Mail Box Features Image Repeat 4 53 6 Press OK ...
Page 428: ...4 Special Copying and Mail Box Features 4 174 Date Printing ...
Page 429: ...chapter 5 Memory Features ...
Page 439: ...5 Memory Features Storing Scan Print Settings 5 11 Storing Scan Print Settings ...
Page 444: ...5 Memory Features 5 16 Naming a Memory Key Naming a Memory Key ...
Page 447: ...5 Memory Features Recalling Scan Print Settings 5 19 Recalling Scan Print Settings ...
Page 450: ...5 Memory Features 5 22 Erasing Scan Print Settings Erasing Scan Print Settings ...
Page 453: ...chapter 6 Sending and Receiving Documents Using the Inboxes ...
Page 469: ...chapter 7 Using the Express Copy Basic Features Screen ...
Page 581: ...chapter 8 Customizing Settings ...
Page 585: ...8 Customizing Settings Customizing Copy Settings 8 5 Customizing Copy Settings ...
Page 609: ...8 Customizing Settings Customizing Mail Box Settings 8 29 Customizing Mail Box Settings ...
Page 621: ...chapter 9 Appendix ...
Page 633: ......


