•
Fit Paper Size
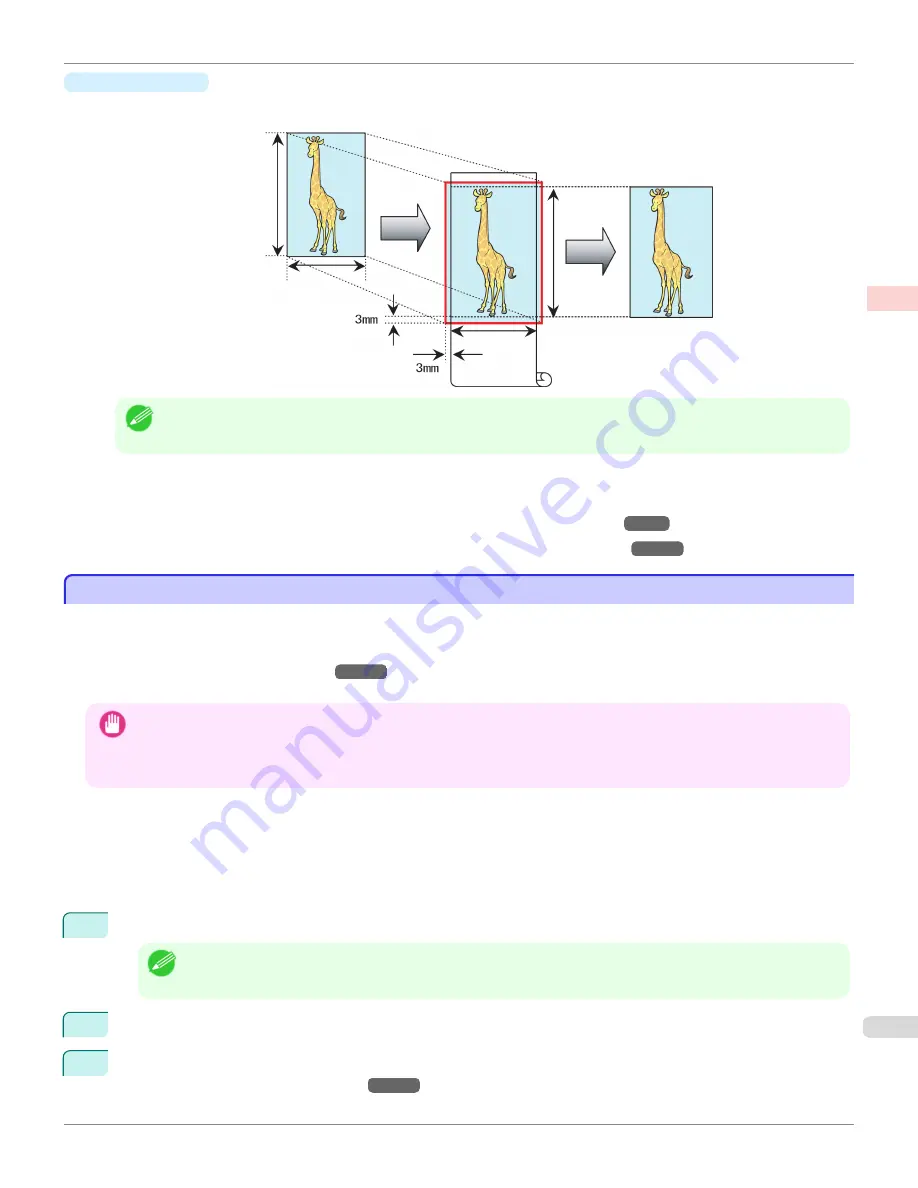
Enlarge or reduce the original to match the size of the paper you are using.
Note
•
The printer driver automatically enlarges originals 3 mm (0.12 in) past the dimensions of the paper on each side. The 3
mm portion beyond the edge on each side is not printed.
For instructions on borderless printing of photos, images, and other documents to match the paper size, refer to
the following topics, as appropriate for your computer and operating system.
•
Borderless Printing by Resizing Originals to Match the Paper Size (Windows)
→P.99
•
Borderless Printing by Resizing Originals to Match the Paper Size (Mac OS X)
→P.101
Borderless Printing by Resizing Originals to Match the Paper Size (Windows)
Borderless Printing by Resizing Originals to Match the Paper Size (Windows)
This topic describes how to enlarge originals before borderless printing to match the paper size, based on the following
example.
If you use an A1 or A2 roll for borderless printing, insert the provided Spacer for Borderless Printing on the Roll Holder.
(See "Loading Rolls on the Roll Holder.")
→P.533
If you do not attach the Spacer for Borderless Printing, the Platen may be soiled from borderless printing.
Important
•
When borderless printing is used, the edge of the paper is cut during printing. Thus, ink density may be uneven at the edges.
If you require higher image quality, select
No
from the
Automatic Cutting
list in the
Roll Paper Options
dialog box. In this
case, the paper can be printed without borders on the left and right sides only. Once printed and cut, please cut the upper
and lower bands with scissors.
•
Document: Any type
•
Page size: 10×12 inches (254.0×304.8 mm)
•
Paper: Roll
•
Paper type:
Canon Heavyweight Coated Paper
•
Roll paper width: 10 inches (254.0 mm)
1
In the application, create an original that takes up the entire space of the paper size.
Note
•
If you can specify the margin, as in Microsoft Word, set the margin at 0 mm. For instructions on specifying the mar-
gin, refer to the software documentation.
2
Choose
in the application menu.
3
Select the printer in the dialog box, and then display the printer driver dialog box.
(See "Accessing the Printer
Driver Dialog Box from Applications .")
→P.183
iPF6450
Borderless Printing by Resizing Originals to Match the Paper Size (Windows)
User's Guide
Enhanced Printing Options
Borderless Printing
99
Summary of Contents for imagePROGRAF iPF6450
Page 20: ...20 ...
Page 174: ...iPF6450 User s Guide 174 ...
Page 642: ...iPF6450 User s Guide 642 ...
Page 696: ...iPF6450 User s Guide 696 ...
Page 730: ...iPF6450 User s Guide 730 ...
Page 812: ...iPF6450 User s Guide 812 ...
Page 916: ...iPF6450 User s Guide 916 ...
Page 1055: ...iPF6450 WEEE Directive User s Guide Appendix Disposal of the product 1055 ...
Page 1056: ...WEEE Directive iPF6450 User s Guide Appendix Disposal of the product 1056 ...
Page 1057: ...iPF6450 WEEE Directive User s Guide Appendix Disposal of the product 1057 ...
Page 1058: ...WEEE Directive iPF6450 User s Guide Appendix Disposal of the product 1058 ...
Page 1059: ...iPF6450 WEEE Directive User s Guide Appendix Disposal of the product 1059 ...
Page 1060: ...WEEE Directive iPF6450 User s Guide Appendix Disposal of the product 1060 ...
Page 1061: ...iPF6450 WEEE Directive User s Guide Appendix Disposal of the product 1061 ...
Page 1062: ...WEEE Directive iPF6450 User s Guide Appendix Disposal of the product 1062 ...
Page 1065: ...1065 ...


