When specifying an IPv4 IP address
1
Start imagePROGRAF Device Setup Utility from the
start
menu.
2
In the
Device Name
list displayed, select the printer to configure.
3
Choose
Protocol Settings
from the
Printer
menu.
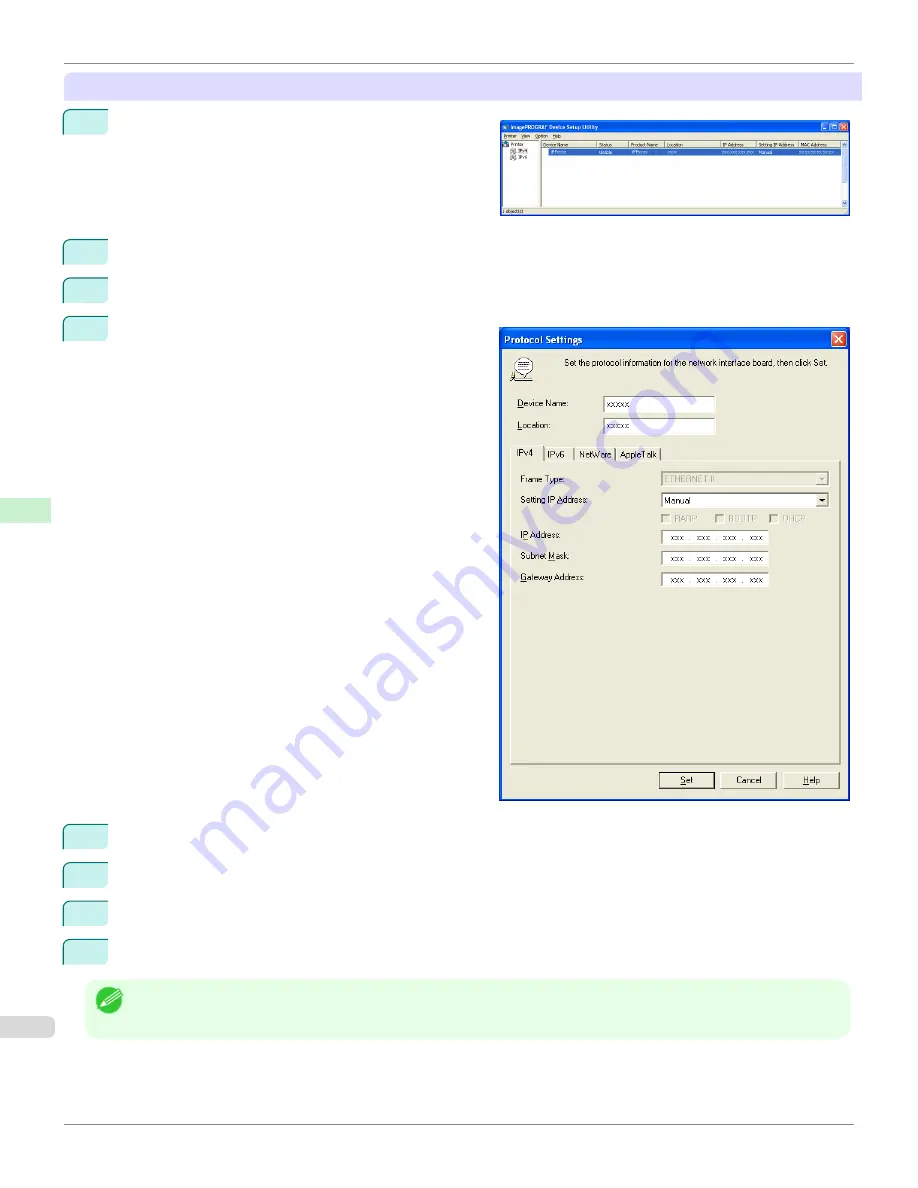
4
Select the
IPv4
tab.
5
In the
Setting IP Address
list, choose
Manual
.
6
Enter the IP address assigned to the printer and click the
Set
button.
7
Click
OK
after the
Confirmation
message is displayed.
8
Exit imagePROGRAF Device Setup Utility.
Note
•
To configure the IP address automatically, choose
Auto
in the
Setting IP Address
list and select
DHCP
,
BOOTP
, or
RARP
.
•
You can also specify the subnet mask and default gateway.
Configuring the IP Address Using imagePROGRAF Device Setup Utility
iPF6450
User's Guide
Network Setting
Device Setup Utility (Windows)
728
Summary of Contents for imagePROGRAF iPF6450
Page 20: ...20 ...
Page 174: ...iPF6450 User s Guide 174 ...
Page 642: ...iPF6450 User s Guide 642 ...
Page 696: ...iPF6450 User s Guide 696 ...
Page 730: ...iPF6450 User s Guide 730 ...
Page 812: ...iPF6450 User s Guide 812 ...
Page 916: ...iPF6450 User s Guide 916 ...
Page 1055: ...iPF6450 WEEE Directive User s Guide Appendix Disposal of the product 1055 ...
Page 1056: ...WEEE Directive iPF6450 User s Guide Appendix Disposal of the product 1056 ...
Page 1057: ...iPF6450 WEEE Directive User s Guide Appendix Disposal of the product 1057 ...
Page 1058: ...WEEE Directive iPF6450 User s Guide Appendix Disposal of the product 1058 ...
Page 1059: ...iPF6450 WEEE Directive User s Guide Appendix Disposal of the product 1059 ...
Page 1060: ...WEEE Directive iPF6450 User s Guide Appendix Disposal of the product 1060 ...
Page 1061: ...iPF6450 WEEE Directive User s Guide Appendix Disposal of the product 1061 ...
Page 1062: ...WEEE Directive iPF6450 User s Guide Appendix Disposal of the product 1062 ...
Page 1065: ...1065 ...