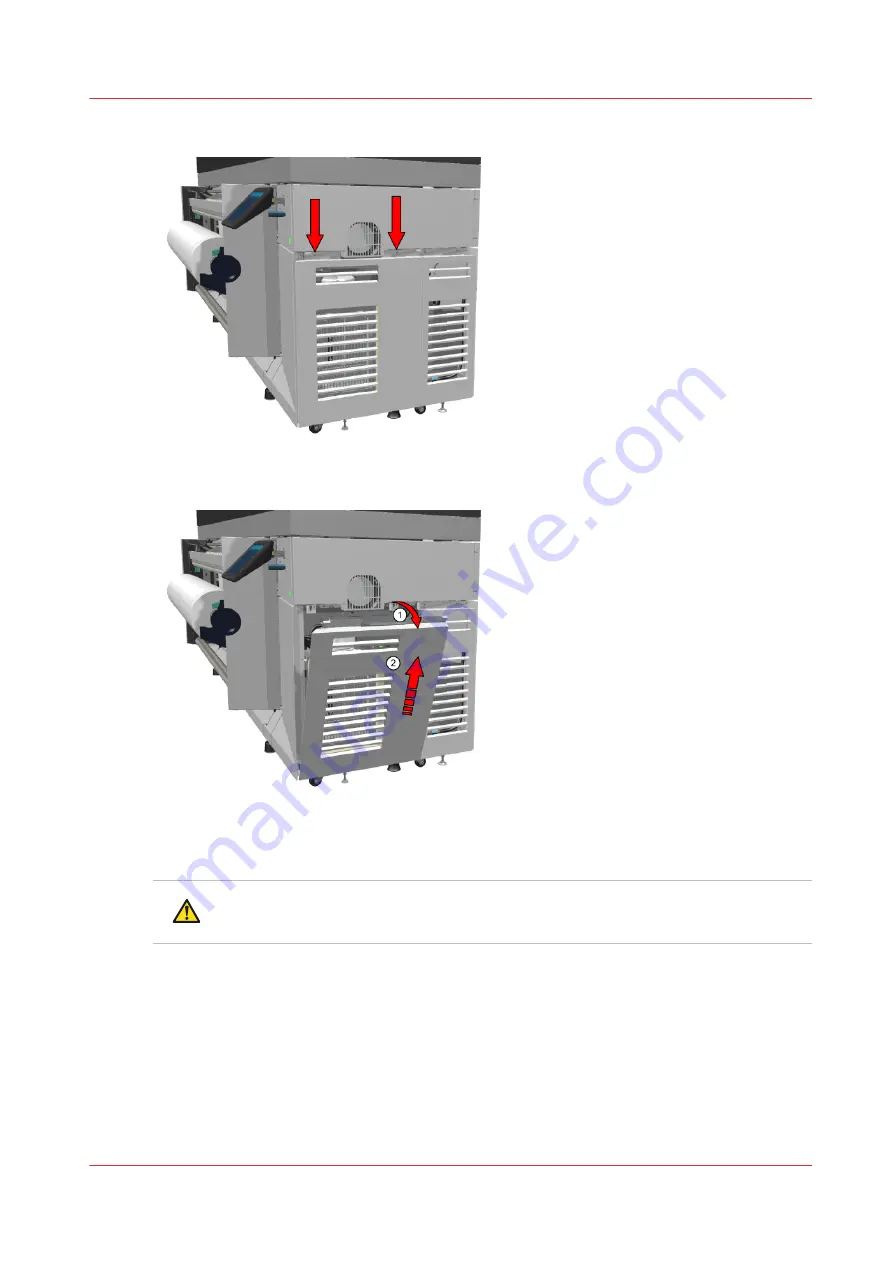
2.
Unscrew the left and right screws on top of the cover with the Torx-25.
3.
Lift the cover a little up and towards you (1), then lift it up fully and take it out (2).
4.
Vacuum the condenser surface as indicated. Make sure you remove all the collected dust.
Do not remove any parts of the chiller.
CAUTION
Vacuum the surface with care, make sure you do not damage the condenser surface.
Vacuum the chiller and check the fluid level
Chapter 6 - Maintain the system
201
Summary of Contents for Colorado M Series
Page 1: ...Colorado M series Extended operation guide 2023 Canon Production Printing ...
Page 9: ...Chapter 1 Introduction ...
Page 17: ...Instruction videos Available documentation Chapter 1 Introduction 17 ...
Page 20: ...Optional features 20 Chapter 1 Introduction ...
Page 21: ...Chapter 2 Safety information ...
Page 32: ...Safety System 32 Chapter 2 Safety information ...
Page 33: ...Chapter 3 Explore the system ...
Page 40: ...The components of the printer top cover open 40 Chapter 3 Explore the system ...
Page 41: ...Chapter 4 Handle the media ...
Page 70: ...FLXfinish in the RIP 70 Chapter 4 Handle the media ...
Page 165: ...Chapter 5 Print a job ...
Page 174: ...Use the PRISMAsync Remote Control app 174 Chapter 5 Print a job ...
Page 175: ...Chapter 6 Maintain the system ...
Page 249: ...Chapter 7 Improve quality ...
Page 259: ...Chapter 8 Configure the network and security settings ...
Page 290: ...Enable system installation from USB 290 Chapter 8 Configure the network and security settings ...
Page 291: ...Chapter 9 Troubleshooting and support ...
Page 309: ...Install a license via ORS Chapter 9 Troubleshooting and support 309 ...
Page 313: ...Install a license received via e mail Chapter 9 Troubleshooting and support 313 ...
Page 363: ...Chapter 10 Regulation Notices ...
Page 377: ......


