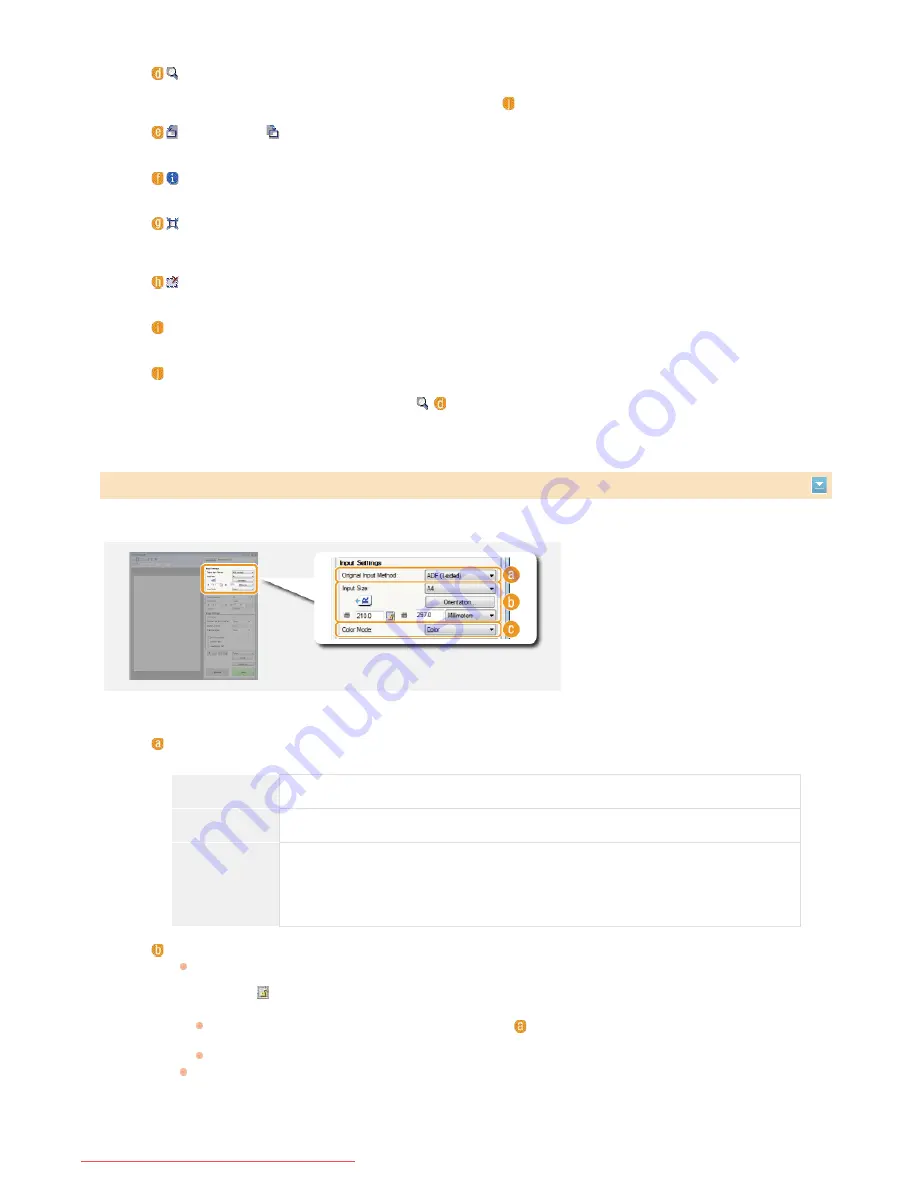
Specify the document input method (the platen glass or feeder), document size, color mode, and other settings.
Drags the image to move the visible part of the image when a preview image is enlarged.
(Zoom)
Enlarges the entire preview image. Left-click the image to zoom in. Right-click the enlarged image to zoom out. To
enlarge a part of the image to check the details, use [Zoom] (
).
(Left Rotate)/
(Right Rotate)
Rotates the preview image 90 degrees to the left or right.
(Information)
Displays the current settings of the scanned image, such as the color mode and size of the scan area.
(Auto Crop)
Automatically sets the cropping frame that fits the scanned document. Each time you click the icon, the cropping
frame is reduced.
(Clear Crop Frame)
Clears the selected cropping frame.
[Select All Crops]
Selects all of the cropping frames on the image.
[Zoom]
Enlarges the image in the cropping frame. The smaller the cropping frame, the larger the image is displayed. You can
check the details that are difficult to see with
(
). To return the image to its original size, click this button again.
Specifying Settings for Documents and Color Mode
[Original Input Method]
Select a setting based on whether you place your documents on the platen glass or in the feeder.
[Platen Glass]
Select when placing documents on the platen glass.
[ADF (1-sided)]
Select when placing 1-sided documents in the feeder.
[ADF (2-sided)]
(MF8580Cdw /
MF8550Cdn /
MF8540Cdn
only)
Select when placing 2-sided documents in the feeder.
[Input Size]
Specify the size of the scanning area. For normal cases, select the same size as the document. To specify the size
with values, select a unit, and enter the values for width and height. To lock the width to height ratio of the
image, click
.
NOTE:
If you select [ADF (2-sided)] for [Original Input Method] (
), you cannot specify the size by entering the
values.
The image size that can be scanned is limited on some applications.
If documents are placed in the feeder, set the orientation of the documents in [Orientation]. You can also set
[Binding Location] if 2-sided documents are placed in the feeder.
㻞㻣㻠㻌㻛㻌㻢㻣㻢
Downloaded from ManualsPrinter.com Manuals
Summary of Contents for Color imageCLASS MF8280Cw
Page 1: ...㻝㻌㻛㻌㻢㻣㻢 Downloaded from ManualsPrinter com Manuals ...
Page 48: ...LINKS Receiving Faxes 㻠㻤㻌㻛㻌㻢㻣㻢 Downloaded from ManualsPrinter com Manuals ...
Page 76: ...Paper 㻣㻢㻌㻛㻌㻢㻣㻢 Downloaded from ManualsPrinter com Manuals ...
Page 106: ...the hook 㻝㻜㻢㻌㻛㻌㻢㻣㻢 Downloaded from ManualsPrinter com Manuals ...
Page 113: ...LINKS Basic Copy Operations 㻝㻝㻟㻌㻛㻌㻢㻣㻢 Downloaded from ManualsPrinter com Manuals ...
Page 169: ...LINKS Receiving Faxes 㻝㻢㻥㻌㻛㻌㻢㻣㻢 Downloaded from ManualsPrinter com Manuals ...
Page 188: ...㻝㻤㻤㻌㻛㻌㻢㻣㻢 Downloaded from ManualsPrinter com Manuals ...
Page 199: ...LINKS Printing a Document 㻝㻥㻥㻌㻛㻌㻢㻣㻢 Downloaded from ManualsPrinter com Manuals ...
Page 269: ...Configuring Scan Settings in ScanGear MF 㻞㻢㻥㻌㻛㻌㻢㻣㻢 Downloaded from ManualsPrinter com Manuals ...
Page 287: ...㻞㻤㻣㻌㻛㻌㻢㻣㻢 Downloaded from ManualsPrinter com Manuals ...
Page 353: ...LINKS Setting Up Print Server 㻟㻡㻟㻌㻛㻌㻢㻣㻢 Downloaded from ManualsPrinter com Manuals ...
Page 455: ...㻠㻡㻡㻌㻛㻌㻢㻣㻢 Downloaded from ManualsPrinter com Manuals ...
Page 656: ...㻢㻡㻢㻌㻛㻌㻢㻣㻢 Downloaded from ManualsPrinter com Manuals ...
Page 669: ...㻢㻢㻥㻌㻛㻌㻢㻣㻢 Downloaded from ManualsPrinter com Manuals ...
Page 677: ...㻝㻌㻛㻌㻣㻠 Downloaded from ManualsPrinter com Manuals ...
Page 726: ...The icon is added to the printer folder 㻡㻜㻌㻛㻌㻣㻠 Downloaded from ManualsPrinter com Manuals ...
Page 731: ...㻡㻡㻌㻛㻌㻣㻠 Downloaded from ManualsPrinter com Manuals ...
Page 733: ...㻡㻣㻌㻛㻌㻣㻠 Downloaded from ManualsPrinter com Manuals ...


