Section 14. Troubleshooting Guide
Setup Screen, no data will be coming into the data cache. Data Table Monitor
can only display and output data from the data cache. Data Table Monitor
displays and outputs all the data points from an array or table.
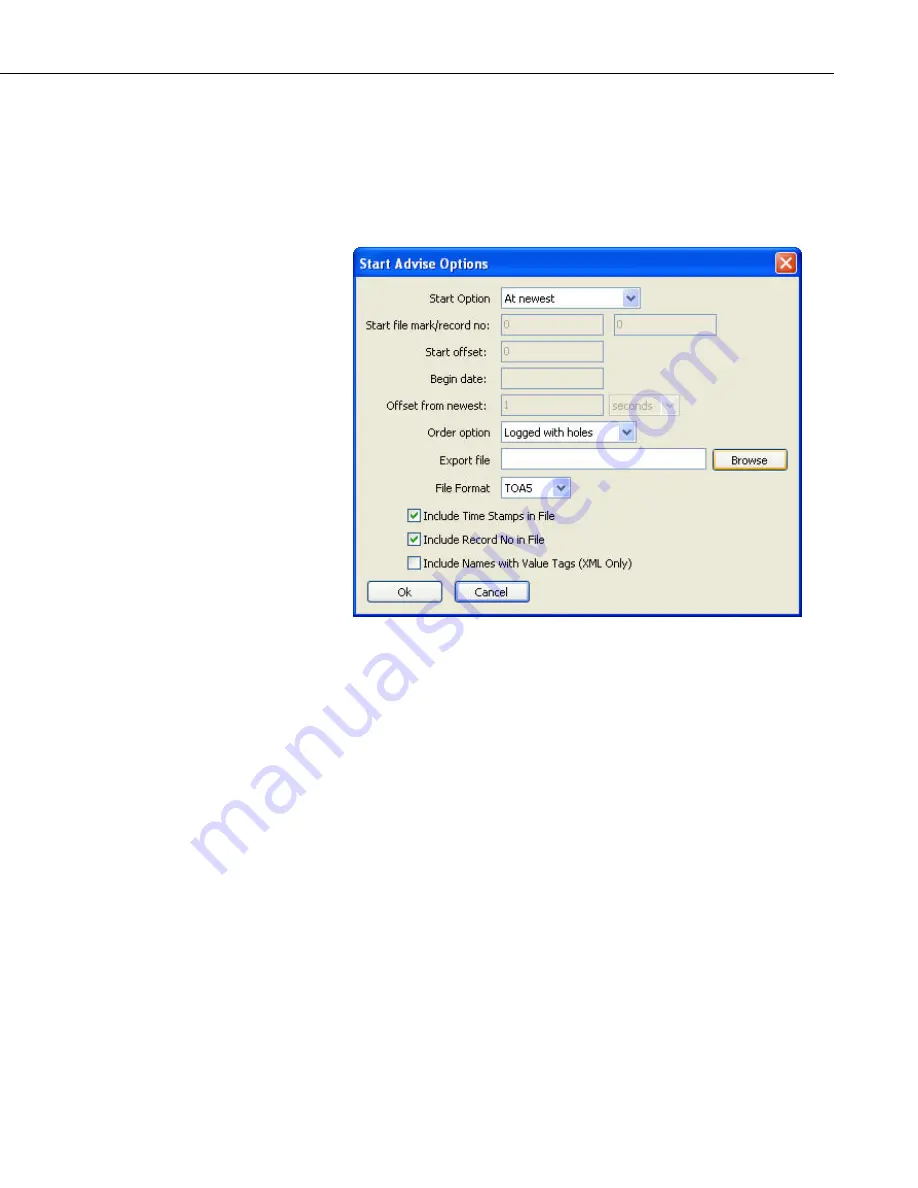
Click the Start button to bring up the Start Advise Options dialog. This dialog
gives you choices about which records to display and the data file in which to
store them.
Start Option
: This selects the starting point for the data to be displayed and
output to the file.
•
At Record: This option allows a selection of starting position based on the
file mark and record number. An entry of 0 in both fields will get all of
the data in the data cache.
•
At Time: This option allows a selection of the starting position based on
the timestamp in the data. The time and date are set in the Begin Date
field. All of the records available after this timestamp are output.
•
At Newest: This option will set the starting position to the last record
stored in the data cache. This last record and any future records stored will
be output.
•
After Newest: This option will set the starting position to be the next
record stored in the data cache. Output begins with the next record stored
in the data cache. No historical records will be output.
•
Relative to Newest: This option starts from the most recent record
collected. The Offset from Newest specifies how much time to go back
from the current write index. For example, an offset of 10 with a setting of
minutes will get the last 10 minutes of data collected.
14-15
Summary of Contents for LoggerNet
Page 2: ......
Page 30: ...Preface What s New in LoggerNet 4 xxvi...
Page 32: ...Section 1 System Requirements 1 2...
Page 44: ...Section 2 Installation Operation and Backup Procedures 2 12...
Page 136: ...Section 4 Setting up Datalogger Networks 4 80...
Page 227: ...Section 7 Creating and Editing Datalogger Programs 7 9...
Page 298: ...Section 7 Creating and Editing Datalogger Programs 7 80...
Page 402: ...Section 9 Automating Tasks with Task Master 9 12...
Page 406: ...Section 9 Automating Tasks with Task Master 9 16...
Page 450: ...Section 11 Utilities Installed with LoggerNet Admin and LoggerNet Remote 11 22...
Page 454: ...Section 12 Optional Client Applications Available for LoggerNet 12 4...
Page 462: ...Section 13 Implementing Advanced Communications Links 13 8...
Page 482: ...Section 14 Troubleshooting Guide 14 20...
Page 570: ...Appendix F Calibration and Zeroing F 16...
Page 578: ...Appendix G Importing Files into Excel G 8...
Page 579: ......


