Section 6. Network Status and Resolving Communication Problems
where
failures = number of communication failures
retries = number of communication retries
attempts = total number of communication attempts
The Communication History can be displayed in a larger view by right clicking
within the history for a device and selecting
Comm History
from the short cut
menu. Each segment of time in this larger view represents 10 minute intervals.
Clicking on a segment will display the time period for the interval and the
number of Attempts (A), Retries (R), and Failures (F) during that period. This
information is provided by a popup above the history and by a line below the
Communication History. (The popup can be turned off by clearing the
Show
Annotations
check box.) The right and left arrow keys can be used to move
right or left one segment at a time. You can zoom in on a particular interval by
clicking and dragging your mouse cursor from the upper left of an area to the
lower right of an area. (To return to normal view, click and drag from the right
to the left.)
One or all of these visual indicators can be toggled on/off from the View menu.
6.1.2 Status Monitor Functions
The Status Monitor includes a number of functions that provide control over
the LoggerNet data collection process, configure the display appearance, or
bring up other applications such as Log Tool. The Status Monitor functions
can also be accessed through the menus at the top of the screen.
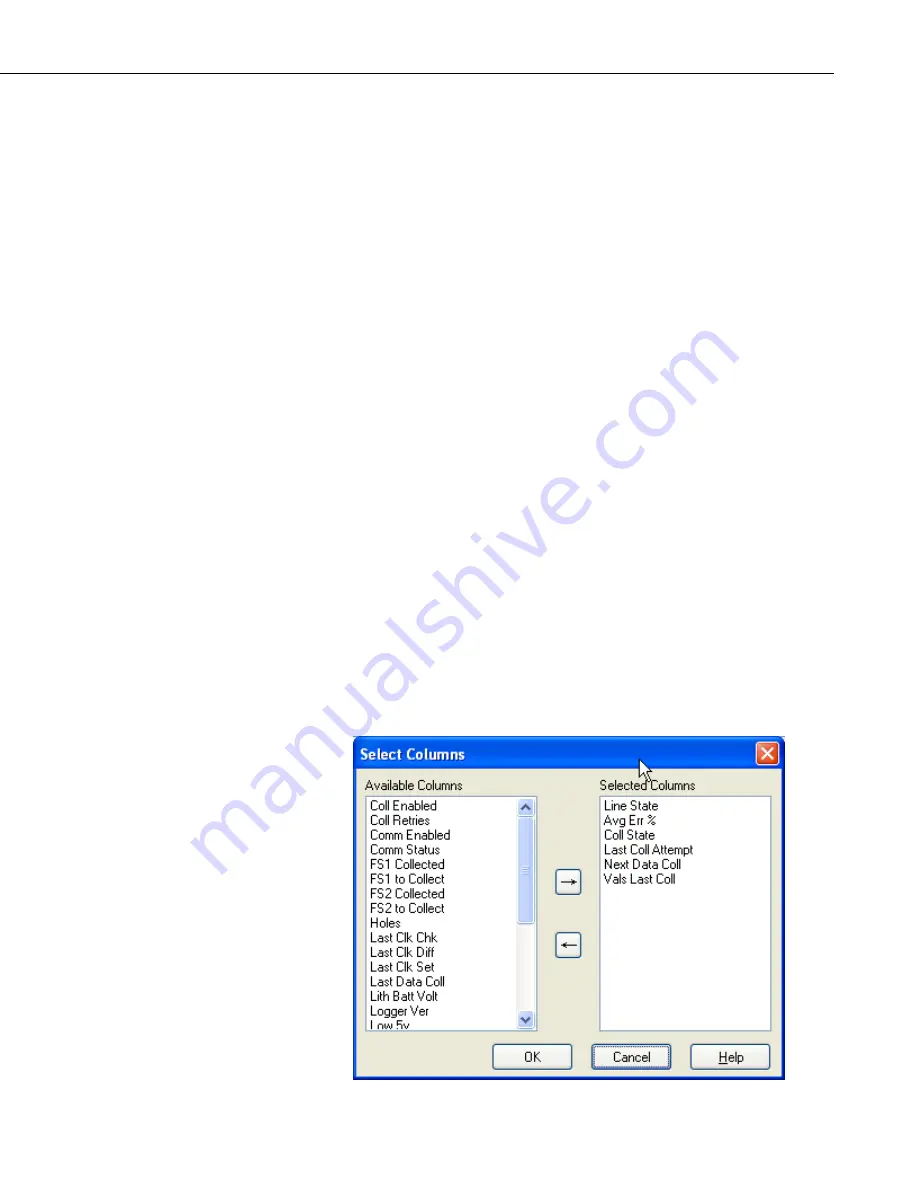
6.1.2.1 Selecting Columns
The Status Monitor can be customized to display only those columns
containing statistics of interest. To add columns to the Status Monitor window,
click Edit | Select Columns. The Select Columns window appears. Right
clicking in the middle of the Status Monitor window and choosing Select
Columns will also bring up the Select Columns window.
6-3
Summary of Contents for LoggerNet
Page 2: ......
Page 30: ...Preface What s New in LoggerNet 4 xxvi...
Page 32: ...Section 1 System Requirements 1 2...
Page 44: ...Section 2 Installation Operation and Backup Procedures 2 12...
Page 136: ...Section 4 Setting up Datalogger Networks 4 80...
Page 227: ...Section 7 Creating and Editing Datalogger Programs 7 9...
Page 298: ...Section 7 Creating and Editing Datalogger Programs 7 80...
Page 402: ...Section 9 Automating Tasks with Task Master 9 12...
Page 406: ...Section 9 Automating Tasks with Task Master 9 16...
Page 450: ...Section 11 Utilities Installed with LoggerNet Admin and LoggerNet Remote 11 22...
Page 454: ...Section 12 Optional Client Applications Available for LoggerNet 12 4...
Page 462: ...Section 13 Implementing Advanced Communications Links 13 8...
Page 482: ...Section 14 Troubleshooting Guide 14 20...
Page 570: ...Appendix F Calibration and Zeroing F 16...
Page 578: ...Appendix G Importing Files into Excel G 8...
Page 579: ......


