3
Custom White Balance
N
52
¡
If the exposure obtained in step 3 is underexposed or overexposed, a
correct white balance might not be obtained.
¡
If an image was captured while the processing parameter was set to [
B/
W
] (p.59), it cannot be selected in step 5.
Instead of a white object, an 18% gray card (commercially available) can
produce a more accurate white balance.
3
Setting the Color Temperature
N
You can numerically set the white balance’s color temperature.
1
Press the <
E
> button.
(
9
)
2
Select the color temperature.
¡
Look at the LCD panel and turn the
<
5
> dial to select <
P
>.
3
Select [Color temp.].
¡
Turn the <
5
> dial to select [
z
Color temp.
], then press <
0
>.
4
Set the color temperature.
¡
Turn the <
5
> dial to select the
desired color temperature, then press
<
0
>.
¡
The color temperature can be set
from 2800K to 10000K in 100K
increments.
¡
When setting the color temperature for an artificial light source, set white
balance correction (magenta or green bias) as necessary.
¡
If you want to set <
P
> to the reading taken with a color temperature
meter, take test shots and adjust the setting to compensate for the
difference between the color temperature meter’s reading and the
camera’s color temperature reading.
53
You can correct the standard color temperature for the white balance
setting. This adjustment will have the same effect as using a color
temperature conversion or color compensating filter. Each color can be
corrected to one of nine levels. Users familiar with using color temperature
conversion or color compensating filters will find this feature handy.
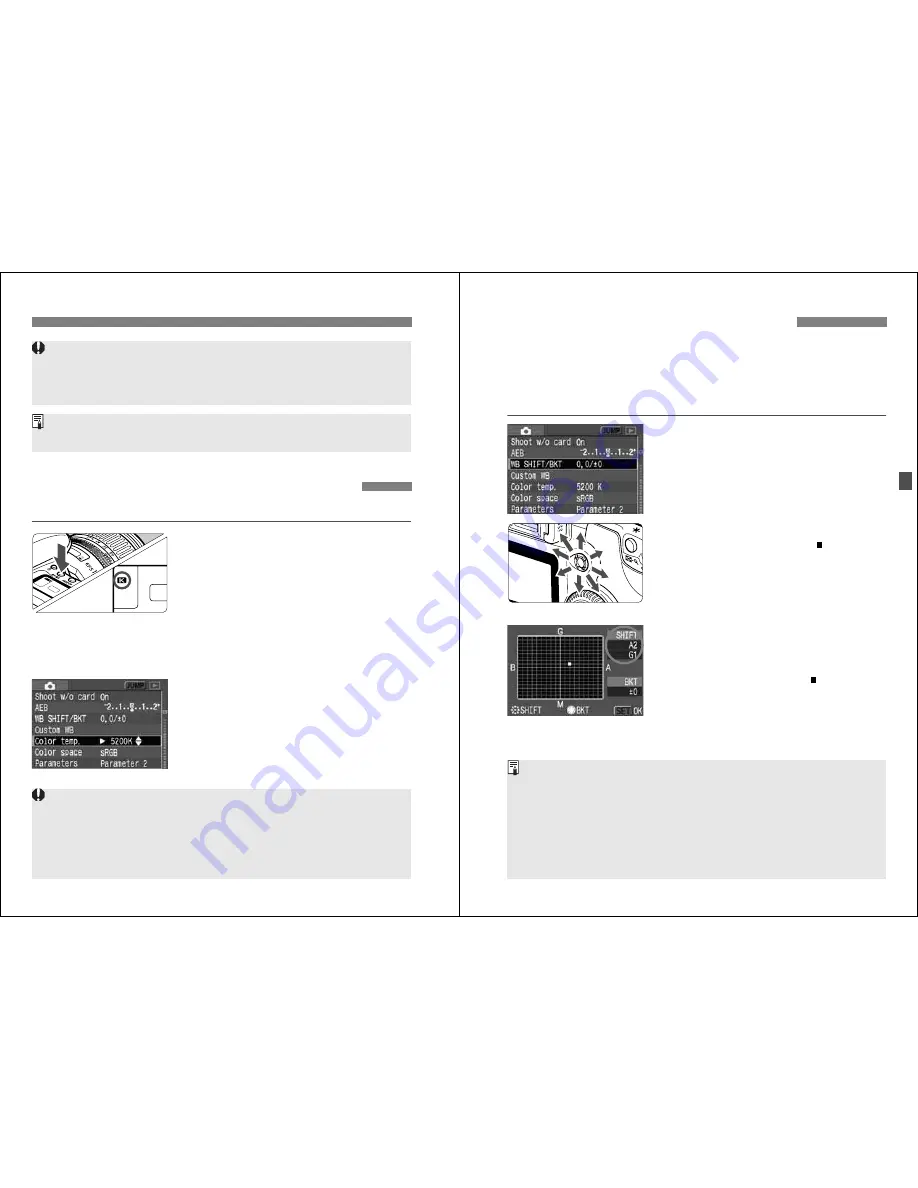
1
Select [WB SHIFT/BKT].
¡
Turn the <
5
> dial to select [
z
WB
SHIFT/BKT
], then press <
0
>.
s
The WB correction/WB bracketing
screen will appear.
2
White Balance Correction
¡
Use <
9
> to move the “ ” to the
desired position on the screen.
¡
B is blue, A is amber, M is magenta,
and G is green. The color in the
respective direction will be corrected.
¡
The upper right of the “
SHIFT
” screen
will show the bias direction and
correction amount.
¡
To cancel the white balance correction,
use <
9
> to move the “ ” to the
center so that the “
SHIFT
” is “
0, 0
”.
¡
Press <
0
> to exit the setting and
return to the menu.
3
White Balance Correction
N
¡
During the white balance correction, <
2
> will be displayed in the
viewfinder and on the LCD panel.
¡
One level of the blue/amber correction is equivalent to 5 mireds of a color
temperature conversion filter. (Mired: A measurement unit indicating the
density of a color temperature conversion filter.)
¡
You can also set white balance bracketing and AEB shooting in
combination with white balance correction.
¡
If you turn the <
5
> dial in step 2, WB bracketing will be set. (p.54)
Sample setting : A2, G1


