background image

Previous

g

Press the multi-function button next to

the Previous prompt to skip to the track immediately
before the current track on the current CD, if less than
eight seconds have played. If the current track has
been playing for more than eight seconds, pressing the
Previous button will take you to the beginning of the
current track. You can also use the steering wheel
controls to change tracks. See “Audio Steering Wheel
Controls” in your vehicle’s owner manual.

If more than one CD is loaded in the CD changer and
you press the Previous multi-function button when
less than eight seconds have played, the CD changer
will skip to the CD loaded immediately before the current
CD. If it has been less than eight seconds, the changer
will skip to the beginning of the current CD. The
new CD will begin playing at track one.

o

SEEK/SCAN

p

(Six-Disc CD Changer Only): Use

the left or right arrow to skip to the previous or next
CD loaded in the CD changer. The new CD will begin
playing at track one.

Z

(Eject): Press the button with this symbol on it to

eject a CD. There is a separate eject button for each
player next to the CD slot. You will hear a beep once the
CD is removed from the slot.

If you press the eject button next to the CD changer,
the current disc will be ejected and the next one
will begin playing. Press and hold the eject button to
eject all of the discs loaded in the changer. You will hear
a double beep.

BAND: Press this button located to the left of the
screen once to switch to the radio while playing a CD.
The audio system screen will appear. See “Radio
Screen” listed previously for more information.

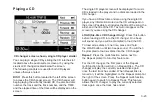
Loading the CD Changer

You can load up to six kc/s in the CD changer. To load
discs, use the following steps:

1. Press the LOAD button. You will hear one beep

and will be prompted to load the CD. The system
will switch to CD and begin playing the disc.

If you press and hold the LOAD button until
two beeps sound, you will be prompted to load all
six discs.

2. Slide discs one at a time, label side up, into the slot

located below the screen.

After each one is loaded, you will hear a beep. As the
discs are loaded, the horizontal lines located in the
lower left of the screen will change colors. If a line is
gray, it means that no CD is loaded in that slot. If a
line is green, it means that a CD is loaded in the slot.
The slot with the currently active CD is yellow.

3-25

Summary of Contents for 2006 CTS

Page 1: ...Controls 2 1 Features and Controls 2 2 Navigation Audio System 3 1 Navigation Audio System 3 2 Voice Recognition 4 1 Voice Recognition 4 2 Vehicle Customization 5 1 Vehicle Customization 5 2 Index 1...

Page 2: ...uct after that time without notice For vehicles first sold in Canada substitute the name General Motors of Canada Limited for Cadillac Motor Car Division whenever it appears in this manual Keep this m...

Page 3: ...Overview 1 2 Navigation System Overview 1 2 Screen Features 1 4 Main Menu 1 6 Browser 1 10 Personal Choice Controls 1 11 Getting Started 1 12 Section 1 Overview 1 1...

Page 4: ...Overview Navigation System Overview 1 2...

Page 5: ...the Tone under Navigation Audio System on page 3 2 J DISC Key See Playing a CD under Navigation Audio System on page 3 2 K BAND Key See Radio Screen and Finding a Station under Navigation Audio System...

Page 6: ...cy alert traffic announcements and program type PTY You will see Emergency Test when the RDS station you are tuned to conducts a test of the local emergency broadcast system If there is a real emergen...

Page 7: ...been changed in a non radio screen The CD track or disc has been changed in a non CD or CD changer screen To display radio or CD information again briefly press the navigation repeat key The previousl...

Page 8: ...t means that key is programmable Once the function you want is active press and hold the key until a beep sounds The new function is now programmed and will display as the prompt for that reconfigurab...

Page 9: ...ddresses Information will be stored alphabetically To access previously stored information do the following 1 Turn the TUNE SEL knob until you reach the letter grouping that contains the first letter...

Page 10: ...ough 3 listed previously to access stored information 2 Scroll to the area you want to edit and press the TUNE SEL knob to bring up the alpha numeric keypad 3 Edit the desired information 4 Select Don...

Page 11: ...u want to add to is highlighted 2 Press the Append key then begin recording the additional information Play r Press this key to play a previously recorded message Play is also used to resume playback...

Page 12: ...slot 2 Press the reconfigurable key next to the Browser prompt The Browser will appear on the screen You must have a DVD DVD R or CD ROM containing HTML files in the player to access the Browser If th...

Page 13: ...o another using the Uniform Resource Locator URL or the name of the web page you wish to view Personal Choice Controls This feature allows up to two drivers to store and recall personal settings for t...

Page 14: ...s using the presets and steering wheel controls if equipped Set up the navigation features that can only be done before you begin driving such as entering an address or a preset destination Entering a...

Page 15: ...nts on traffic and emergency alert communications The information in the system may not always be complete Road conditions such as prohibited turns detours and construction zones change frequently It...

Page 16: ...address number for the address 7 Press the Calc reconfigurable soft key and the system will calculate a route Once the route is calculated the system will display and voice turn by turn guidance to t...

Page 17: ...e is calculated the system will display and voice turn by turn guidance to the destination Entering a Nearby POI 1 Press the TUNE SEL knob to display the Navigation Menu 2 Press the Enter Dest reconfi...

Page 18: ...NOTES 1 16...

Page 19: ...Menu 2 12 Traveling Across Regions 2 34 Colors on the Screen 2 34 OnStar System 2 35 Global Positioning System GPS 2 35 Vehicle Positioning 2 36 Problems with Route Guidance 2 37 If the System Needs S...

Page 20: ...vigation screen to operate the system Once the vehicle is moving various functions will be disabled to reduce driver distractions Navigation System Startup Screen This screen will appear the first tim...

Page 21: ...eral of your vehicle s systems See Driver Information Center DIC in Section 3 of your vehicle s owner manual for more information NAV Navigation If you are in a menu and are not on the map screen pres...

Page 22: ...o go to the next or previous radio station and stay there See Finding a Station under Navigation Audio System on page 3 2 If you are currently viewing a map screen you may also press this knob to acce...

Page 23: ...his key to view a list of all points of interest POI close to the area in which you are traveling Press this key to access the Enter Destination screen Press this key to view a list of the last 10 des...

Page 24: ...to input a phone number or house address Move through the list of characters by turning the TUNE SEL knob then press the knob to select a character The numbers available to you are at the end of the...

Page 25: ...t for the vehicle s systems You can choose between Mile feet Mi ft Mile yard Mi yd and Kilometer meter Km m Turn the TUNE SEL knob to scroll through the choices Once your choice is highlighted press t...

Page 26: ...t to the Night prompt to select it An X will appear to show it has been selected You can select this mode regardless of exterior lighting conditions Contrast Press the key next to the Contrast prompt...

Page 27: ...e lost Press the Back key to exit the Clock menu without saving your changes Language Select Language to choose the language you prefer for information on the display voice recognition and voice promp...

Page 28: ...he slot by inserting it partway The system will pull it in Once the map DVD is inserted correctly you will have the following two choices Select a Language Agree English is the default language or you...

Page 29: ...ion Menu on page 2 12 for more information on planning a route This symbol will appear on the map when a waypoint has been entered The number on the flag indicates the sequence of the waypoint on the...

Page 30: ...will always be at the top of the map screen If a red stick pin appears along a highlighted route on a map screen it marks a place where turn guidance is provided Navigation Menu To access the Navigat...

Page 31: ...you follow the highlighted route Popup Press this key to see a regular view of the map and to have the next turn represented by an arrow pointing in the direction of the turn pop up as you approach it...

Page 32: ...tination There will be an arrow to the left of each turn indicating the direction of the turn Delete Current Trip Select this option to delete the current trip The system will ask you to confirm your...

Page 33: ...the system will respond with Louder or Softer to provide you with an example of the new volume at each level You can also turn the navigation prompts on and off using the NAV key Map Scroll Select th...

Page 34: ...in the box next to the icon If you prefer to see all the icons press the Set All reconfigurable soft key This will select all five icons You can de select all previously chosen icons by pressing the...

Page 35: ...see where you have already traveled When you wish to return to your point of origin without planning another route you can follow the tracking bubbles back to where you started When you drive into an...

Page 36: ...tem using the TUNE SEL knob 2 Press and hold the reconfigurable soft key you wish it to replace for two seconds The menu item will now be a reconfigurable soft key and will remain that way unless you...

Page 37: ...by the time of day you are traveling such as no left turns before 3 00 p m etc Auto Recalc Automatic Recalculation If you have selected this option and leave the original calculated route the system...

Page 38: ...creen Store Point Press the Store PT key to save the current location to a stored point in the system s memory A total of 60 points can be stored The first stored point is reserved for your home locat...

Page 39: ...points which have not been locked in Back This key always returns you to the previous screen Use the TUNE SEL knob to move to the stored point you want to edit Once you make your selection by pressing...

Page 40: ...ain Navigation Menu See Route Option listed earlier for more information Store Press this key to save a trip to memory Stored Trips Press this key to retrieve a list of all stored trips The following...

Page 41: ...to the desired location 4 Press the reconfigurable soft key next to the OK prompt to confirm the change Calc Calculation Press this key to start route calculation Back Press this key from the Trip Po...

Page 42: ...red city 4 Use the TUNE SEL knob to enter in the name of the first intersecting street Remember to enter only the street name and not the direction for example enter only Civic Center Dr not N Civic C...

Page 43: ...rn by turn guidance to the destination will begin If a phone number cannot be found no phone number is available will be displayed Previous Origin This option allows you to return to the place where y...

Page 44: ...fter receiving the beamed data the screen will display this data A search must be performed to find the matching data in the navigation database Turn the TUNE SEL knob to select a field to search then...

Page 45: ...I by name enter the name of the POI in the POI Name screen The POI Name screen allows you to perform the following functions with the reconfigurable soft keys on the currently selected POI More Press...

Page 46: ...press the More key and the system will scroll to the end of the name The POI for Restaurant is broken down into 51 distinct categories Select Restaurant from the POI choices and press the List key Cu...

Page 47: ...nation without deleting your current trip This will take you to the Trip Points screen where this POI can be moved to any location in your trip point list Top 1 2 3 The most commonly used categories c...

Page 48: ...late reconfigurable soft keys as described earlier for any other destination See Enter Destination listed previously in this section for more information Address This method allows you to enter a dest...

Page 49: ...y display a list of matching street names once there are only a few matches remaining Use the TUNE SEL knob to select the desired street name If the desired street name is not shown it is possible tha...

Page 50: ...route will change See Colors on the Screen on page 2 34 later in this section for more information Editing a Trip While at the Trip Point screen press the Edit reconfigurable soft key This screen allo...

Page 51: ...t be taken by the driver to remain on the currently traveled road For example the road may have a sharp curve in it The curve would not qualify as an official turn on the planned route However the dri...

Page 52: ...e will appear on the IPD roads This is only a suggested route due to the lack of traffic restriction information on the IPD roads Special attention should be paid to the existing traffic conditions su...

Page 53: ...configuration the condition of the vehicle and or other circumstances can interfere with the system s ability to determine the accurate position of the vehicle This is when the GPS symbol will appear...

Page 54: ...een transferred by a vehicle carrier or a ferry The current position calibration is set incorrectly The vehicle is being driven at high speeds The vehicle is repeating a change of direction by going f...

Page 55: ...e shown See Ordering Map DVDs on page 2 37 If the System Needs Service If you are still experiencing difficulty with the navigation system after reading this information see your GM dealer for assista...

Page 56: ...NOTES 2 38...

Page 57: ...Navigation Audio System 3 2 CD DVD Player 3 26 Section 3 Navigation Audio System 3 1...

Page 58: ...additional equipment is added to your vehicle the chimes may not work Make sure that replacement or additional equipment is compatible with your vehicle before installing it See Accessories and Modifi...

Page 59: ...on Directly below the DIC information you will see the banner with Radio and the currently selected band For example Radio FM1 means that the presets for FM1 are displayed at the right of the screen Y...

Page 60: ...d the FM1 or FM2 band must be active Press the TUNE SEL knob once The following menu will appear Help Prompt RDS List Seek RDS List Region Alt Frequency Display RDS Messages Intrpt Volume Display Freq...

Page 61: ...B Soft Rock Sports Talk Top 40 Weather Set All selects all categories Clear All clears all currently selected categories Seek Selected seeks to currently selected categories To select a category scrol...

Page 62: ...Messages This menu item allows you to see RDS messages broadcast by the currently selected radio station Press the TUNE SEL knob to switch back and forth between on and off When this feature is turned...

Page 63: ...e P Sets and the preset stations at the right of the screen will change to your local presets Home will appear on the screen near the current station frequency To store preset radio stations see Setti...

Page 64: ...t to select the category you want to seek to Use the SEEK SCAN switch or press the TUNE SEL knob to seek to the first available channel in the selected category XM Radio Satellite Service XM is a sate...

Page 65: ...tune the radio access the radio menus and scroll through the menu items See FM Menu listed previously in this section for more information o SEEK SCAN p Press the left or right arrow to seek to the pr...

Page 66: ...ack Bass Turn the TUNE SEL knob to increase or decrease Bass Mid Midrange Turn the TUNE SEL knob to increase or decrease Midrange Treble Turn the TUNE SEL knob to increase or decrease Treble EQ 1 3 Eq...

Page 67: ...for any material Rear Seat This setting adjusts the audio to give the rear seat passengers the best possible sound qualities Rear Seat can be used at any time for any material Spacious This setting i...

Page 68: ...y presets each have 30 separate presets For more information on the Home and Away feature see FM Menu listed previously in this section To store a radio station as a preset use the following steps 1 S...

Page 69: ...e signal should return Loading XM Acquiring channel audio after 4 second delay The audio system is acquiring and processing audio and text data No action is needed This message should disappear shortl...

Page 70: ...ctive The XM receiver in the vehicle may have previously been in another vehicle For security purposes XM receivers cannot be swapped between vehicles If this message is received after having your veh...

Page 71: ...Unscheduled traffic incident data such as accidents and disabled vehicles Scheduled traffic incident data such as road construction and road closures Traffic flow information rate of speed data Traff...

Page 72: ...proaching traffic condition If currently driving using a planned route the pop up screen will appear on the display when this has been selected When traffic is enabled a TRF icon will appear at the to...

Page 73: ...aveling on a planned route the system will show traffic conditions for approximately 31 miles 150 km with a maximum of 250 traffic conditions The list of conditions will appear in order from closest t...

Page 74: ...affic condition symbol and the street name of the traffic condition location will appear on the display 4 Turn the TUNE SEL knob to receive the information for the next traffic condition Scrolling Map...

Page 75: ...UNE SEL knob 2 Turn the knob to Traffic Setup 3 Press the TUNE SEL knob 4 Turn the knob to Approaching Event Alert 5 Press the TUNE SEL knob to select it An X will appear when it is selected When driv...

Page 76: ...t type of road the system will have you traveling on When traveling on a planned route the alternate route key is always available Press the alternate route key and a list will appear Select TRF Detou...

Page 77: ...desired option is highlighted 2 Press the TUNE SEL knob to select the highlighted option Traffic Condition Symbols The following are traffic condition symbols that can appear on the display Stopped t...

Page 78: ...Road work Construction Alert Road condition Road visibility Other 3 22...

Page 79: ...e song the artist and the title of the CD Text will not appear on the screen if you are using the CD changer LOAD Six Disc CD Changer Only Press this button before loading a CD into the CD changer One...

Page 80: ...changer to turn off the Random feature For the CD player the first press of the Random button will turn Random Track on The second press will turn Random Track off Pause To pause the playback of a CD...

Page 81: ...n for each player next to the CD slot You will hear a beep once the CD is removed from the slot If you press the eject button next to the CD changer the current disc will be ejected and the next one w...

Page 82: ...e speed is less than 5 mph 8 km h for a manual transmission If these conditions are not met a message will be displayed on the screen stating that the DVD is not available while driving The audio will...

Page 83: ...p four multi function buttons to bring up the on screen display The following multi function buttons will be available while a DVD is playing Play Pause Pressing this button will pause a disc if it is...

Page 84: ...ges or listen to commentary The choices available are dependent on the DVD itself Turn the TUNE SEL knob to choose the track Stopping and Ejecting a DVD To stop a DVD from playing press the second mul...

Page 85: ...Voice Recognition 4 2 Voice Recognition CTS 4 2 Section 4 Voice Recognition 4 1...

Page 86: ...nized The invalid command message indicates that the command cannot be used in the currently active screen For example if you say Next Track while listening to the radio you will receive the invalid c...

Page 87: ...sted later in this section for more information DVD This command instructs the system to display the DVD player screen Once the screen is displayed you can use other DVD commands See DVD Commands late...

Page 88: ...source Set Day This command instructs the system to change the screen appearance to Day mode Set Night This command instructs the system to change the screen appearance to Night mode Set Day Night Au...

Page 89: ...e frequency of the radio station For example if you say radio tune ninety four point seven the station will switch to 94 7 FM If you are changing the station for the AM band say radio tune ten seventy...

Page 90: ...CD changer to the next CD loaded Previous Disc This command instructs the system to go back to the previous disc Disc X This command instructs the CD changer to play a specific CD To use this command...

Page 91: ...ructs the system to play a memo saved to a specific location that is not the memo currently highlighted on the screen To use this command you must know the location of the memo you wish to hear For ex...

Page 92: ...s command instructs the system to switch from the current map view to Heading Up Bird View This command instructs the system to switch from the current map view to the bird view Split View This comman...

Page 93: ...Vehicle Customization 5 2 Personalization 5 2 Driver Information Center DIC 5 15 Section 5 Vehicle Customization 5 1...

Page 94: ...ess entry transmitter 1 or 2 or by pressing the appropriate memory button 1 or 2 located on the driver s door Certain features can be programmed not to recall until the key is placed in the ignition T...

Page 95: ...L knob to scroll through the available letters numbers and symbols Press the knob to select the highlighted character As each character is selected it will appear on the screen and the system will adv...

Page 96: ...to view the modes 4 Scroll to Recall Driving Positions and press the knob once to select it When the mode is turned on an X will appear in the box to the left This feature cannot be selected if Remote...

Page 97: ...eature available on your vehicle Key in Recall Memory If your vehicle has the optional memory package you will have this feature When this feature is turned on you can recall any previously programmed...

Page 98: ...the factory To program the vehicle to a different mode do the following 1 Enter the Personalization menu following the instructions listed previously 2 Scroll to Auto Exit Seat using the TUNE SEL kno...

Page 99: ...you selected is now set You can either exit the programming mode by following the instructions later in this section or program the next feature available on your vehicle Lights Flash at Unlock This...

Page 100: ...view the modes 4 Scroll to Lights Flash At Lock and press the knob once to select it When the mode is turned on an X will appear in the box to the left You can select this feature by itself or you ca...

Page 101: ...seconds unless a door is opened the ignition is turned to ACCESSORY ON or START or the remote keyless entry transmitter is used to lock the vehicle The following modes are available for selection Mode...

Page 102: ...s Unlock Key Out Off or Doors Unlock in Park is selected If any of these was previously selected you must first de select it in order to be able to select Driver Unlock in Park The mode you selected i...

Page 103: ...ck in Park Automatic Transmission The feature allows the doors to automatically unlock when the transmission is shifted into PARK P The following modes are available for selection Mode 1 ON Mode 2 OFF...

Page 104: ...4 Scroll to Doors Unlock Key Out Off and press the knob once to select it When a mode is turned on an X will appear in the box to the left If you select Mode 1 Doors Lock in Gear automatic transmissio...

Page 105: ...passenger window switches only If this feature is turned on all passenger window switches will be disabled when the window lockout button is pressed If the feature is off only the rear passenger wind...

Page 106: ...itch back and forth between on and off When the mode is turned on an X will appear in the box to the left The mode you selected is now set You can either exit the programming mode by following the ins...

Page 107: ...hicle Information menu that provides the status of various vehicle systems See Vehicle Information Menu later in this section for more information TUNE SEL Tune Select Knob Once a menu is displayed us...

Page 108: ...y one item can be displayed at a time Vehicle Information Menu Item Descriptions Outside Air Temperature If you select this item the current outside temperature is displayed at the top of the screen I...

Page 109: ...km is displayed This number is calculated based on the number of mpg L 100 km recorded since the last time this menu item was reset To reset the Average Fuel Economy press and hold the reconfigurable...

Page 110: ...ossible DIC messages that may be displayed See DIC Warnings and Messages later in this section for more information Engine Oil Life If you select this item the percentage of remaining oil life is disp...

Page 111: ...keep a written record of the mileage and date of the fluid change so you will have it for future reference When you reset the Change Transmission Fluid message by clearing it from the display you sti...

Page 112: ...and battery charging systems Have the electrical system checked by your dealer as soon as possible Battery Saver Active This symbol appears with the Battery Saver Active message This message appears...

Page 113: ...mation menu Battery Voltage Low This symbol appears with the Battery Voltage Low message This message will appear when the electrical system is charging less than 10 volts or if the battery has been d...

Page 114: ...s unbuckled and the passenger is still unbuckled and the passenger airbag is enabled If the passenger s seat belt is already buckled this message and chime will not come on Buckle Seat Belt This symbo...

Page 115: ...le Information Menu Item Descriptions previously in this section Change Trans Fluid Automatic Transmission This symbol appears with the Change Trans Fluid message This message indicates that the life...

Page 116: ...brake system serviced by your dealer as soon as possible See Brake System Warning Light in your vehicle s owner manual Check Coolant Level This symbol appears with the Check Coolant Level message This...

Page 117: ...display it means that your vehicle is low on windshield washer fluid You should refill the tank as soon as possible See Windshield Washer Fluid in your vehicle s owner manual Competitive Driving CTS...

Page 118: ...oolant Hot Idle Engine message This message will appear when the engine coolant temperature is too hot Stop and allow the vehicle to idle until it cools down Notice If you drive your vehicle while the...

Page 119: ...oid damage to the engine or transmission Engine Overheated Stop Engine This symbol appears with the Engine Overheated Stop Engine message This message will appear when the engine has overheated Stop t...

Page 120: ...tank as soon as possible A single chime will sound when this message is displayed Headlamps Suggested This symbol appears with the Headlamps Suggested message This message will appear when the amount...

Page 121: ...ure that the door is closed completely Oil Pressure Low Stop Engine This symbol appears with the Oil Pressure Low Stop Engine message A multiple chime will sound when this message is displayed Notice...

Page 122: ...tion Off Driver Identification This symbol appears with the Personalization Off message When this message appears the personalization features previously stored are turned off If you want your customi...

Page 123: ...e Service AC System message This message appears when the electronic sensors that control the air conditioning and heating systems are no longer working Have the climate control system serviced by you...

Page 124: ...blem has occurred within the Powertrain Control Module PCM or the ignition switch Have your vehicle serviced by your dealer Service Fuel System This symbol appears with the Service Fuel System message...

Page 125: ...ing the ignition off then back on If the Service Stability System message still stays on or comes back on again while you are driving your vehicle needs service Have the StabiliTrak System inspected b...

Page 126: ...k is no longer available to assist you with directional control of the vehicle Adjust your driving accordingly Stability System Ready Message This symbol appears with the Stability System Ready messag...

Page 127: ...d you may notice that the effort required to steer the vehicle increases or feels heavier but you will still be able to steer the vehicle Service Theft System This symbol appears with the Service Thef...

Page 128: ...your vehicle serviced by your dealer as soon as possible Starting Disabled Remove Key This symbol appears with the Starting Disabled Remove Key message This message will appear when the vehicle theft...

Page 129: ...age This message is displayed if the content theft deterrent system has detected a break in attempt while you were away from your vehicle Top Speed Fuel Cut Off This symbol appears with the Top Speed...

Page 130: ...ingly The message will stay on for a few seconds after the traction control system stops limiting wheel spin See Traction Control System TCS in your vehicle s owner manual Trans Transmission Hot Idle...

Page 131: ...sed completely You should make sure that the trunk lid is closed completely Turn Signal On This symbol appears with the Turn Signal On message If you drive your vehicle for more than about 1 mile 1 6...

Page 132: ...NOTES 5 40...
Page 133: ...26 CD DVD Player 3 26 Clock 2 8 Colors on the Screen 2 34 Creating a Trip with Waypoints 2 32 D Database Coverage Explanations 2 37 DIC Warnings and Messages 5 20 Display 2 8 DVD 1 6 Player 3 26 DVD...

Page 134: ...a Station 3 9 G Getting Started Navigation 1 12 Global Positioning System GPS 2 35 H Hard Keys 2 3 L Language 2 9 M Main Menu 1 6 Map Adjustments 2 10 Map Scales 2 10 Maps 2 10 Measurement Units 2 7...

Page 135: ...r System 2 35 Ordering Map DVDs 2 37 Overview Navigation System 1 2 Owners Canadian ii P Personal Choice Controls 1 11 Personalization Features 5 3 Plan a Route 2 32 Playing a CD 3 23 Playing the Radi...

Page 136: ...20 Symbols 2 11 System Controls 5 15 System Needs Service If 2 37 T Traveling Across Regions 2 34 Traveling on a Planned Route 2 33 Trip Points 2 22 V Vehicle Information 1 10 Vehicle Position 2 9 Ve...

Reviews: