Using the 7C0x SmartSwitch Bridge View
6-10
Using the Detail View Window
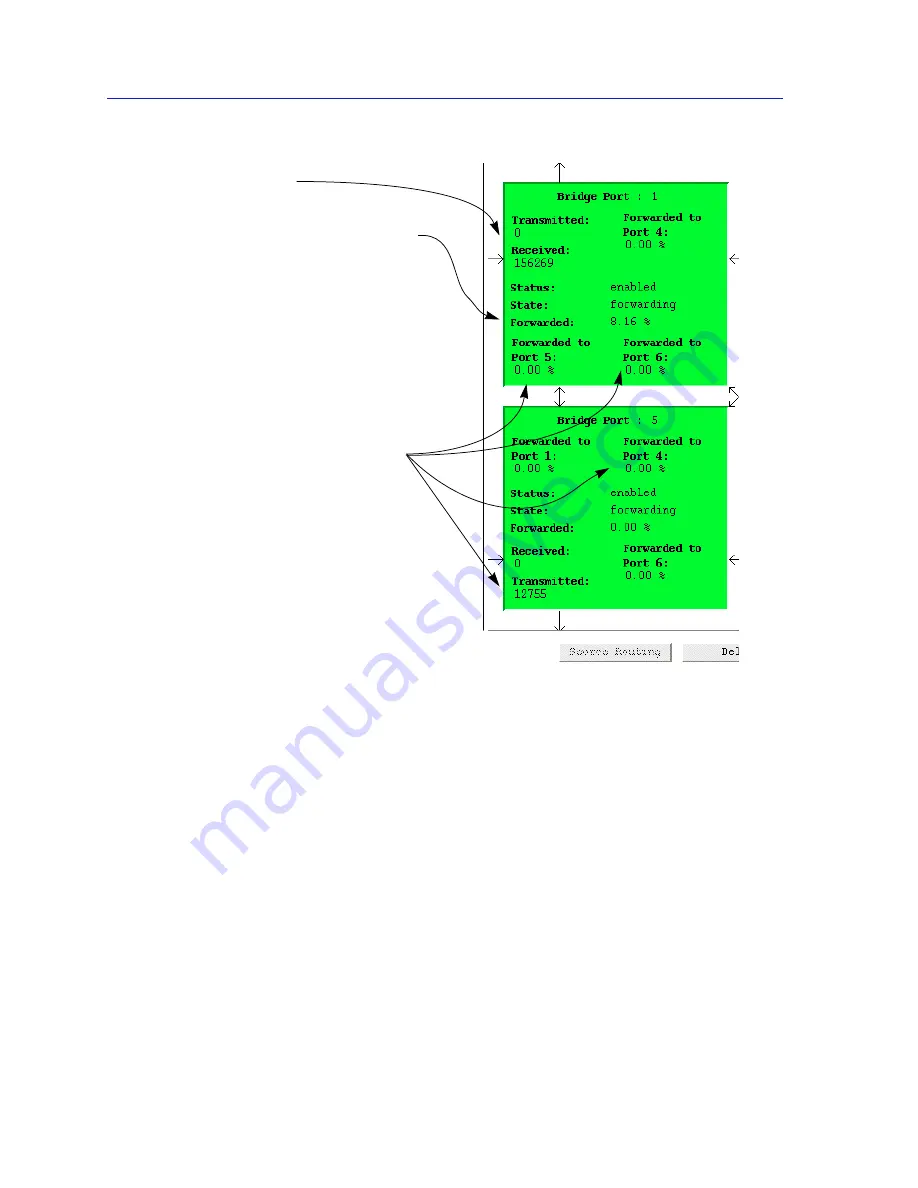
Figure 6-4. Port Boxes in the Detail View
Changing Ports in the Detail View
The Detail View can display up to four ports at the same time. If the bridge has
more than four ports, you can show other device ports by exchanging an existing
port in the Detail View for a port that is not displayed.
To select a new port for the Detail View:
1.
In the Detail View, click mouse button 3 on the bridge port you want to replace
with another port. The Change Menu appears.
2.
Select the range of bridge ports (e.g., Port 1-10) that includes the desired
port. A menu listing the individual ports included in the selected range (i.e.,
Port 1, Port 2, Port 3, and so on) will appear. Ports that are currently
displayed in the Detail View are grayed in the menu.
3.
Select the desired Bridge Port index number from the list. The port box will
display information for the newly selected port.
Each port shows the total frames transmitted and
received by the port.
Port summary information includes Port Index (at
the top of the Bridge Port box), Port Status,
Bridge Port State, and Frames Forwarded. You
can display Frames Forwarded as a delta value
(the total number of frames forwarded by this
bridge port to any other port on the bridge during
the last polling interval) or as a percentage value
(showing the percentage of all frames received by
the port from its attached network segment during
the last polling interval that were forwarded to
another port on the bridge) by clicking the
Delta/Percentage button at the bottom of the
window (see
Figure 6-3
).
Each corner of the bridge port summarizes
activity to another bridge port. You can display
Forwarded To as a delta value (the total number
of frames forwarded by this bridge port to the
specified port on the bridge during the last polling
interval) or as a percentage value (showing the
percentage of all frames received by the port
during the last polling interval that were forwarded
to the specified port on the bridge) by clicking the
Delta/Percentage button at the bottom of the
window (see
Figure 6-3
).
Summary of Contents for SPECTRUM
Page 2: ......
Page 8: ...Contents vi ...
Page 56: ...Using the 7C0x SmartSwitch Hub View 2 40 Managing the Hub ...
Page 68: ...Basic Alarm Configuration 3 12 Viewing an Alarm Log ...
Page 96: ...FDDI Management 4 28 Viewing the Station List ...
Page 102: ...ATM Configuration 5 6 Configuring Connections ...
Page 140: ...Using the 7C0x SmartSwitch Bridge View 6 38 Enabling and Disabling Ports ...
Page 150: ...Index Index 6 ...


