Operation
- 3.20 -
SMART 200 TSS
DEVICE - Parameters setting for Initial installation
SETUP
#
#
#
#
CONFIG
#
#
#
#
DEVICE
During the initial installation, this function allows the automatic numbering of the
sensors connected to the system. Once the function has been carried out the system
will be able to identify each one of the connected sensors, in univocal mode and
with a progressive number (from 1 to 200).
Subsequently, you will use this function when it will be necessary to remove, add or
replace individual sensors.
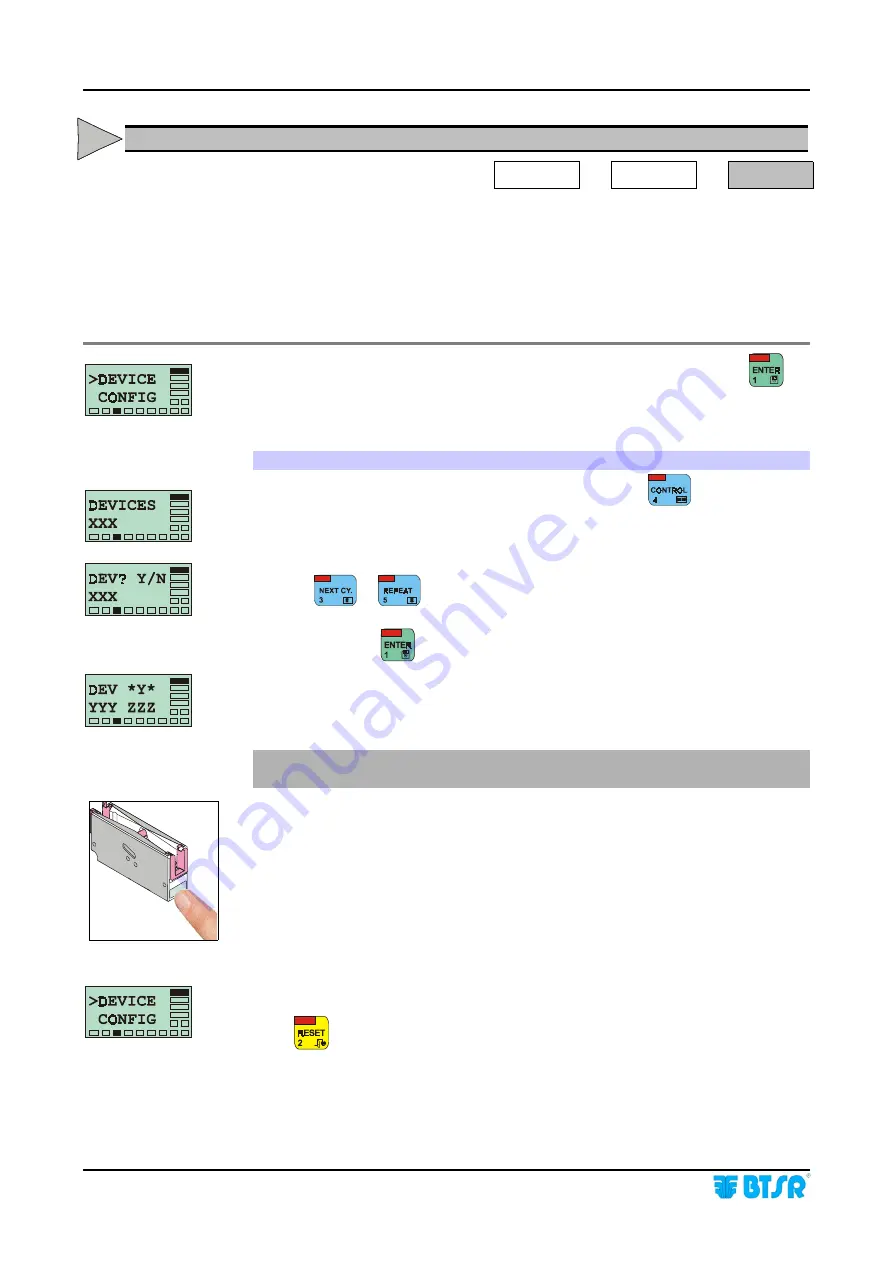
Once you have selected the DEVICE function from CONFIG menu, press
to
have access to the function.
Global Automatic Numbering
When the display shows the DEVICES XXX screen, press
to continue the
sensor numbering phase..
Set the number of TS5.. sensors actually connected to
SMART 200 TSS
. By
pressing
or
it is possible to either increase or decrease the XXX value
until the number of sensors actually connected to the system is reached.
At this point press
to start the numbering operation.
This screen indicates that the phase of automatic sensor numbering is starting.
YYY shows the total amount of sensors to be numbered.
ZZZ shows the number of the first sensor
(and subsequently the next one)
to be
numbered.
!
Check that the sensor being numbered has the green LED flashing which
indicates "Sensor ready to be numbered”.
With a finger skim the “Touch Light” area of the sensor to which you wish to
assign the number shown by YYY and check that:
a) The sensor LED goes from flashing green to red.
b) The number ZZZ is increased by 1 unit
Repeat the operation on all connected sensors.
Once all the sensors have a unique number assigned, the DEVICE CONFIG
message re-appears.
Press
once to return to the CONFIG menu, or press it twice to return to the
Main Menu.
A
1
Summary of Contents for SMART 200 TSS
Page 1: ...SMART 200 TSS TS5 YARN CONTROL SYSTEM Operating Manual Rev 2 0 July 2003 ENGLISH ...
Page 8: ...Introduction I 4 SMART 200 TSS Page intentionally left blank ...
Page 16: ...Technical data and installation 2 6 SMART 200 TSS Page intentionally left blank ...
Page 22: ...Operation 3 6 SMART 200 TSS Technical Characteristics of TS5 sensor Sizes mm ...
Page 32: ...Operation 3 16 SMART 200 TSS Enabling the SETUP Menu Functions CONFIG ...
Page 34: ...Operation 3 18 SMART 200 TSS Enabling the GRAPH Menu Function ...
Page 74: ...Operation 3 58 SMART 200 TSS Production Report Example ...
Page 80: ...Troubleshooting and Maintenance 4 6 SMART 200 TSS Page intentionally left blank ...
Page 82: ...Appendix A Quick Reference Symbols Key A 2 SMART 200 TSS ...
Page 83: ...Appendix A Quick Reference Symbols Key SMART 200 TSS A 3 ...
Page 84: ...Appendix A Quick Reference Symbols Key A 4 SMART 200 TSS ...
Page 85: ...Appendix A Quick Reference Symbols Key SMART 200 TSS A 5 ...
Page 86: ...Appendix A Quick Reference Symbols Key A 6 SMART 200 TSS ...
Page 87: ...Appendix A Quick Reference Symbols Key SMART 200 TSS A 7 ...
Page 88: ...Appendix A Quick Reference Symbols Key A 8 SMART 200 TSS ...
Page 89: ...Appendix A Quick Reference Symbols Key SMART 200 TSS A 9 ...
Page 90: ...Appendix A Quick Reference Symbols Key A 10 SMART 200 TSS ...
Page 91: ...Appendix A Quick Reference SMART 200 TSS A 11 Note ...
Page 92: ...Appendix A Quick Reference A 12 SMART 200 TSS Page intentionally left blank ...


