Operation
40 / 72
E164809_2_002
Repetitive measurements require several control parameters. When this command is
selected, a table appears where the following parameters can be specified: the waiting time
in seconds before a repetitive minispec measurement begins, the delay between two
successive repetitions, and the maximum number of repetitive measurements.
6.2.4.7
The View Menu
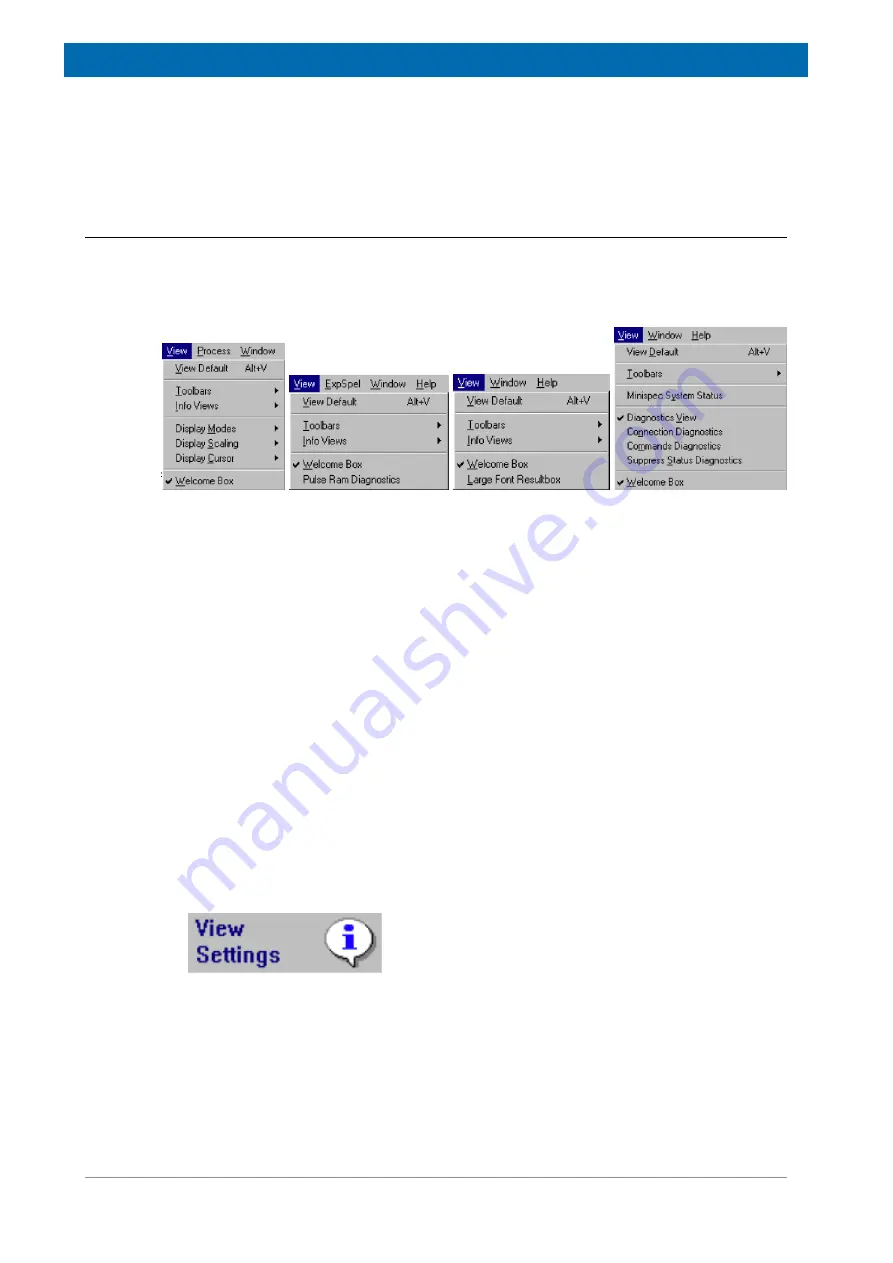
Each user can configure the screen for the special requirements of a measurement. With the
help of the pull-down menu
View
one can adjust the arrangement of the different windows,
the display of toolbars, the font size for the result output and much more. The list of available
commands depends on the active window and the active application:
Figure 6.11: The View Pull-Down Menu
The View Default and the Toolbars Commands
The minispec software shows four tool bars: the Standard Tool Bar, the Result Bar, the
Measurement Tool Bar and the Info Tool Bar (see the figure above). When the minispec
software is configured as the Relaxation Time or NMR Analyzer type, all toolbars are docking
toolbars. This means that the toolbars can be moved to any location on the entire screen by
pressing and holding the left mouse key. The location can be outside of the minispec
software main window, within the main window docked (e.g. on the left, right, top or bottom),
or switched off entirely. To switch toolbars on and off, mark/unmark the corresponding toolbar
in the minispec application menu
View
.
To get an impression of the toolbars and to restore the default screen select
View Default
.
Shortcut Keys: ALT+V
The Info Views Command
This command is subdivided into four parts:
1.
minispec Settings:
If you choose this item you will get a table of all minispec application
relevant instrument settings and parameters.
Shortcut: Info Toolbar:
The function is disabled (grayed) if no minispec is connected.
2.
minispec System Status:
The user can get a real-time indication of the status of the
minispec instrument, particularly:
– Magnet Unit temperature and status.
– Sample orifice status (sample inserted or not).
– Sample insertion detection (grayed if sample detection is set OFF.
– Transmitter power status.
– Heater power status.
Summary of Contents for minispec LF Series
Page 1: ...minispec minispec LF series User Manual Version 002 Innovation with Integrity AIC...
Page 8: ...Introduction 8 72 E164809_2_002...
Page 13: ...Safety E164809_2_002 13 72 Figure 2 2 Example of a Stray Field Plot for the LF90 Top View...
Page 14: ...Safety 14 72 E164809_2_002...
Page 18: ...Transport Packaging and Storage 18 72 E164809_2_002...
Page 50: ...Operation 50 72 E164809_2_002...
Page 56: ...Maintenance 56 72 E164809_2_002...
Page 58: ...Replacement of Parts 58 72 E164809_2_002...
Page 64: ...Technical Data 64 72 E164809_2_002 Figure 12 1 An Example of a minispec Rating Plate...
Page 66: ...Contact 66 72 E164809_2_002...
Page 68: ...List of Figures 68 72 E164809_2_002...
Page 71: ...E164809_2_002 71 72...
Page 72: ...Bruker Corporation info bruker com www bruker com Order No E164809...


