9. STANDARD ADJUSTMENTS
RH-9820
84
9-13. Adjusting the cutting surface of the hammer
<Adjustment procedure>
1. Remove the hammer. (Refer to the previous page for
instructions on removing the hammer.)
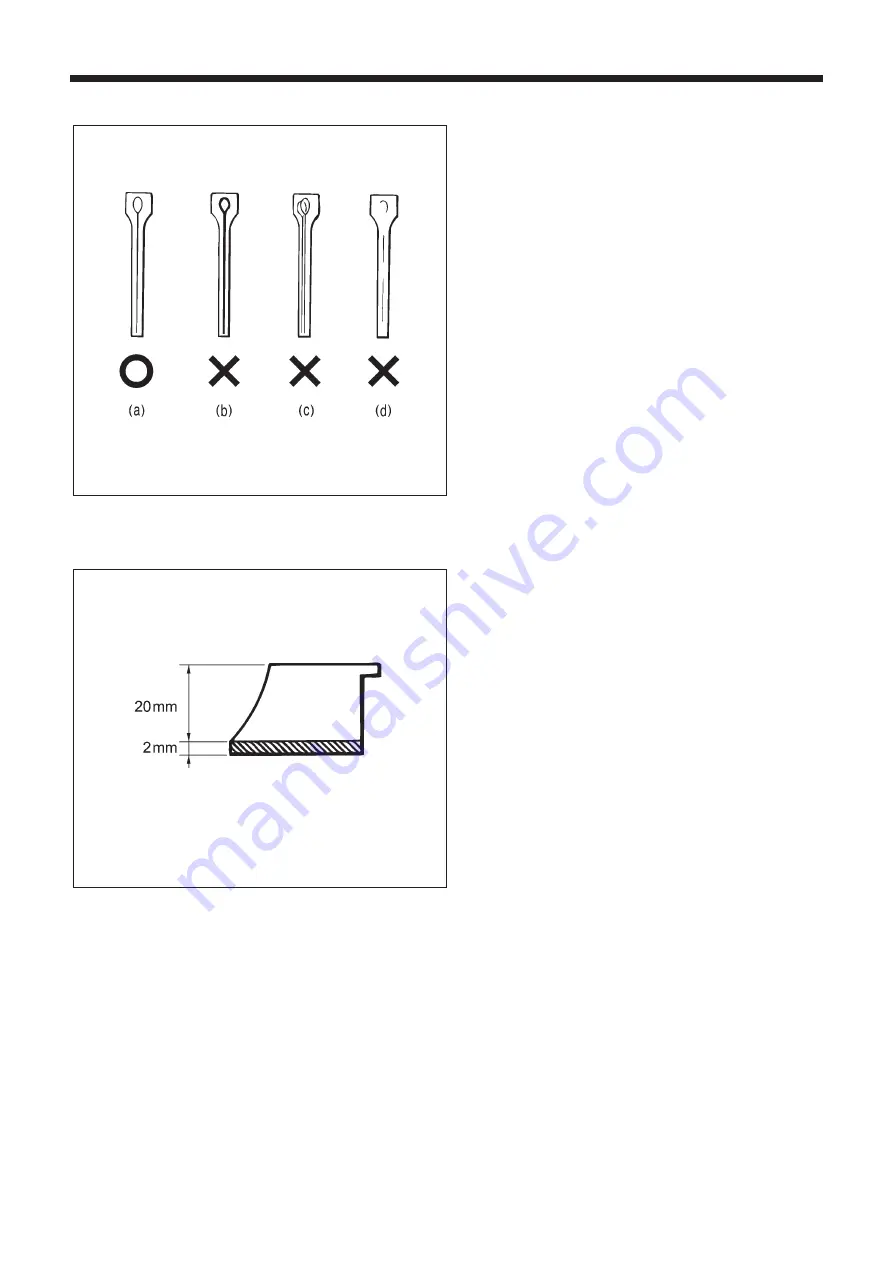
2. Check the cutting surface of the hammer. Refer to the
illustration at left, and if the cutting surface looks like (b) -
(d), file the cutting surface so that the knife incision is
made evenly on the cutting surface.
(a) Knife incision is correct
(b) Knife incision is too deep
(c)
A different knife was used which produced an
overlapping knife incision
(d)
Partial knife incision which is not being made
completely
3. If the material cannot be cut cleanly even though the
hammer has been ground correctly, also check whether
the tip of the knife is worn.
* If the tip is worn, replace the knife.
* Do not use the old hammer after the knife has been
replaced. If the same hammer is used, it may damage
the tip of the knife.
9-13-1. Filing the cutting surface of the hammer
The cutting pressure over the whole of the hammer should be
uniform so that the material will be cut cleanly. File the cutting
surface of the hammer so that the knife incision will be uniform
over the whole of the hammer.
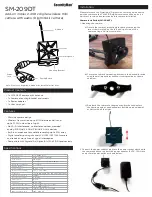
* The hammer can be filed until a height of 20 mm remains.
* Use a flat file for filing the hammer.
Filing the cutting surface of the hammer on which the
knife incision is overlapping or has shifted
1. Grip the hammer in a vise.
2. Use the flat file to file the cutting surface of the hammer
until the knife incision disappears.
Filing the cutting surface of the hammer in which knife
incision is deep
1. Grip the hammer in a vise.
2. Use the flat file to file the cutting surface of the hammer
smoothly until a single knife incision can still be seen
faintly.
* Once filing is complete, install the hammer.
0504B
0505B


