


Installation Instructions for 83KW/93KW–85KW/95KW IDH Max Cylindrical Locks
BEST ACCESS SYSTEMS
Indianapolis, Indiana
9
Installation Instructions for 83KW/93KW–85KW/95KW IDH Max Cylindrical Locks
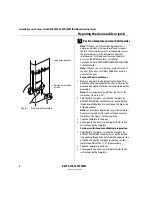
Preparing the door and door jamb
8
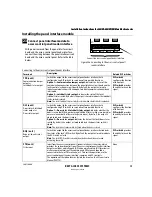
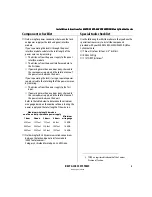
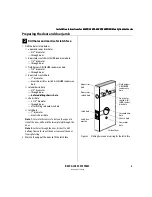
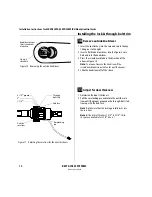
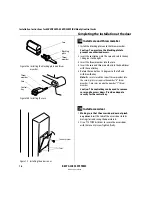
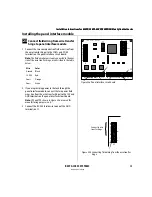
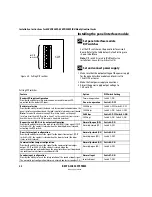
Install door status switch and magnet
1 On the door jamb, mark the drill point for the
1
″
diameter magnet hole. This hole should be directly
opposite the door status switch reader wire hole when
the door is closed.
2 Drill a 1
″
diameter hole for the magnet, at least 1 3/4
″
deep.
3 Insert the magnet in the hole.
4 Insert the door status switch assembly into the door
status switch hole in the edge of the door, feeding the
connectors out the wire hole to the inside of the door,
as shown in Figure 8.
9
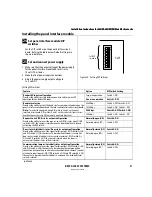
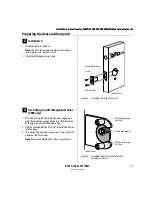
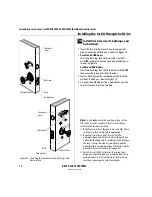
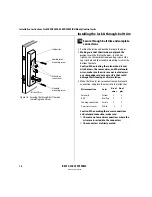
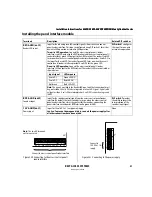
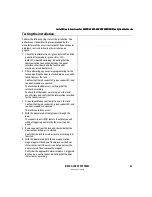
Install strike box and strike plate
1 In alignment with the center of the latchbolt, mortise
the door jamb to fit the strike box and strike plate.
2 Insert the strike box and secure the strike with the two
screws provided.
3 Check the position of the deadlocking plunger against
the strike plate.
Caution:
The deadlocking plunger of the latchbolt
must make contact with the strike plate, as shown
in Figure 9b. The plunger deadlocks the latchbolt
and prevents someone from forcing the latch
open when the door is closed.
Figure 8
Installing the door status switch and magnet
Magnet
Wire hole
Inside of door
Door
status
switch
Door jamb
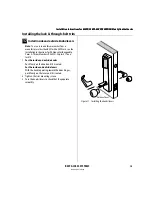
Figure 9a Installing the strike box and strike plate
Strike box
Strike plate
Door jamb
Figure 9b Aligning the deadlocking plunger with the
strike plate
Strike plate
Deadlocking
plunger
Summary of Contents for 34HW
Page 1: ......
Page 6: ...Contents vi W Series Service Manual...
Page 38: ...IDH Max Locks Functions and Parts 2 24 W Series Service Manual...
Page 54: ...Electrified Locks Functions and Parts 3 16 W Series Service Manual...
Page 140: ...Service and Maintenance for Cylindrical Locks 5 30 W Series Service Manual...
Page 158: ...Additional Service and Maintenance for IDH Max Locks 6 18 W Series Service Manual...
Page 162: ...Glossary A 4 W Series Service Manual...
Page 164: ...Installation Instructions B 2 W Series Service Manual...