background image

Error Messages

QL-850 User Guide

60


3.

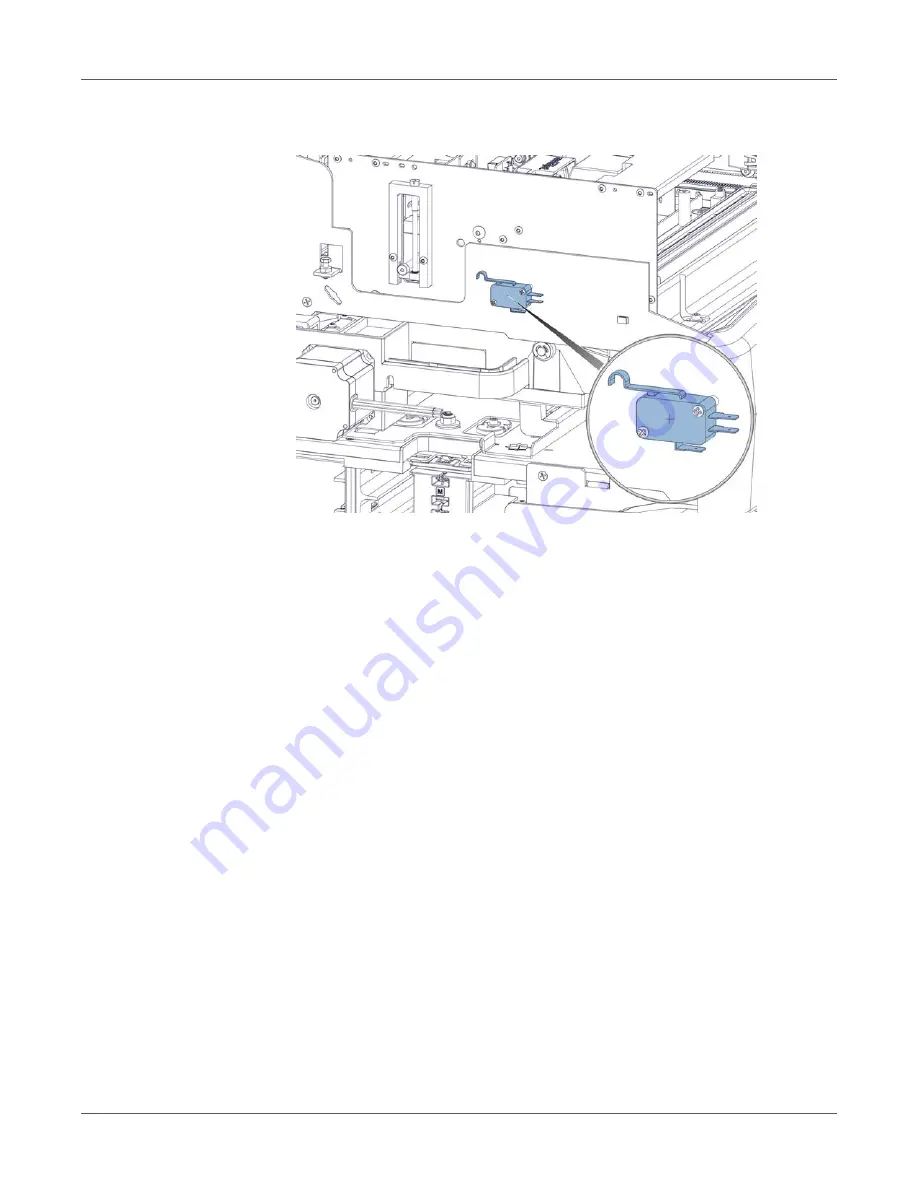
If the top cover is closed and the error persists, ensure that the cover switch is engaged 
when the door is closed. Bend the switch arm upward if necessary.

Error 100C - Maintenance Cartridge Missing

The printer cannot detect the maintenance cartridge.

Solutions

Use the following solutions to troubleshoot the issue. The most likely solutions are listed first, 
followed by other possibilities. Check to see if the issue is resolved after performing each 
recommended solution. If the issue is not resolved, proceed to the next solution. If the issue 
persists after performing all solutions, contact Technical Support.

1.

Install the maintenance cartridge. If a maintenance cartridge is installed, try repositioning 
it.

Press and release the power key to clear the error.

Error 100D - Transport not Installed

The printer cannot detect the transport unit.

Solutions

Use the following solutions to troubleshoot the issue. The most likely solutions are listed first, 
followed by other possibilities. Check to see if the issue is resolved after performing each 
recommended solution. If the issue is not resolved, proceed to the next solution. If the issue 
persists after performing all solutions, contact Technical Support.

1.

Install the transport unit. If the transport unit is installed, try repositioning it.

Press and release the power key to clear the error.

Summary of Contents for QuickLabel QL-850

Page 1: ...U S E R G U I D E...

Page 2: ...Label An AstroNova Division World Headquarters 600 East Greenwich Ave West Warwick RI 02893 Tel 1 401 828 4000 Fax 1 401 822 2430 E mail info QuickLabel com www QuickLabel com Technical Support Tel 1...

Page 3: ...t written permission of QuickLabel Trademarks QL 850 and CQL Pro are registered trademarks of AstroNova Inc Adobe Photoshop and Illustrator are registered trademarks of Adobe Systems Inc Corel is a re...

Page 4: ...0 quicklabel de Canada 3505 Rue Isabelle Suite O Brossard QC J4Y 2R2 Tel 1 800 565 2216 quicklabel ca Latin America Av Insurgentes Sur No 1602 4 Piso Suite 467 Col Credito Constructor Ciudad de Mexico...

Page 5: ...ergy and if not installed and used in accordance with the instruction manual may cause interference to radio communications However there is no guarantee that interference will not occur in a particul...

Page 6: ...6 EC and or your national laws implementing those Directives If a chemical symbol is printed beneath the symbol shown above in accordance with the Battery Directive this indicates that a heavy metal H...

Page 7: ...ith EEE At the same time your cooperation in the correct disposal of this product will contribute to the effective usage of natural resources For more information regarding return and recycling of WEE...

Page 8: ...007 Ed 2 A1 A2 Application of Council Directives Application des Decisions du Conseil Anwendbar fur die Richtlinien Applicazione delle Direttive del Comitato 2014 30 EU 2014 35 EU I the undersigned he...

Page 9: ...nd Functions 30 Operation Panel 32 LED Indicators 33 Color Basics 34 Chapter 3 Designing and Printing Labels 36 Designing Labels 36 Setting up the Label Design Software 38 Printing Labels 38 Estimatin...

Page 10: ...Error 1022 Shared Memory Response Timeout 66 Error 1023 System Initialization Timeout 66 Error 1024 Unexpected Engine Response 66 Error 1025 Shutdown Timeout 67 Error 1030 Can t Erase EEPROM 67 Error...

Page 11: ...Issues 95 Resolving USB Communication Issues 97 Identifying and Resolving Priming Problems 99 Addressing Data Starvation 100 Chapter 7 Rewinder 102 Before Installing the Rewinder 102 Installing the Re...

Page 12: ...owing actions Foam support block removal See Preparing the Maintenance Roller on page 20 Ink cartridge installation See Installing Ink Cartridges on page 21 Printhead installation See Installing the P...

Page 13: ...5 Place the printer on a sturdy flat horizontal surface that can support at least 100 pounds 45 4 kilograms 6 Remove all packing tape from the printer exterior This tape is used to secure the doors an...

Page 14: ...nter 10 Close the main side door but leave the lower side door open 11 Grasp the maintenance cartridge and pull it straight out of the printer Then reinstall the maintenance cartridge Ensure it is ful...

Page 15: ...elative humidity For optimal print quality a relative humidity of approximately 60 is recom mended Avoid placing the printer in areas exposed to high temperature and humidity extremely low temperature...

Page 16: ...ed handle Lift the rear of the printer by the flat area of the plastic frame above the mandrel Keep the printer level while lifting it The printer has rubber feet that help secure the printer and prev...

Page 17: ...B cable until prompted later in this procedure 2 Power on your PC and download the QL 850 installer program from www QuickLabel com downloads Run the Setup exe file The Installer wizard will open Choo...

Page 18: ...during installation choose to continue the installation 4 When prompted to select a printer connection method choose Configure to print over the network Then choose Next 5 When prompted view the list...

Page 19: ...u would like to assign a specific IP address ensure the dhcp and autoip options are not checked Enter the new IP address in the ip_address field and choose Submit 4 Choose the Diagnostics link to retu...

Page 20: ...m block 1 Open the top cover and remove the cinch strap 1 2 Remove the foam support block 2 from the printer Use caution when removing the block to avoid dislodging the maintenance roller assembly Sav...

Page 21: ...from the ink cartridge slots Save the pads for future shipping purposes 3 Slide in the ink cartridge nozzle end first label side up Push the cartridge in all the way You will feel slight resistance n...

Page 22: ...powered on and the ink cartridges have been installed 2 Open the top cover 3 Make sure the printhead latch 1 is in the open vertical position Remove the cap protectors 2 from the two fluidic couplings...

Page 23: ...e protective plastic strips with the other hand Grasp the pull tab and slowly peel back the plastic strip covering the electrical contacts Grasp the pull tab and slowly peel back the plastic strip cov...

Page 24: ...in place gently rotate the printhead cartridge forward into position against the stops on the printhead connector circuit board Caution If the printhead will not rotate into position do not force it...

Page 25: ...ply See Working with Wide Gap Media on page 28 1 Turn the wing nut 1 on the end of the mandrel counterclockwise to loosen the mandrel 2 Loosen the fastener on the outer flange 4 Then remove the outer...

Page 26: ...no excessive slack in the media during this process 11 The printer will beep three times to indicate the media has been detected Release the media when the printer starts automatically feeding it into...

Page 27: ...he thumbscrew on the adjustable media guide 6 and slide the guide to the width of the media The edges of the media should lightly contact the edges of the fixed media guide 7 and the adjustable media...

Page 28: ...2 on the end of the mandrel counterclockwise to loosen the mandrel Loosen the wing nut until the media roll moves freely 5 Remove the media roll from the mandrel Working with Wide Gap Media Gap media...

Page 29: ...loading media ensure that the leading edge of the media contains no reflective mark within the first inch from the cut edge If any part of the reflective mark is within this area cut the media direct...

Page 30: ...h this slot 2 Operation Panel Use these keys to operate various printer functions 3 Top Cover Open this cover to access the printhead 4 Main Side Door Open this door to access the transport unit and i...

Page 31: ...onnection method 4 LAN Port Connect the LAN cable here when using the LAN connection method 5 Power Inlet Connect the power cord here 6 Inner Flange Position the media roll edge so it touches this fla...

Page 32: ...release the feed key to feed media one label length Press and hold the feed key to feed media until you release the key While paused press and hold the feed key to perform a light printhead cleaning o...

Page 33: ...s in the ready state press and hold this key for approximately one second to cut media at the exit Key Description LED Description 1 Power This green LED indicates the power status of the printer Off...

Page 34: ...nces are universal and as a result of them software developers display manufacturers and printer manufacturers have worked together to develop a way to successfully describe and use color taking into...

Page 35: ...s will help with the full design and printing process If color matching is important to you you may consider profiling your computer display QuickLabel QL 850 Color Profiles When printing even the typ...

Page 36: ...ting point of new labels Continuous Media Continuous media does not have reflective marks It also does not have die cuts and therefore contains no gaps It is a continuous sheet of label material affix...

Page 37: ...trix removed you can print all the way to the edge of die cut labels but doing so may cause a small amount of ink to deposit onto the liner In the event excess ink deposits on the liner it will not dr...

Page 38: ...JPG uncompressed TIF GIF PNG or PDF format Select a resolution of 400 or 800 pixels per inch For raster based design applications such as Adobe Photoshop choose a resolution of 400 or 800 pixels per...

Page 39: ...job While paused press and hold the feed key to perform a light printhead cleaning operation Printhead cleaning options are also available in the QL 850 Mainte nance Utility 7 Receive the printed lab...

Page 40: ...k Usage screen 4 Print the label job Observe the following guidelines to ensure an accurate ink estimate Print a high number of copies such as 100 Print with the same driver settings media resolution...

Page 41: ...four yellow LEDs on the printer indicate ink status Flashing LEDs indicate low ink Illuminated LEDs indicate empty ink The printer has four ink cartridges black K cyan C magenta M and yellow Y Confir...

Page 42: ...You will feel slight resistance near the end of this process as the nozzle engages the ink needles inside the printer Caution There are sharp needles in the ink cartridge slot Never put your fingers i...

Page 43: ...nch Rollers As media is fed into the printer it is advanced by a series of rollers just inside the media entry slot Over time these rollers may accumulate dust or adhesive residue You can clean these...

Page 44: ...ct a physician immediately To prevent ink from leaking from a used maintenance cartridge avoid dropping the cartridge or storing it at an angle Otherwise ink may leak and cause stains Ink adheres to t...

Page 45: ...from staining your hands during this procedure 1 Remove media from the printer 2 Open the main side door 3 Grasp the handle on the transport unit Then pull the transport unit straight out of the print...

Page 46: ...e the belts manually in either direction to expose more belt surface area for cleaning All four belts will move at the same time 8 If the belts are damp from cleaning allow them to dry completely befo...

Page 47: ...en the main side door 4 Release the two ink cartridge latches 5 Carefully slide all four ink cartridges one at a time out of the unit 6 Use a swab or lint free cloth dampened with isopropyl alcohol to...

Page 48: ...lly When heavy and light automated cleanings are not sufficient in nozzle restoration a manual cleaning method can be used This process requires a clean lint free cloth de ionized or distilled water a...

Page 49: ...d in the printer and close the latch Complete the printhead replacement procedure Powering Up After Extended Downtime If the QL 850 has been powered down or unplugged for two weeks or longer you must...

Page 50: ...tions to upgrade the print module firmware 1 Obtain the print module firmware file from the QuickLabel website or QuickLabel Technical Support The file will have a name similar to the following exampl...

Page 51: ...ns running during this process Once the print module has completed restarting the upgrading progress bar window will close 6 When the upgrade is complete choose Cancel to close the Update Firmware win...

Page 52: ...the job can be sent again If no jam is present press and hold the pause resume key to cancel the job Press and release the feed key as needed until the last label printed is aligned with the exit Res...

Page 53: ...rror 1003 Unwind too Slow The mandrel is moving slower than expected Solutions Use the following solutions to troubleshoot the issue The most likely solutions are listed first followed by other possib...

Page 54: ...ion If the issue persists after performing all solutions contact Technical Support 1 Load media 2 Press and release the power key to resume the job Or press and hold the pause resume key to cancel the...

Page 55: ...ing made where the transport unit plugs into the printer Examine both connectors and make sure the connectors pins are clean and not pushed in or damaged The connector on the transport unit is illustr...

Page 56: ...Make sure all parts are intact Ensure the metal locking washer that retains the white plastic gear is installed 5 Ensure that the cut is occurring through the label liner between labels If necessary a...

Page 57: ...Use the following solutions to troubleshoot the issue The most likely solutions are listed first followed by other possibilities Check to see if the issue is resolved after performing each recommended...

Page 58: ...issue is resolved after performing each recommended solution If the issue is not resolved proceed to the next solution If the issue persists after performing all solutions contact Technical Support 1...

Page 59: ...If the issue is not resolved proceed to the next solution If the issue persists after performing all solutions contact Technical Support 1 Close the top cover Press and release the power key to resum...

Page 60: ...sts after performing all solutions contact Technical Support 1 Install the maintenance cartridge If a maintenance cartridge is installed try repositioning it Press and release the power key to clear t...

Page 61: ...e if the issue is resolved after performing each recommended solution If the issue is not resolved proceed to the next solution If the issue persists after performing all solutions contact Technical S...

Page 62: ...issue is not resolved proceed to the next solution If the issue persists after performing all solutions contact Technical Support 1 Press and release the power key to clear the error 2 Confirm the me...

Page 63: ...e printer turn the power inlet switch off Wait three seconds Then turn the power inlet switch on Power on the printer Error 1015 Internal Error There is an electronics failure Solutions Use the follow...

Page 64: ...g each recommended solution If the issue is not resolved proceed to the next solution If the issue persists after performing all solutions contact Technical Support 1 Look for and clear a potential ja...

Page 65: ...persists after performing all solutions contact Technical Support 1 Press and release the power key to clear the error 2 Press and hold the power key on the operation panel for three seconds to turn t...

Page 66: ...ollowed by other possibilities Check to see if the issue is resolved after performing each recommended solution If the issue is not resolved proceed to the next solution If the issue persists after pe...

Page 67: ...sue is not resolved proceed to the next solution If the issue persists after performing all solutions contact Technical Support 1 Press and release the power key to clear the error 2 Press and hold th...

Page 68: ...ower key for one second to turn the printer on again 3 On the rear of the printer turn the power inlet switch off Wait three seconds Then turn the power inlet switch on Power on the printer Error 1038...

Page 69: ...e printer turn the power inlet switch off Wait three seconds Then turn the power inlet switch on Power on the printer Error 103A Upgrade Failure There was an internal upgrade failure Solutions Use the...

Page 70: ...t followed by other possibilities Check to see if the issue is resolved after performing each recommended solution If the issue is not resolved proceed to the next solution If the issue persists after...

Page 71: ...persists after performing all solutions contact Technical Support 1 Press and release the power key to resume the job Or press and hold the pause resume key to cancel the job Error 1046 Can t find Job...

Page 72: ...esent on the sensor or the exterior of the maintenance cartridge false sensor readings may occur Open the lower side door and remove the maintenance cartridge Use a clean lint free cloth dampened with...

Page 73: ...2001 Faulty Printhead The printhead is damaged or has a poor electrical connection Solutions Use the following solutions to troubleshoot the issue The most likely solutions are listed first followed...

Page 74: ...lled has a poor electrical connection or a printhead latch is not recog nized as being closed Solutions Use the following solutions to troubleshoot the issue The most likely solutions are listed first...

Page 75: ...nction in the Parts Replacement tab of the QL 850 Maintenance Utility Clean the electrical contacts on the printhead with a clean lint free cloth and isopropyl alcohol Finish using the printhead repla...

Page 76: ...details are not retained in the Maintenance Utility log Error 2009 Maintenance Jam Mechanical components in the print module have failed to move Solutions Use the following solutions to troubleshoot...

Page 77: ...nance sled at the illustrated port 4 Tension in the printhead harness bundles can restrict motion and make it more difficult for the printhead to move up and down Check the harness routing 5 Inspect t...

Page 78: ...Error Messages QL 850 User Guide 78 6 Inspect the cam rollers on the print engine Ensure both rollers are present...

Page 79: ...rming all solutions contact Technical Support 1 Clean ink cartridge electrical contacts and reinstall the ink cartridge Error 200C Yellow Cartridge is Missing The yellow ink cartridge was not detected...

Page 80: ...is not resolved proceed to the next solution If the issue persists after performing all solutions contact Technical Support 1 Replace the ink cartridge Error 2010 Magenta Ink Out The magenta ink cartr...

Page 81: ...cal Support 1 Replace the ink cartridges indicated by the front panel LEDs Error 2014 Missed TOF The top of form mark was not found within the expected time Solutions Use the following solutions to tr...

Page 82: ...head moves to the print position the printer may be receiving corrupt data This may occur when using CQL Pro software The corrective action is to reduce the size of the image slightly For example if y...

Page 83: ...ce the affected star wheel or the star wheel assembly A star wheel has become unseated Remove and reinstall the affected star wheel Proper operation is for the star wheel to spin on the dowel pin that...

Page 84: ...r on the star wheel assembly to the encoder sensor This harness is protected by a cover Remove the cover by unfastening the two screws Then unplug the harness Note Use caution when working near the en...

Page 85: ...otective cover Then fasten the two screws to secure the cover Caution Do not overtighten these screws The screws should just contact the cover Overtightening can result in 2017 2100 errors Error 2100...

Page 86: ...Caution Use caution when removing a media jam The printer contains sensitive components that can be damaged by debris impact excessive force etc 1 If media is exiting the front of the printer perform...

Page 87: ...cut the media under the transport entrance guide You can use scissors or a blade to start the cut and then tear the rest of the way with your hands Caution Use caution when cutting media inside the p...

Page 88: ...ng lock by rotating it counterclockwise and then pulling it straight out This lock is usually removed during the unpacking process 11 The next steps will vary based on the media jam location Refer to...

Page 89: ...op cover and main side door if they are open 15 Power on the printer 16 Reload the media Removing a Media Jam in the Input Pinch Rollers 1 Remove the media roll from the printer Use scissors to cut th...

Page 90: ...rollers 3 as necessary by turning the drive pulley 4 Remove the jam when it is accessible c Position the roller cover plate 2 in the mounting location and install the two screws 1 Installing the plat...

Page 91: ...ects the sensor on the star wheel assembly to the encoder sensor This harness is protected by a cover Remove the cover by unfastening the two screws Then unplug the harness Note Use caution when worki...

Page 92: ...ed f If you removed the star wheel assembly near the media entrance plug in the sensor harness Move the harness under the protective cover Then fasten the two screws to secure the cover Caution Do not...

Page 93: ...printhead in the uncapped position too long will result in dried ink nozzles a Turn the worm gear counterclockwise to raise the printhead b Slide the maintenance sled away from the printhead toward th...

Page 94: ...or excessive air in the ink lines internal to the printer To resolve this issue perform the following steps Cancel the print job Perform the Before Moving function in the Cleaning tab of the QL 850 Ma...

Page 95: ...not recognize the printer correctly In this case the QL 850 will be listed as an Unspecified item in the Devices and Printers window Use the following procedure to correct this issue This procedure a...

Page 96: ...e Properties window will open Choose the General tab 4 Choose Change Settings Then choose the Driver tab 5 Choose Update Driver When you are prompted select the Search automatically for updated driver...

Page 97: ...er with the QL 850 Maintenance Utility Status Monitor or CQL Pro software In this situation a warning symbol will displayed over the printer icon in the driver properties window Use the following proc...

Page 98: ...Universal Serial Bus controllers option 3 Right click USBCOMM Device Driver and select Update Driver You will be prompted to select a search method Choose Browse my computer for driver software The Br...

Page 99: ...n in the Cleaning tab of the QL 850 Maintenance Utility After Shipping function in the Cleaning tab of the QL 850 Maintenance Utility Printhead replacement function in the Parts Replacement tab of the...

Page 100: ...ge in a job rather than data for a single page and then printing it multiple times For some jobs data for each individual page is necessary such as when printing unique labels or labels containing uni...

Page 101: ...and resuming when more data is available to print In some situations this may result in an error 101D If either of these situations is to be avoided then the entire job can be set to be rendered befo...

Page 102: ...k table or other similar surface it must be sturdy and stable enough to support the weight of the printer rewinder and roll media A table that can support at least 150 pounds 68 kilograms is recommend...

Page 103: ...h off 3 Disconnect the accessory cover 1 by removing the two upper 2 and two lower 3 screws Note The upper and lower screws are different sizes Keep these screws separated to ensure correct installati...

Page 104: ...ring this process Note These instructions assume you are using the rewinder accessory and the external unwinder accessory If you are using only the rewinder accessory the installation procedure will d...

Page 105: ...er Insert the power plug into an AC power receptacle Rewinding Labels The rewinder automatically winds printed media exiting the QL 850 onto rolls The setup process for rewinding labels requires an em...

Page 106: ...the rewinder to the bracket Slide the rewinder left right as allowed by the adjustment slots until the media is squarely aligned with the inner flange Then tighten the thumb screws 8 Fasten the end of...

Page 107: ...k table or other similar surface it must be sturdy and stable enough to support the weight of the printer unwinder and roll media A table that can support at least 150 pounds 68 kilograms is recommend...

Page 108: ...as illustrated Insert the tabs into the corresponding slots on the brackets 5 Align the unwinder 2 with the bracket Ensure the thumb screw mounting locations align with the slotted holes on the bracke...

Page 109: ...nt of the printer should make contact with the raised tab on the bracket 8 Plug the power jack into the power slot on the unwinder Insert the power plug into an AC power receptacle 9 On the rear of th...

Page 110: ...unwinder with the printer The inside edge of the inside flange should be aligned with the fixed media guide on the media entry slot Slide the unwinder left right as allowed by the adjustment slots un...

Page 111: ...s 2 Ensure the power switch 3 on the unwinder is in the off position 3 Turn the thumb screw 6 counterclockwise to loosen and remove the removable roll support arm 7 4 Turn the unwinder mandrel adjustm...

Page 112: ...wer switch 5 on the unwinder to the on position The unwinder will remove slack and provide back tension during the loading process The media unwind path is illustrated below 11 Finish loading media us...

Page 113: ...Draining ink from the printhead Removing the printhead Removing ink cartridges Securing the maintenance roller Caution If you are unable to use the Before Shipping function due to an error condition l...

Page 114: ...arrow symbol on the packaging Do not store or transport the cartridge with its long axis vertically oriented Longer Printhead Storage Beyond Specification If the storage has been relatively well contr...

Page 115: ...uch extreme conditions Before use the inks should be brought to room temperature and ink cartridges given a gentle shake to remix the ingredients The amount of agitation that occurs during handling on...

Page 116: ...printer If this happens allow the printer to sit for at least 1 hour at room temperature to adapt to the ambient temperature and humidity Never place the printer on a slanted or unstable stand or tabl...

Page 117: ...s designed to be used in the region where purchased Also make sure the power source can supply sufficient power for the printer This could cause a fire or serious electrical shock or damage the printe...

Page 118: ...en any covers and do not remove the power plug Do not apply excessive force or strong shock to the printer Doing so can result in a machine failure or impair printer quality Be sure to open close the...

Page 119: ...dren This prevents accidents If a child accidentally swallows ink seek medical attention immediately If ink gets into your eyes wash it out with flowing water immediately If irritation persists consul...

Page 120: ...K dye cartridges 250mL Maintenance Cartridge Capacity Approximately 1 million printed inches or 850 mid job cleanings Near full warning at approximately 80 full Printhead Life Approximately 250 000 li...

Page 121: ...core Thickness 5 5 mil 7 5 mil 0 140 mm 0 191mm Control Panel 5 buttons Power Pause Feed Back Feed Cut 7 LEDs Power Status Error Ink Out C M Y K Service Wait Time to Ready On Ready 60 seconds Connect...

Page 122: ...onger than 2 weeks powered off or in standby Ink Storage 32 F to 95 F 0 C to 35 C 35 to 85 Relative Humidity non condensing Ink Warranty 24 months from date of production or 6 months after installatio...

Page 123: ...nthetic labels Label Size Print Area Width 2 0 8 3 51 mm 211 mm Length 1 0 30 0 25 mm 762 mm Construction Width a 2 125 8 425 54 mm 214 mm Edge Trim Left Right b 0 063 1 59 mm Reflective Mark Width c...

Page 124: ...3 0 mm 0 75 19 mm Multi Across Down Yes 1 0 25 mm min width 1 0 25 mm min length Maximum of 0 25 horizontal and vertical gaps Butt Cut Label Construction acceptable if no print required for length of...

Page 125: ...rror 1001 52 Error 1002 52 Error 1003 53 Error 1004 54 Error 1005 54 Error 1006 54 Error 1007 57 Error 1008 57 Error 1009 57 Error 100A 58 Error 100B 59 Error 100C 60 Error 100D 60 Error 100E 61 Error...

Page 126: ...acing 41 Inner Flange 31 Installation Location 15 Installation Precautions 16 Installation Summary 12 IP Address 18 L Label Design Software Setup 38 Labels Designing 36 LAN Port 31 LED Indicators 30 3...

Page 127: ...Index QL 850 User Guide 127 W Wing Nut 31...

Reviews: