3-8 | 3050-RM Moisture Analyzer
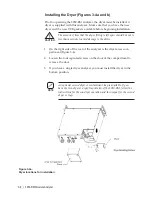
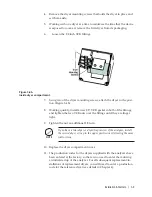
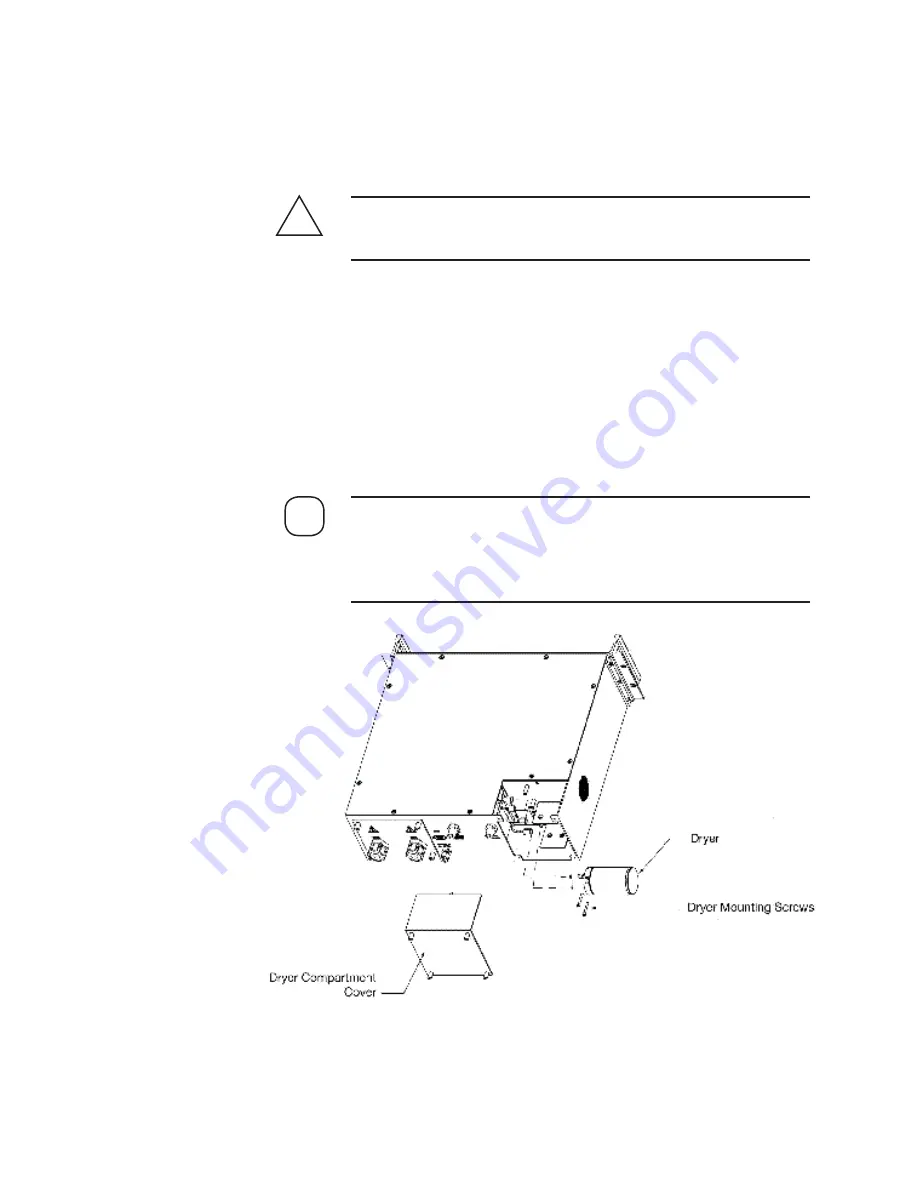
Installing the Dryer (Figures 3-4a and b)
Prior to operating the 3050-RM analyzer, the dryer must be installed. A
dryer is supplied with this analyzer. Make sure that you have the new
dryer and the new VCR gaskets available before beginning installation.
The amount of time that the dryer fitting is left open should be kept to
less than a minute to avoid damage to the device.
1. On the right side of the rear of the analyzer is the dryer acess com-
partment (Figure 3-4).
2. Loosen the four captured screws on the door of the compartment to
remove the door.
3. If you have a single dryer analyzer, you must install the dryer in the
bottom position.
An optional second dryer or contaminant trap is available. If you
have the two-dryer or dryer/trap version of the 3050-RM, follow the
instructions for the one-dryer operation and then repeat for the second
dryer or trap.
!
CAUTION
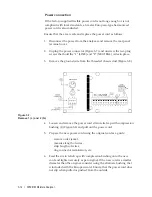
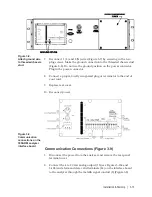
Figure 3-4a.
Dryer locations for installation.
NOTE
Summary of Contents for 3050-RM
Page 11: ... xi ...
Page 20: ...1 8 3050 RM Moisture Analyzer This page intentionally left blank ...
Page 24: ...2 4 3050 RM Moisture Analyzer This page intentionally left blank ...
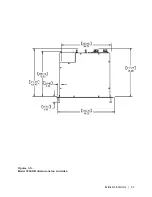
Page 27: ...Installation Start Up 3 3 Figures 3 1c Model 3050 RM dimensions top and sides ...
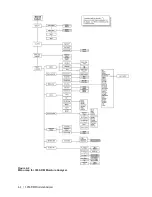
Page 44: ...4 2 3050 RM Moisture Analyzer Figure 4 2 Menu map for 3050 RM Moisture Analyzer ...
Page 63: ...Serial Communications 5 7 Figure 5 6 Defined Failure Codes ...
Page 64: ...5 8 3050 RM Moisture Analyzer Figure 5 7a Variable Table ...
Page 65: ...Serial Communications 5 9 Figure 5 7b Variable Table ...
Page 66: ...5 10 3050 RM Moisture Analyzer This page intentionally left blank ...
Page 78: ...7 2 3050 RM Moisture Analyzer This page intentionally left blank ...
Page 91: ...Service Parts 8 13 Figure 8 9 Electronic Module ...
Page 98: ...PPmV Centigrade Fahrenheit lbs mnscf mg Nm3 ppmW ...


