background image

User Manual – Rev J 


CS Series 

California Instruments 


77 

ENTRY 

DESCRIPTION 

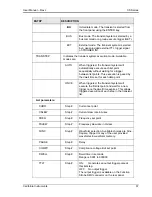
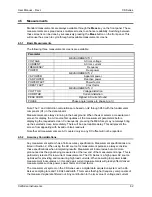
In three-phase mode, available current is three 
times limit shown. 
For multi-chassis configuration, limit field still 
shows current per chassis and phase. 

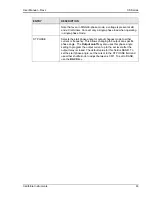
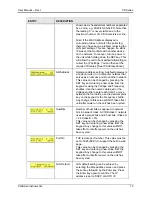
PHASE (C) 

Phase Setting 

Displays phase angle for phase C. Valid values 
are 120 for three-phase or mode configuration, 
0 for single-phase only configuration. Any other 
value indicates split (2) phase configuration. 

4.3 Output 

Programming 

4.3.1 

Set the Output 

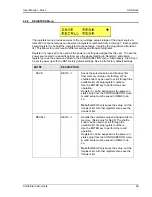
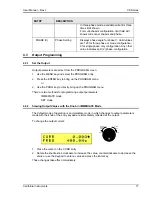
Output parameters are all set from the PROGRAM screen.  

1.  Use the MENU key and select the PROGRAM entry. 

2.  Press the ENTER key to bring up the PROGRAM menu. 

 or 

2.  Use the PROG key to directly bring up the PROGRAM menu. 

There are two methods for programming output parameters: 

 IMMEDIATE 

mode 

 SET 

mode 

4.3.2 

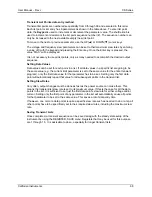
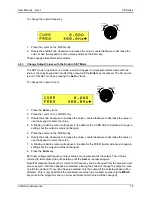
Slewing Output Values with the Knob in IMMEDIATE Mode 

The default mode of operation is an immediate mode in which changes to output parameters 
made with the knob or the entry keypad are immediately reflected at the output.  

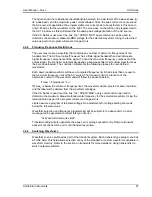
To change the output current: 


Counter
Clock
wise

Clock

wise

INCR

DECR


1.  Place the cursor on the CURR entry 

2.  Rotate the shuttle knob clockwise to increase the value, counterclockwise to decrease the 

value or use the Keypad to enter a value and press the Enter key. 

These changes take effect immediately. 

Summary of Contents for 13500CS/3

Page 1: ... Programmable Power All rights reserved P N 7004 987 CS Series AC Power Source User Manual TEL 800 733 5427 toll free in North America 1 858 450 0085 direct FAX 1 858 458 0267 Email sales programmablepower com Web Site http www programmablepower com ...

Page 2: ... Series California Instruments 2 Refers to CS Series AC Power Sources Models Single chassis 3000CS 4500CS Multiple chassis 9000CS 2 13500CS 3 18000CS Manual revision G Copyright 2005 2009 AMETEK Programmable Power division ...

Page 3: ... respective owners and are used herein for identification purposes only Notice of Copyright MX Series User Manual 2003 2009 AMETEK Programmable Power Inc All rights reserved Exclusion for Documentation UNLESS SPECIFICALLY AGREED TO IN WRITING AMETEK PROGRAMMABLE POWER INC AMETEK a MAKES NO WARRANTY AS TO THE ACCURACY SUFFICIENCY OR SUITABILITY OF ANY TECHNICAL OR OTHER INFORMATION PROVIDED IN ITS ...

Page 4: ... grounded properly for both personnel and equipment safety Always ensure that facility AC input power is de energized prior to connecting or disconnecting any cable In normal operation the operator does not have access to hazardous voltages within the chassis However depending on the user s application configuration HIGH VOLTAGES HAZARDOUS TO HUMAN SAFETY may be normally generated on the output te...

Page 5: ...User Manual Rev J CS Series California Instruments 5 SAFETY SYMBOLS ...

Page 6: ...uctions of AMETEK is opened modified or disassembled in any way without AMETEK s consent or is used in combination with items articles or materials not authorized by AMETEK The Buyer may not assert any claim that the Products are not in conformity with any warranty until the Buyer has made all payments to AMETEK provided for in the Purchase Order Agreement PRODUCT RETURN PROCEDURE Request a Return...

Page 7: ...faces and CSGui Program 47 3 11 RPV Input RPV option 47 4 Front Panel Operation 49 4 1 Tour of the Front Panel 49 4 2 Menu Structure 55 4 3 Output Programming 77 4 4 Waveform Management 79 4 5 Measurements 82 4 6 Harmonic Analysis 83 4 7 Transient Programming 83 4 8 Setting the Power on Initialization Values 86 4 9 Remote Inhibit Function 87 5 Principle of Operation 88 5 1 Overall Description 88 5...

Page 8: ...User Manual Rev J CS Series California Instruments 8 7 5 Advanced Troubleshooting 100 7 6 Factory Assistance 100 7 7 Fuses 100 7 8 Replaceable Parts 101 8 Error Messages 103 Index 109 ...

Page 9: ...ws application software 47 Figure 4 1 Shuttle Knob 51 Figure 4 2 Menu Keys 52 Figure 4 3 Measurement Screen 54 Figure 4 4 PROGRAM Menu 60 Figure 4 5 CONTROL Menus 61 Figure 4 6 MEASUREMENT Screen 64 Figure 4 7 Selecting a Waveform 79 Figure 4 8 Selecting Waveforms for Single Phase or All Phases 80 Figure 4 9 Waveform Crest Factor Affects Max RMS Current 80 Figure 4 10 Switching Waveforms in a Tran...

Page 10: ...re attempting to install and operate the CS AC current source Note All interfaces use the SCPI command syntax as described in the programming manual 1 2 Manual organization and format All user documentation for California Instruments power sources is provided on CDROM in electronic format Adobe Portable Document Format The required Adobe PDF viewer is supplied on the same CDROM This manual may be ...

Page 11: ...es its own AC service Note 3000CS may be operated from 208 230 V L N single phase AC input between B and C on TB3 for 3000CS Line VA total 3000CS 5900 VA 4100 W 4500CS 8900 VA 5900 W x2 for 9000CS 2 x3 for 13500CS 3 x4 for 18000CS 4 Line Current per phase 3000CS Std 19 Arms 187 VLL 3 phase AC input 32 Arms 187 VLN single phase AC input Connect between TB3 B and TB3 C 400 10 Arms 360 VLL 3 phase AC...

Page 12: ...Arms single phase mode Max current is power limited above 202V Resolution 0 01 A Ranges L N 13500CS 3 135V CVR 0 44 44 Arms three phase mode 0 133 3 Arms single phase mode Max current is power limited above 101V 270V CVR 0 22 22 Arms three phase mode 0 66 66 Arms single phase mode Max current is power limited above 202V Resolution 0 01 A Ranges L N 18000CS 4 135V CVR 0 59 24 Arms three phase mode ...

Page 13: ...rents are 2 x 4500CS For 13500CS 3 currents are 3 x 4500CS For 18000CS 4 currents are 4 x 4500CS Compliance Voltage Ranges 135Vrms or 270Vrms Minimum compliance voltage as a function of current voltage range and phase mode 3000CS Vcomp Iprog 1 KVA 3 phase mode Vcomp Iprog 3 KVA 1 phase mode 4500CS Vcomp Iprog 1 5 KVA 3 phase mode Vcomp Iprog 4 5 KVA 1 phase mode Vcomp Iprog x Vrange 2 1500 3 phase...

Page 14: ...hase Mode 18 KVA Three Phase Mode per phase 6 KVA Frequency Range 45 Hz 2000 Hz Resolution 1 0 01 Hz 81 91 Hz 0 1 Hz 82 0 to 819 1 Hz 1 Hz 819 Hz Accuracy 0 025 Temp Coefficient 5 ppm of value C Stability 15 ppm of value year Phase 3 phase mode Range Phase B C relative to phase A 0 0 to 360 0 Resolution 0 1 819 1 Hz 0 5 819 1 Hz Accuracy 2 45 Hz 1000 Hz 1 1 kHz 1000 Hz Note All output specificatio...

Page 15: ...ge versus Current Rating Charts CS Series 135 Range Figure 2 1 Voltage Current Rating Chart in 3 phase mode 135 Range Figure 2 2 Voltage Current Rating Chart in 1 phase mode 135 Range 1 Programming resolution reduced if LKM LKS option is installed See paragraph 2 6 2 ...

Page 16: ...ries California Instruments 16 2 1 4 Voltage versus Current Rating Charts CS Series 270 Range Figure 2 3 Voltage Current Rating Chart in 3 phase mode 270 Range Figure 2 4 Voltage Current Rating Chart in 1 phase mode 270 Range ...

Page 17: ...rnia Instruments 17 2 1 5 Load Impedance versus Current Rating Charts CS Series 135 Range Figure 2 5 Load Impedance Current Rating Chart in 3 phase mode 135 Range Figure 2 6 Load Impedance Current Rating Chart in 1 phase mode 135 Range ...

Page 18: ...rnia Instruments 18 2 1 6 Load Impedance versus Current Rating Charts CS Series 135 Range Figure 2 7 Load Impedance Current Rating Chart in 3 phase mode 270 Range Figure 2 8 Load Impedance Current Rating Chart in 1 phase mode 270 Range ...

Page 19: ...s Current and Power range and accuracy specifications are times the number of chassis Note Frequency measurement specification valid for output 1 Arms Note Crest Factor accuracy applies for Irms 50 of max Note Power Factor accuracy applies for PF 0 5 and VA 50 of max 2 1 8 Harmonic Measurements Harmonic measurement specifications apply to CS Series AC sources in three phase mode See notes for sing...

Page 20: ...IEEE 488 AH1 DC1 DT1 L3 RL2 SH1 SR1 T6 IEEE 488 2 and SCPI Response time is 10 ms typical LAN Ethernet LAN Option RJ45 Connector 10BaseT 100BaseT or 1000BaseT Data transfer rate 460 800 bps Protocol TCP IP Note If LAN is installed RS232C interface is disabled RS232C Baud rates 9600 19200 38400 57600 and 115200 Data bits 8 Start bits 1 Stop bits 1 Parity None Syntax SCPI Response time is 10 ms typi...

Page 21: ... J CS Series California Instruments 21 Parameter Specification Output Over Voltage Adjustable level constant voltage mode with programmable set point Open Circuit Automatic shutdown Over temperature Automatic shutdown ...

Page 22: ...d individually Material Steel chassis with aluminum top cover Finish Anodized external surfaces Front panel color medium gray Cooling Fan cooled with air intake on the sides and exhaust to the rear Variable speed fan control Acoustic Noise Supplemental specification Measured at 1 m distance Fan speed Low power mode Full power mode Front of unit 47 dBA 50 dBA Rear of unit 62 dBA 67 dBA Internal Con...

Page 23: ...nt values for selected phase or phase A if all three phases are selected Menu key selects main menu Enter key is used to confirm selections Back key is used to back up to previous screen Output on off key for output relay control Phase key toggles between phase A B C or all phases selection Keypad is used to enter numeric values without using the shuttle knob Displays LCD graphics display Large hi...

Page 24: ...r the bus using the OUTP TTLT MODE FSTR command The Trigger Output Trig Out1 function strobe is an active low1 TTL signal with a duration of no less than 400 usec Clock and Lock Mode Enables two or more independent CS power systems to be phase synchronized to each other One system LKM acts as the master the other s LKS as auxiliaries The LKS units are synced to the LKM unit Refer to section 3 9 fo...

Page 25: ...Series Supplemental Specifications Specifications for AX auxiliary output voltage option on the CS units are listed below This output is available on the Phase D and E terminal strip There is no external sense connection for the AX outputs Sense is internal only Specifications apply for programmed frequency range of 360 Hz to 440 Hz Parameter Supplemental Specification Phase D Output Voltage 26 0 ...

Page 26: ...es Supplemental Specifications The EXS External Sync option allows the output frequency of the AC source to be synchronized to an external TTL level clock signal The following supplemental specifications apply when the CS is configured with the external sync option EXS Parameter Supplemental Specification Input Voltage Input TTL Level square wave Impedance 10 KOhm Frequency Range Same as internal ...

Page 27: ...mming Accuracy 1000 Hz 0 05 0 25 V from 5V to FS 1000 Hz 0 1 0 1 KHz 0 3V from 5V to FS Output Noise 20 kHz to 1 MHz 250 mVRMS typical For output frequencies up to 2000 Hz refer to standard measurement specifications For output frequencies above 2000 Hz see table below Parameter Range MEASUREMENT Accuracy Resolution 1 Phase Mode 3 Phase Mode Frequency 1 45 00 5000 0 Hz 0 1 1 digit 0 01 Hz to 81 91...

Page 28: ...AC input frequency range Max Sync Input Slew Rate 80 Hz sec Changes in sync input frequency occurring faster than this rate will result in Error 804 External Sync Error Output relay is opened on Error Max Sync Step 20 Hz Sudden changes in sync input frequency greater than 20 Hz will result in Error 804 External Sync Error Output relay is opened on Error Mode Selection When switching between INT an...

Page 29: ...t is three wire plus ground CAUTION Do not connect 400V into a unit designed for 208 use The result could be a severely damaged unit Always check the input rating on the model number tag before connecting AC input power AC voltage input settings CANNOT be changed in the field 3 3 Mechanical Installation The CS Series AC power sources can be used free standing on a solid surface or mounted in a 19 ...

Page 30: ...2 HI LO HI LO ØA ØB ØC NEUT ØA HI ØB HI ØC HI NEUT TO MASTER INTERFACE TO AUXILIARY INTERFACE J1 CLOCK J2 LOCK SERIAL TAG øA øB øC GND INPUT TB3 OUTPUT SAFETY COVER INPUT SAFETY COVER VOLTAGE INPUT RATING J6 EXT SENSE øD øE OUTPUT TB1 J7 36 27 J7 31 14 USB LAN Figure 3 1 Rear Panel Connector Locations CS Series ...

Page 31: ...er and Auxiliary chassis equal CAUTION Capacitors in the power source may hold a hazardous electrical charge even if the power source has been disconnected from the mains supply Allow capacitors to discharge to a safe voltage before touching exposed pins of mains supply connectors Power modules need at least 10 Minutes to discharge to safe levels before they can be removed 3 5 Output Connections 3...

Page 32: ...tical length 3 5 2 Output Terminal Block OUTPUT TB1 Each CS chassis has a single AC output terminal block For tabletop operation of a single chassis system the output terminal block must be covered using the supplied AC Output safety cover The terminal blocks are large enough to accommodate required wire gauge sizes The terminal block is located in the upper left corner on the rear panel of the un...

Page 33: ...ACE and the female DB25 connector on the Auxiliary unit rear panel labeled TO MASTER INTERFACE as shown in Figure 3 2 The OUTPUT SAFETY COVER must be removed to use the System Interface and the AC Source must be installed in a cabinet with a protective rear screen or door FLT INH FSTB IN1 RPV TRIGGER IEEE 488 AUX OUTPUT OUTPUT TB1 HI LO HI LO 26VAC 5VAC ØA ØB ØC N SENSE ØA ØB ØC N 300 VAC MAX TO T...

Page 34: ...User Manual Rev J CS Series California Instruments 34 Figure 3 3 9000CS 2 Wiring diagram 3 Phase mode ...

Page 35: ...User Manual Rev J CS Series California Instruments 35 Figure 3 4 13500CS 3 Wiring diagram 3 Phase mode ...

Page 36: ...User Manual Rev J CS Series California Instruments 36 Figure 3 5 18000CS 4 Wiring diagram 3 Phase mode ...

Page 37: ...ØA ØB ØC NEUT AC output User Load External Sense Function Table Sense ØA HI ØB HI ØC NI NEUT External Sense Table 3 6 Remote Control Function Table RS232 Serial Control Interface Table 3 7 IEEE 488 GPIB Control Interface See IEEE 488 standard for pin out LAN Ethernet Interface Optional LAN option USB USB Control Interface System Interface Function Table Master Connects to Master DB25 MALE Auxiliar...

Page 38: ...s using more conventional BNC cables SMA Male to BNC Female adapters may be used These are available from www pasternack com P N PE9074 PE9074 Adaptor SMA Description FLT Discrete Fault Indicator output Isolated Open Collector Can be used to signal external devices when a fault condition is detected INH Remote Inhibit TTL input FSTB Function Strobe Trigger Output TTL output TRIG Trigger Input TTL ...

Page 39: ...se A sense Hi 2 Phase B sense Hi 3 Phase C sense Hi 4 Neutral sense 5 AX Option Phase D Hi N A 6 AX Option Phase D Lo N A Table 3 6 External Sense Connector 3 6 5 RS232C Serial Interface RS232C A standard RS232C DB9 connector is located on the rear panel for serial control A straight thru DB9 male to DB9 female interface cable to 9 pin PC serial port connector may be used Pin Designator Dir Descri...

Page 40: ...als are provided on the System Interface connections and they should only be used for their intended purpose To use the System Interface capability the output safety cover has to be removed As such multi chassis configurations cannot be used outside of a cabinet with proper rear screens Note that for multi chassis systems it is recommended to turn the Master unit ON first and then the Auxiliary un...

Page 41: ...nterface refer to the CS Series Programming Manual P N 7004 988 distributed in Adobe PDF format on CD ROM CIC496 LAN Pin Ethernet TPE 10BaseT 100BastT 1000BaseT EIA TIA 568A EIA TIA 568B Crossover 1 Transmit Receive Data 0 White with green stripe White with orange stripe 2 Transmit Receive Data 0 Green with white stripe or solid green Orange with white stripe or solid orange 3 Transmit Receive Dat...

Page 42: ...AC input voltage is present turn on the CS unit s by closing the On Off circuit breaker on the front panel of both chassis 5 Program the low voltage range the output current to 0 amps and close the output relay with the OUTPUT ON OFF button There should be little or no output although the DMM may show a noise level especially if the DMM is in auto ranging mode 6 Select the Set screen and use the s...

Page 43: ...76 Ohms 18 KW rating 18000CS 4 1 71 Ohms 8 KW rating 0 43 Ohms 24 KW rating Table 3 10 Full Load Resistance CS Series FLT INH FSTB IN1 RPV TRIGGER IEEE 488 AUX OUTPUT OUTPUT TB1 HI LO HI LO 26VAC 5VAC ØA ØB ØC N SENSE ØA ØB ØC N 300 VAC MAX TO TO MASTER INTERFACE TO AUXILIARY INTERFACE CLOCK LOCK A B C GND AC SERVICE SERIAL TAG ØA ØB ØC INPUT TB3 INPUT SAFETY COVER VOLTAGE INPUT RATING RS232C USB ...

Page 44: ...l power up as a stand alone unit Connection diagrams for a MB system are identical to those for a 9000CS 2 13500CS 3 or 18000CS 4 See section 3 5 3 Figure 3 3 through Figure 3 5 for wiring diagrams 3 8 1 Power Up and Power Down sequence A multi box CS system can be turned on in either order Generally it is recommended to turn on the master unit before turning on the auxiliary unit and turn off in ...

Page 45: ...ain higher power capability on the same phase s For higher power configurations use the multi chassis configuration through the system interface connection instead Refer to section 3 5 3 for multi chassis configuration and connection information The frequency of the auxiliary unit will track that of the master The output phase angle of phase A will be locked to the auxiliary unit as well to within...

Page 46: ...CE TO AUXILIARY INTERFACE LOAD 1 MASTER LKM AUXILIARY LKS A B C GND AC SERVICE øA øB øC N SERIAL TAG ØA ØB ØC INPUT TB3 INPUT SAFETY COVER VOLTAGE INPUT RATING SERIAL TAG ØA ØB ØC INPUT TB3 INPUT SAFETY COVER VOLTAGE INPUT RATING RS232C USB LAN RS232C USB LAN AUX OUTPUT OUTPUT TB1 HI LO HI LO 26VAC 5VAC ØA ØB ØC N SENSE ØA ØB ØC N 300 VAC MAX TO CLOCK LOCK LOAD 2 øA øB øC N BNC CABLES WARNING DO N...

Page 47: ...terface program CSGui P N CIC913 is provided on CD ROM CIC496 The CSGui may be used to control the CS Series units from a PC1 Figure 3 9 CSGui Windows application software Note Use of the USB port to control more than one power source from a single PC is not recommended as communication may not be reliable Use GPIB interface for multiple power source control 3 11 RPV Input RPV option The RPV optio...

Page 48: ...the selected voltage range To enable the RPV mode press the MENU key until the CONTROL screen and scroll to the ALC setting entry If the ALC is set to REG or ON turn if OFF first Then scroll to the VOLT REF entry Select EXT to use the RPV remote programming voltage The presence of the RPV option is indicated by the RPV field in the model number on the serial tag Note that the EXT and RPV options a...

Page 49: ...panel Status Indicator lights Shuttle knobs Voltage Frequency LCD display MENU and CURSOR keys 4 1 2 System On Off Circuit Breaker The circuit breaker located on the top left side of the front panel of the unit and disconnects the three phase Line input As such the circuit breaker acts as a power on off switch for the CS Series unit When the input current rating of the CS Series AC power source is...

Page 50: ... REM command Any time the Remote LED is lit the front panel of the power source is disabled Note The BACK button doubles as a GOTO LOCAL button LOCAL while the unit is in remote state This allows the user to regain control of the front panel The LOCAL button can be disabled by sending a Local Lockout bus command This prevents unauthorized changes of settings in ATE applications Output on off The O...

Page 51: ...pressed the CS Series returns to its normal mode of operation In this mode changes made with the shuttle knob will take immediate effect The IMMEDIATE mode is useful for slewing output values such as current and frequency and observing the effect on the load SET mode When the Set key is pressed again while the PROGRAM screen is already displayed changes made with the shuttle to any output paramete...

Page 52: ...voltage and frequency shuttles are active while the measurement screen is displayed Additional measurement data can be displayed by using the up and down cursor keys Menu The top level menu is accessed by pressing the Menu key Refer to section 4 2 for details on available menus Enter The Enter key is used to confirm selections made in menus or to activate settings made in SET mode Decimal Keypad A...

Page 53: ...nt cursor is at the bottom of the right hand column the cursor is moved to the top of the left hand column 4 1 7 Output on off Key The Output on off key located to the left of the Menu keys may be used to control the state of the output relays The active state is indicated by the LED directly above the on off key If the output relays are open LED is off the output is floating The ON OFF button pro...

Page 54: ...y screen is shown in Figure 4 3 Due to the two line x 20 characters display limitation of the LCD display most menus are accessed by scrolling through two or more entries Alternatively the Menu key may be pressed repeatedly to access additional available menu entries The active cursor position is indicated by a LEFT POINTING ARROW and can be moved by using the UP and DOWN keys located to the right...

Page 55: ...f 1 No LAN option is installed 2 The USB port is connected to a computer 3 The RS232 port is enabled jumper is not installed This process may take several seconds 2 Company and firmware information Displays the manufacturer Cal Inst which is short for California Instruments and the firmware part number and revision The firmware part number starts with CIC followed by a three digit code and dash nu...

Page 56: ...User Manual Rev J CS Series California Instruments 56 The power source is now ready to be used ...

Page 57: ...ation settings such as the IEEE 488 address RS232C or USB LAN internal baudrate power on state and Master Auxiliary control mode OUTPUT CAL The OUTPUT CAL menu provides access to the LCD viewing angle and Calibration password entry If the correct calibration password is entered additional Calibration screens can be accessed MEAS CAL The MEAS CAL menu allows for calibration of the AC source measure...

Page 58: ...MODE CV SENSE INT LANetwork SYNC INT CLOCK INT LAN option only IP Address NC MODE STAN FW 1 33 100 10 1 87 ALC STATE ON MAC Address CURR REF INT 0 20 4A 9A 02 FD NO OUTP THREE GWAddress NC ST PHASE RAND 100 10 1 1 HostBits 8 NC Port No 5025 MEASUREMENT 1 00A 30 0A OUTP CAL VIEW ANGLE 5 TRANSIENT 400 0HZ 30 0W MEAS CAL CAL PWORD 100 30 0VA 1 00Cf VOLT F S 450 2 349Ap 0 98Pf PHASE OFST 1 0 0 18 A 10...

Page 59: ...MIL704 ON FUNC 12 0 DO160 N A PAUSE 12 0 0 MS704 N A COMPV 12 20 0 ABD ON PHASE 12 0 0 ETIME TEMP ETIME 21 20 03 DWELL 12 10 00 LIMITS TEMP 25 33 C TTLT 12 ON LIM LVOLT 135 0V HVOLT 270 0V Pwr on Screens 1 CAL INST LIM LFREQ 45 00HZ CIC910 1 Rev1 20 HFREQ 1200HZ 2 MODEL 4500CS CURR 11 11A SERIAL 12345 PHASE C 120 0 3 Memory test passed Table 4 1 Menu Tree ...

Page 60: ...C source If the clock source is internal this parameter has no effect FUNC Selects the waveform for the selected phase Available choices are SINE SQUARE and CLIPPED or any user defined waveform that was downloaded to the AC source waveform memory using the IEEE 488 LAN RS232C or USB interface CLIP LEVEL Sets the clip level for the CLIPPED sine wave in percent of total harmonic current distortion I...

Page 61: ...ernal sync which means a free running time base The timebase can be synchronized to either the AC line frequency LNS option required or an external sync signal EXS option required depending on the installed option The sync parameter field will display INT EXT or LINE depending on the selected sync mode INT Default internal sync EXT External sync Requires EXS option LINE AC line sync Requires LNS o...

Page 62: ...evel Control ALC mode This mode uses the internal measurement system to zero regulate the output There are three modes of operation OFF No measurement based output regulation REG Output regulation is enabled AC source will continuously regulate output but will not trip off output ON Output regulation is enabled and output will fault trip off with Error 802 Output current fault if regulation cannot...

Page 63: ...ase angle for output changes made to either current or frequency This allows changing the output at a specific phase angle The Output on off key also uses this phase angle setting to program the output current up to the set level after the output relay is closed The default value for this field is RAND To set the start phase angle set the cursor to the ST PHASE field and use either shuttle knob to...

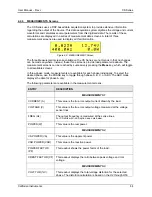
Page 64: ...ens In three phase mode measurements are available for each phase individually To select the desired phase use the PHASE key to toggle through phase A B C or ABC The ABC mode displays the data for phase A only The following parameters are available in the measurement screens ENTRY DESCRIPTION MEASUREMENTS 1 CURRENT A This value is the true rms output current drawn by the load VOLTAGE V This value ...

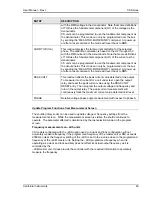
Page 65: ...or a unit under test open the output relay and reset the peak current value using the PEAK VOLT RESET entry Then program the output voltage and frequency and turn on the output relay The peak current measurement will continuously track the maximum current value detected until reset PHASE Relative voltage phase angle measurement with respect to phase A Update Program Functions from Measurement Scre...

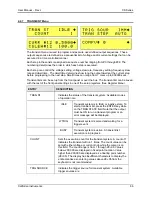
Page 66: ...e Register Menu ENTRY DESCRIPTION TRAN ST Indicates the status of the transient system Available modes of operation are IDLE Transient system is in IDLE or inactive state To start a transient list press the ENTER key while on the TRAN STATE field Note that the output must be ON to run a transient program or an error message will be displayed WTRIG Transient system is armed and waiting for a trigge...

Page 67: ... the dwell time set for each data point ONCE When triggered the transient system will execute the first list point and wait for a new trigger once the dwell time expires This allows triggered execution of each step in the transient list List parameters CURR Step Current set point CSLEW Step Current slew rate in A sec FREQ Step Frequency set point FSLEW Step Frequency slew rate in Hz sec FUNC Step ...

Page 68: ...e e g the current limit parameter is set to the same value for the entire transient program only the first data value for that parameter has to be set Setting only the first data point will automatically repeat that value for all subsequent points in the transient list Setting Slew Rates Very often output changes must be done as fast as the power source can make them This means the transient list ...

Page 69: ...actory default settings ENTRY DESCRIPTION SAVE REG 0 7 Saves the selected setup and transient list from memory Setup only for Reg 0 The shuttle knob may be used to scroll through the available list of setup register numbers Use the ENTER key to perform the save operation Register 0 can be assigned as the power on state setup from the CONFIGURATION menu A valid setup must be saved in REG0 to do so ...

Page 70: ...internal baud rate used to interface with the USB and LAN interface of the power source Factory default is 38400 baud Available settings are 9600 through 460800 baud for RS232C Note For USB use you must set the baud rate to 460800 For LAN use any baud rate can be used but 460800 is recommended The shuttle knob can be used to scroll through these selections POWER ON REG0 RST Selects either non vola...

Page 71: ...the numeric data pad or the voltage shuttle to enter each field To move between the four fields use the decimal point key on the keypad or the Frequency shuttle To set a fixed IP address press SET and enter the desired IP address To set the unit to Dynamic Host Configuration Protocol DHCP mode press SET and enter all zeros 0 0 0 0 as the IP address and cycle power two times The obtained IP address...

Page 72: ...ng the Voltage and Frequency shuttles Use the numeric data pad or the Voltage shuttle to enter each field To move between the four fields use the decimal point key on the keypad or the Frequency shuttle Any change to this value will NOT take effect until after power on the unit has been cycled HostBits Number of host bits as opposed to network bits in network mask A CIDR class C network uses 24 ne...

Page 73: ...User Manual Rev J CS Series California Instruments 73 ...

Page 74: ... LCD viewing angle adjustment ENTRY DESCRIPTION VIEW ANGLE 10 to 10 LCD viewing angle adjustment CAL PWORD V range Calibration password required to access all calibration screens The calibration password is the highest voltage range value 270 The password can be entered using the keypad followed by the ENTER key Measurement Calibration Screens MVOLT F S 9999 Calibration coefficient for full scale ...

Page 75: ...ut has no function The option settings are protected and cannot be changed by the user These screens are provided for information purposes only ENTRY DESCRIPTION LANGUAGE N A Standard SCPI command language ADVANCE ON Standard on all CS Series models MODE ON Standard on all CS Series models Allows the output to be switched between single and three phase modes of operation CLOCK LOC N A Clock and lo...

Page 76: ...ided for informational purposes only 4 2 14 LIMIT Menu The Limit menu displays the maximum available value for current frequency and compliance voltage of the power supply This screen is used for information only and contains no user changeable fields The limit values shown cannot be changed ENTRY DESCRIPTION LIM LVOLT Low Voltage Range Displays low compliance voltage range value HVOLT High Voltag...

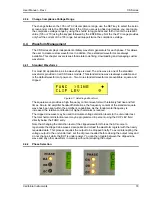
Page 77: ...and select the PROGRAM entry 2 Press the ENTER key to bring up the PROGRAM menu or 2 Use the PROG key to directly bring up the PROGRAM menu There are two methods for programming output parameters IMMEDIATE mode SET mode 4 3 2 Slewing Output Values with the Knob in IMMEDIATE Mode The default mode of operation is an immediate mode in which changes to output parameters made with the knob or the entry...

Page 78: ...ter the value 4 A blinking underline cursor will appear in the data for the CURR field to indicate a change in settings but the output remains unchanged 5 Place the cursor on the FREQ entry 6 Rotate the knob clockwise to increase the value counterclockwise to decrease the value or use the keypad to enter the value 7 A blinking underline cursor will appear in the data for the FREQ field to indicate...

Page 79: ...e and is the default waveform at power on Two more standard waveforms are available square and clipped Figure 4 7 Selecting a Waveform The square wave provides a high frequency content waveform with relatively fast rise and fall times Due to AC amplifier bandwidth limitations the frequency content of the standard square wave has been kept within the amplifier s capabilities As the fundamental freq...

Page 80: ...to each custom waveform Avoid using any of the standard waveform names SINE SQUARE or CLIPPED as these names will not be accepted Also names cannot begin with a number Waveforms may be deleted using the IEEE 488 RS232C LAN or USB interface as well Custom waveforms cannot be deleted from the front panel however to avoid accidental erasure 4 4 4 RMS Amplitude Restrictions The output of a sine wave m...

Page 81: ...eforms Each down loaded waveform will have a computed frequency limit that is less than or equal to the maximum frequency limit of the AC source The frequency limit is a function of the harmonics content of the waveform and will follow the equation below Fmaxh Fmax level hn If Fmaxh is below the minimum frequency limit the waveform will be rejected at down load time and the label will be deleted f...

Page 82: ...measurement parameters before displaying the requested screen Consequently pressing the MEAS key may not always bring up the selected screen immediately There will be a perceptible delay This will prevent the screen from appearing with invalid or blank readouts Note that all measurements are AC coupled only so any DC offset will not be reported 4 5 2 Accuracy Considerations Any measurement system ...

Page 83: ...ains at the level set by the user Changes made to the output current made from the PROGRAM menu take effect immediately In front panel operation mode the current and frequency slew rates rate of change are always at their maximum of 2E5 V s and 2E5 Hz s Slew rate programming is only possible over the IEEE 488 RS232C LAN or USB bus On power up the AC source always reverts to the maximum slew rate f...

Page 84: ...urrent slew rate Frequency Frequency slew rate Compliance voltage Function Dwell time Trigger out Phase The current compliance voltage and frequency settings are the same as one would do form the setup screen using the knobs At each step the output will be set to the specified current voltage and or frequency The rate of change for current and frequency is determined by the slew rate set Voltage s...

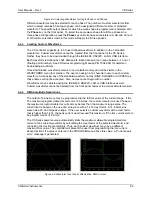
Page 85: ... 10 Switching Waveforms in a Transient List 4 7 8 Transient Execution Figure 4 11 TRANSIENT Menu A transient list can be executed from the TRANSIENT menu To start a transient list position the cursor on the TRAN ST field as shown in Figure 4 11 and press the ENTER key Transients may be aborted by pressing the ENTER key again while on the same field as the field changes to ABORT while a transient e...

Page 86: ...s shipped with default factory settings when the unit is powered up The factory settings are Parameter Factory default setting Current 0 00 A Frequency 60 Hz Compliance Voltage 135 V Output state OFF Local Remote State Local Table 4 2 Factory Default Power on Settings It is possible to change the power on initialization values in one of two ways 1 Using the IEEE 488 RS232C LAN or USB bus interface...

Page 87: ...the RI input latches the output in the protection shutdown state which can only be cleared by an OUTPut PROTection CLEar command or by manually resetting the output LIVE The output state follows the state of the RI input A TTL low at the RI input turns the output off a TTL high turns the output on This mode is equivalent to using the Output On Off button on the front panel Default mode This mode i...

Page 88: ...eled together to form a 9000VA to 18000VA three phase AC current source This is accomplished through the system interface which routes the required analog and digital signals from the 4500CS master unit with controller front panel to the 4500CS auxiliaries 5 2 Controller Assembly The Controller Assembly is located on the front panel the CS master unit The controller assembly consists of a single p...

Page 89: ...AGES UP TO 480 VAC AND 500 VDC ARE PRESENT IN CERTAIN SECTIONS OF THIS POWER SOURCE THIS EQUIPMENT GENERATES POTENTIALLY LETHAL VOLTAGES DEATH ON CONTACT MAY RESULT IF PERSONNEL FAIL TO OBSERVE SAFETY PRECAUTIONS DO NOT TOUCH ELECTRONIC CIRCUITS WHEN POWER IS APPLIED ...

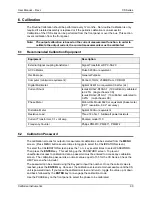
Page 90: ... or equivalent phase meter 0 01 resolution 0 02 accuracy Distortion Meter Agilent 339A or equivalent Resistive Load Three 18 ohm 1 5 kilowatt power resistors Current Transformer 0 1 volt amp Pearson model 110 Frequency Counter Philips PM6670 PM6671 PM6672 6 2 Calibration Password The calibration screens for output or measurement calibration can be selected from the MENU screen Press MENU button se...

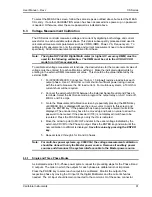
Page 91: ...rent shunt will be required 2 Connect the external AC DVM between the External Sense Neutral and Phase A terminals Select the Ext Sense mode program the output relay on ALC mode off 400 Hz and 7 4 amps 3 Go to the Measurement Calibration screen by repeatedly pressing the MENU key until MEAS CAL is displayed Move the arrow cursor to point to this screen and press the ENTER key If the password has b...

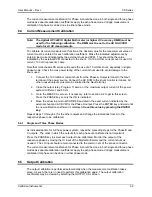
Page 92: ...am 11 amps or the maximum output current of the power system if different and 60 Hz 3 Go to the MEAS CAL screen If necessary refer to section 6 2 to get to this screen Press the PHASE key so only the A is indicated 4 Move the arrow to point to MCURR FS and dial in the exact current indicated by the external shunt and AC DVM for the Phase A output Press the ENTER key and wait until the new calibrat...

Page 93: ...S Series programming manual P N 7004 988 for command syntax on bus calibration Phase offset calibration requires a phase meter for reference See section 6 1 for recommended equipment list For front panel calibration proceed as follows 1 To sense the phase of the output current the Pearson CT use a 0 01 V amp CT for multi box power systems must be used for both inputs of the Phase Meter A no load c...

Page 94: ...ce personnel only Dangerous Voltages are present inside the AC power source 6 7 1 Output Signal Gain Adjustment Note For multi box power systems eg 9000CS 2 the output signal gain adjustment should be done with only the Master power source Remove all auxiliary power sources and disconnect the system interface cable to the Master power source To adjust internal output gains proceed as follows 1 Loo...

Page 95: ...relays and repeat steps 8 through 10 for phase B and C Output Phase Current Limit Board Adjustment Pots OUTP CAL value A R1 450 B R2 450 C R3 450 Table 6 2 Output Calibration Coefficients Factory Defaults 6 8 Non Routine Distortion Adjustment If an amplifier assembly CI P N 3009 411 1 has been replaced as a result of a service action it may be necessary to adjust the distortion setting The Distort...

Page 96: ...Rev J CS Series California Instruments 96 MODEL LOAD PROGRAM HI LO MODEL LOAD PROGRAM HI LO 3000Cs 20 Ω 6 A 1 0 A 4500Cs 12 Ω 10 A 1 0 A 9000Cs 2 6 0 Ω 20 A 1 0 A 13500Cs 3 4 0 Ω 30 1 0 A 18000Cs 4 3 0 Ω 40 A 1 0 A ...

Page 97: ...ian should attempt this level troubleshooting 7 3 Basic operation Table 7 1 Basic Symptoms PARAGRAPH PROBLEM 7 3 1 Excessive Output Current 7 3 2 Poor Output Voltage Regulation 7 3 3 Overload Light On 7 3 4 Distorted Output 7 3 5 Unit Shuts Down After 1 2 Seconds 7 3 6 No Output and no lights on front panel 7 3 7 No output but front panel controller is active 7 3 1 Excessive Output Voltage CAUSE S...

Page 98: ...put module failure Have power module serviced Operating load with too high inrush or start up currents Consult factory for application advice 7 3 6 No Output and No Lights on Front Panel CAUSE SOLUTION Input circuit breaker switched off Switch the breaker on No input power Ensure 3 phase power is present at AC input terminal block 400 Input Power Supply failure Have 400 input supply serviced 7 3 7...

Page 99: ...e supplied CSGui1 Windows program command line can be used to send the TST Command The following rules apply 1 If a current error is reported on phase øA øB or øC it indicates the corresponding amplifier in the Master chassis has most likely failed 2 If a voltage error is reported on phase øA øB or øC it indicates one of the auxiliary chassis amplifiers on the phase indicated has failed On a 2 box...

Page 100: ...R IS APPLIED Switch Off Units Switch off each unit at the circuit breaker on the front panel as well as removing the input power from the unit WARNING Wait 10 minutes for all internal capacitors to discharge Removing Cover Remove the screws securing the top cover and remove it Initial Inspection Make a visual inspection of the unit and ensure all the connectors are properly mated and there are no ...

Page 101: ...267 or via email support programmablepower com REF Sub PART DESCRIPTION MNF P N QTY Common Assemblies A1 2 3 3009 411 1 Heatsink assembly Amplifier CI 3 A1 5001 725 3 1 Amplifier Power board CI 1 A2 3009 703 6 1 Amplifier Control board CI 1 A5 7004 700 1 Power Mother board CI 1 F1 2 3 270176 Fuse 20A 250V Bussmann ABC20 3 A6 7004 705 1 Control Mother board CI 1 A8 4009 737 1 EMI board 208V 400V CI...

Page 102: ... IDI 1050QN3 1 C1 611295 Electrolytic Cap 3900uF 400V CDE 500R392T400DE2B 500X442T450DF2A 1 400 V Input Models 400 A7 7004 712 1 Input Power Supply CI 1 F1 270193 Fuse 7A 250V Slow Blow LittleFuse 313007 1 CB1 270221 Circuit breaker 15A 415V Airpax IELK1111 31311 1 V 1 C27 611305 Electrolytic Cap 3900uF 350V CDC 550392T350DC2B 1 C17 18 611306 Electrolytic Cap 1600uF 350V CDC 550162T350BC2B 2 A16 7...

Page 103: ...plete requested operation Unit may be in a mode inconsistent with request 102 Syntax error Command syntax incorrect Misspelled or unsupported command 103 Invalid separator SCPI separator not recognized See SCPI section of programming manual 104 Data type error Data type invaled Check command for supported data types 108 Parameter not allowed One or more additional parameters were received Check pr...

Page 104: ...ect parameter or parameter value Check programming manual for allowable parameters 221 Setting conflict Transient programmed with more than 1 mode Check other settings E g Redefine transient mode As result of TST execution indicates ALC mode is off or waveform not set to Sine 222 Data out of range Parameter data outside of allowable range Check programming manual for allowable parameter values 223...

Page 105: ... issued but response not read Check application program for correct flow Response must be read after each query to avoid this error 420 Query UNTERMINATED Query incomplete Check for terminator after query command 430 Query DEADLOCKED Query cannot be completed Check application program for multiple queries 440 Query UNTERMINATED Query incomplete Check for terminator after query command 0 No error N...

Page 106: ...rd 403 CAL not enabled No password entered for calibration Enter correct CAL password 600 Systems in mode list have different list lengths Transient lists have unequal lengths Check list settings and correct to same no of data points 601 Requested voltage and waveform exceeds peak voltage capability Wave shape selected and RMS voltage combine to exceed peak voltage capability Reduce RMS or crest f...

Page 107: ...st Initial settings could not be recalled at power up Save power on settings again to overwrite old content 806 Limit memory lost Hardware configuration settings could not be recalled at power up Contact CI service department at support programmablepower com to obtain instructions on restoring configuration data 807 System memory lost Memory corrupted during power up Recycle power 808 Calibration ...

Page 108: ... fault An amplifier failure Can be reported at any time Determine which amplifier is at fault with self test or checking LED on Relay Board Replace amplifier 824 Auxiliary down One or more auxiliary units is not powered up or not working Turn on all auxiliary units 825 Over voltage prot trip Over voltage detected on output Check output voltage for correct RMS value 826 Peak current prot trip Peak ...

Page 109: ... deleting 76 downloading 76 D Dimensions 22 Distorted output 94 E Efficiency 10 Enter key 51 error messages 99 Ethernet 20 EXS External Sync 26 Ext Trig 24 External Sync EXS 26 F factory default power on setting 82 Finish paint 22 Frequency Range 13 front panel 48 lock 49 52 Function Strobe 24 Functional Test 41 G GPIB Setup 46 H Hold Up Time 10 I initialization changing 82 Input AC 30 Inrush Curr...

Page 110: ...ing manual 9 pulse transient 80 R Regulation 60 Relay output 24 remote control 49 Remote Inhibit 36 83 replacement parts 97 RPV 25 36 37 47 RS232 Setup 46 RS232C 20 S self test 54 sense 93 wiring 30 Set key 51 SET mode 50 setting baud rate 68 GPIB address 68 Shock 23 shuttle 50 SET mode 50 Shuttle IMMEDIATE mode 50 status 49 step transient 79 T temperature over 49 Temperature operating storage 22 ...

Page 111: ...User Manual Rev J CS Series CS Series 111 voltage rating 28 W Weight 22 Wiring AC input 30 ...

Reviews: