78
USING PHOTOSHOP LIGHTROOM 2
Organizing photos in the catalog
2
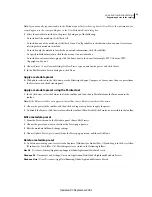
Choose Library > Refine Photos.
3
Click Refine in the Refine Photos dialog box.
Select flagged photos
❖
In the Library module, do any of the following:
•
To select flagged photos in the Grid view or the Filmstrip, choose Edit > Select Flagged Photos.
•
To deselect unflagged photos in the Grid view or the Filmstrip, choose Edit > Deselect Unflagged Photos.
Set labels and color groups
Labeling photos with a certain color is a flexible way to quickly mark a large number of photos. For example, suppose
you’ve just imported a large number of photos and are viewing them in the Grid view. As you review each new photo,
you can label the ones you want to keep. After this initial pass, you can click the color label filter buttons in the
Filmstrip to display and work on photos that you’ve labeled with a particular color. See “
Filter the photos displayed in
the Filmstrip and Grid view
” on page 42 and “
Find photos using the Attribute filters
” on page 94.
❖
In the Library module, do one of the following:
•
Select one or more photos in the Grid view, or select a single photo in the Filmstrip in Loupe, Compare, or Survey
view. Then, choose Photo
> Set Color Label and choose a label from the submenu. If more than one photo is
selected in the Filmstrip in Loupe, Compare, or Survey view, the label is applied only to the active photo.
•
(Grid view only) Move the pointer over the Color Label icon at the bottom of the thumbnail cell and then click a
color label.
Note:
To show or set color labels in thumbnail cells, select Include Color Label in the Grid View tab of the Library View
Options dialog box. (Choose View
> View Options.)
•
(Grid, Compare, or Survey view only) Click a color label icon below the photos.
Set color labels in the Library toolbar
❖
With one or more photos selected the Grid view, or with a single photo selected in the Filmstrip in Loupe or Survey
view, click a color label in the toolbar. If more than one photo is selected in the Filmstrip in Loupe or Survey view,
the label is applied only to the active photo.
Note:
To show or set color labels in the Library module toolbar, choose Color Label from the toolbar pop-up menu.
Set color labels using the Painter tool
1
In the Grid view, select the Painter tool in the toolbar, and then choose Label from the Paint menu in the toolbar.
Note:
If the Painter tool does not appear in the toolbar, choose Painter from the toolbar menu.
2
Select the color label in the toolbar, and then click or drag across photos to apply the label.
3
To disable the Painter, click the circular well in the toolbar. When disabled, the Painter icon is visible in the toolbar.
Edit color label sets
You can assign names to color labels in the Edit Color Label Set dialog box. The name is then added to the photo’s
metadata when you apply the label.
1
In the Library module, choose Metadata > Color Label Set
> Edit.
2
In the Edit Color Label Set dialog box, type a name next to a color.
Updated 03 September 2009


