


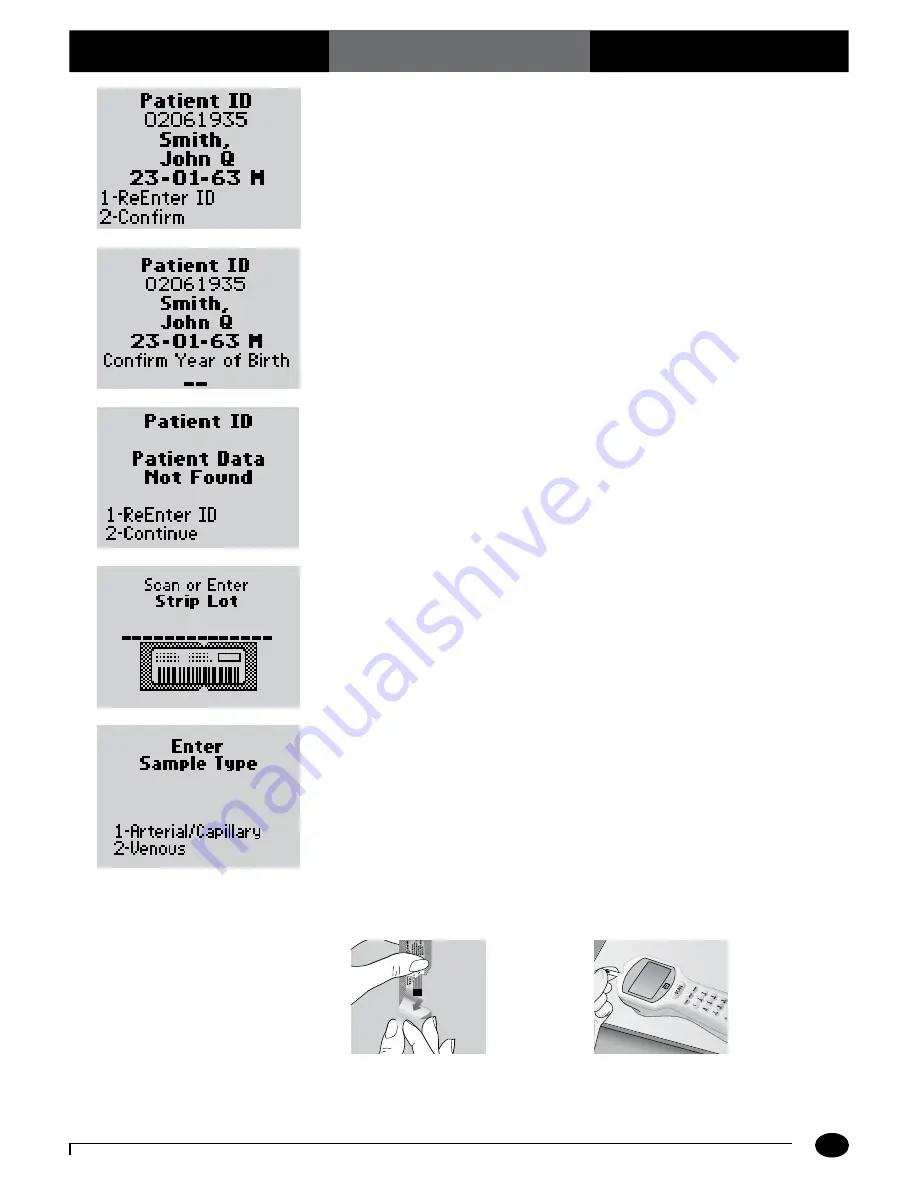
What You See on the Display
What You Do
Comments
3-4
Questions? Refer to Page 10-10 for Technical Support Instructions.
Press
2
to
Confirm
Patient ID or
1
to
ReEnter
the ID.
Enter the year of birth (e.g. enter "63"
for 1963; enter "01" for 2001) then press
the
Enter
button.
Press
Clear
to re-enter the ID. If numbers
have been entered, the Clear key will
erase those first. Multiple presses of the
Clear key may be required to return to the
Patient ID
entry screen in step 4.
Press
2
to
Continue
testing or
1
to
ReEnter
the ID.
6.
Press
Scan
to scan the test strip bar
code or manually enter the test strip lot
number via the keypad , then press
Enter
.
Scanning the bar code identifies the strip
type, calibrates the monitor, ensures the
expiry date has not passed, records the strip
lot used, and checks that the lot has been
approved for use by your institution.
7.
If using Precision PCx Plus Test Strips, the
Sample Type
screen may appear.
You can select one of the following:
Press
1 - Arterial/Capillary
or
Press
2 - Venous
Use
Venous
mode only for venous
samples that have been in capped tubes
and that have not been mixed with air.
Use
Arterial/Capillary
mode for all
other samples.
If the sample type screen is not seen,
continue with step 8.
8.
Open the foil test strip packet at the notch
and tear down to remove the test strip.
With clean, dry hands, you may gently
touch the test strip anywhere when
removing it from the foil to insert it into
the monitor.
/
Chapter 3: Patient Test


