4-2
Questions? Refer to Page 10-10 for Technical Support Instructions.
Note:
The following section illustrates some common settings. Depending on your institution's specific
settings, some screens will display differently or not at all. If the monitor does not display the screens shown,
please refer to Chapter 10, Troubleshooting.
Control Test Procedure - Glucose
Use the following procedure to perform glucose control tests.
What You See on the Display
What You Do
Comments
1.
Press
On/Off
to turn on the monitor.
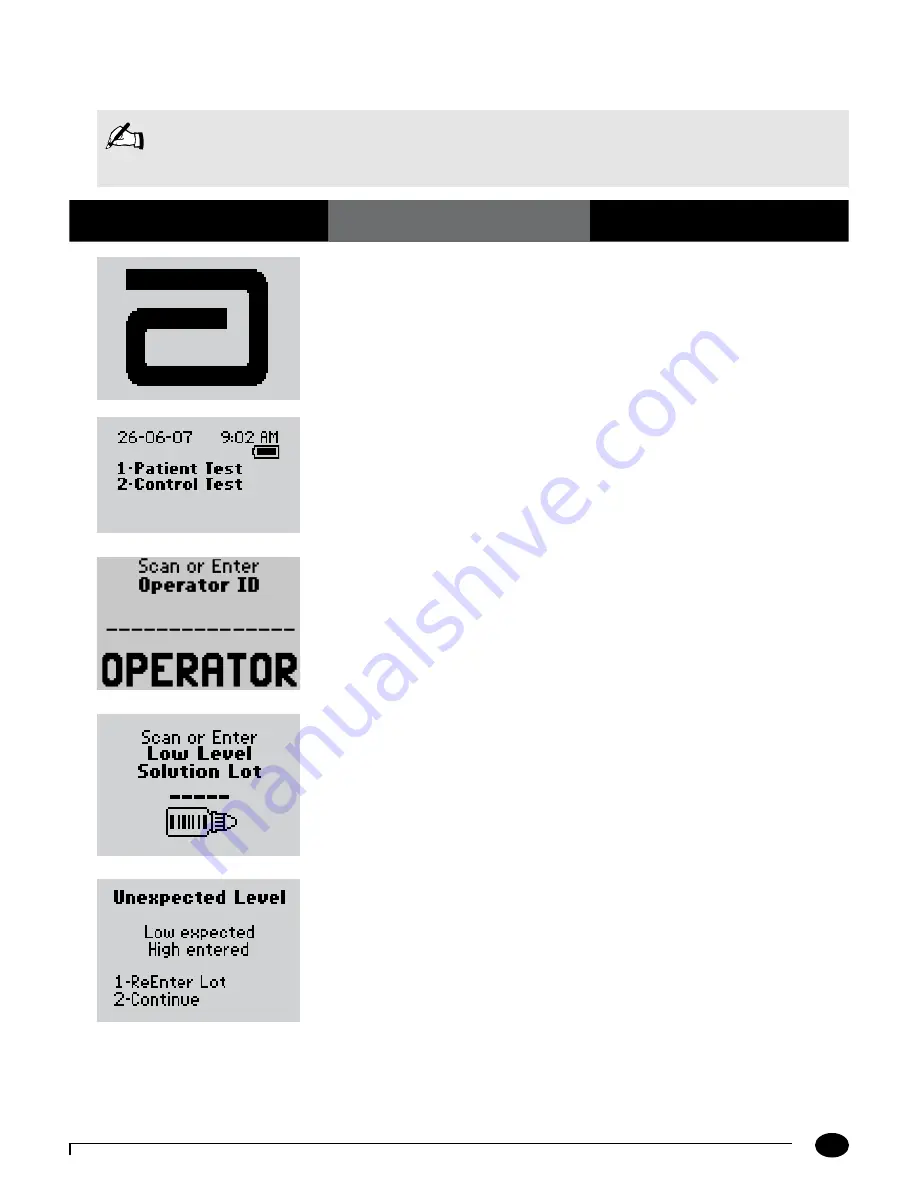
The Abbott logo screen will appear
in black for a few seconds and then will
appear in gray to ensure that the display
is functioning properly. Next the software
version will briefly appear.
2.
Press
2
to select
Control Test.
The monitor starts in
Test Mode
. The
Menu button will toggle the monitor to
Menu Mode
.
3.
Press
Scan
to scan the Operator ID bar
code or manually enter the Operator ID
via the keypad, then press
Enter.
While the Operator ID may be up to 30
digits, not all digits will fit on the display.
The monitor may also be set to truncate
(ignore) leading, trailing, and/or selected
digits of the bar code.
4.
Scan or manually enter the low control
solution lot number via the keypad,
then press
Enter.
You can scan or manually enter the
information from the control solution’s
bar code. For manual entry, key in the five
numeric digits of the lot number printed on
the control solution bottle. You do not need
to enter the alpha character that appears at
the end of the five-digit number. The
Strip
Lot
screen will appear next.
If the
Unexpected Level
screen appears,
you may either:
1. Press
1
to
ReEnter
the expected level.
2. Press
2
to
Continue
.
The monitor is programmed to expect Low,
Mid, and High Glucose, then Low, Mid, and
High Ketone control tests in this order. A
warning message will appear if the controls
are used in a different order, however you
may still proceed with the test.
Chapter 4 : Control Test


