25
Scanning steps
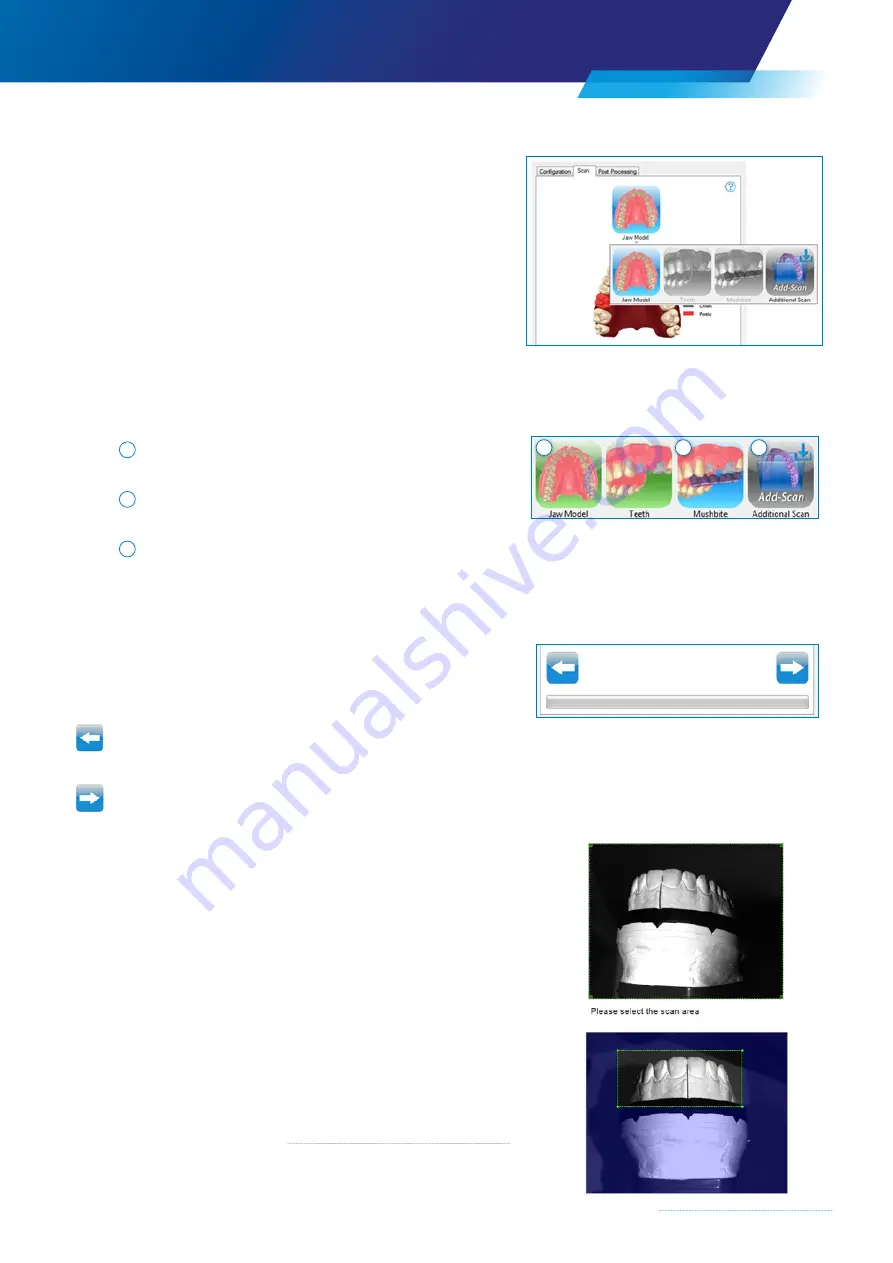
The number of images describes the number of scanning steps
necessary and depends on the scope of the restoration.
The sequence of the scanning steps can be freely selected after
capturing the basic data (e. g. jaw model).
The next scanning step to be carried out is selected by
clicking with the mouse.
Scan status
The background color of the display indicates the scan status of the
various scanning steps:
1
Background
GREEN
3D data have already been gathered
2
Background
BLUE
3D data have not yet been gathered
3
Background
GRAY
Scanning step requires a preliminary step which has not yet been
carried out or the data can be gathered as an option, see Add
Scan.
Arrow buttons
The arrow buttons allow the user to move forwards or backwards
through the scanning steps in order to process the scan order.
Back
The last scan step is discarded
Next
Complete the scan and go to the next scan step
4.5.3 Define scan area
The area that is relevant to the order can be selected in order to
narrow down the scope of the scan area (top left). This helps to save
time, as areas which are not required for the calculation of the 3D data
are no longer considered.
The green selection frame defines the area that will be scanned.
Initially, the entire possible scan area is preselected. This can be
adjusted manually.
Reduce the scan area to the section necessary for the order.
It is recommended that the scan area be chosen such that part of the
mounting plate is scanned at the same time. Superfluous data can be
selected and deleted later. (
→
4.5.8 ”Selecting and deleting a data set”)
1
2
3
Содержание Zfx EvolutionNEXT
Страница 1: ...Zfx EvolutionNEXT Manual A COMPANY OF ...
Страница 7: ...7 ...
Страница 13: ...13 ...
Страница 45: ...45 ...
Страница 65: ...65 ...


