


ENG
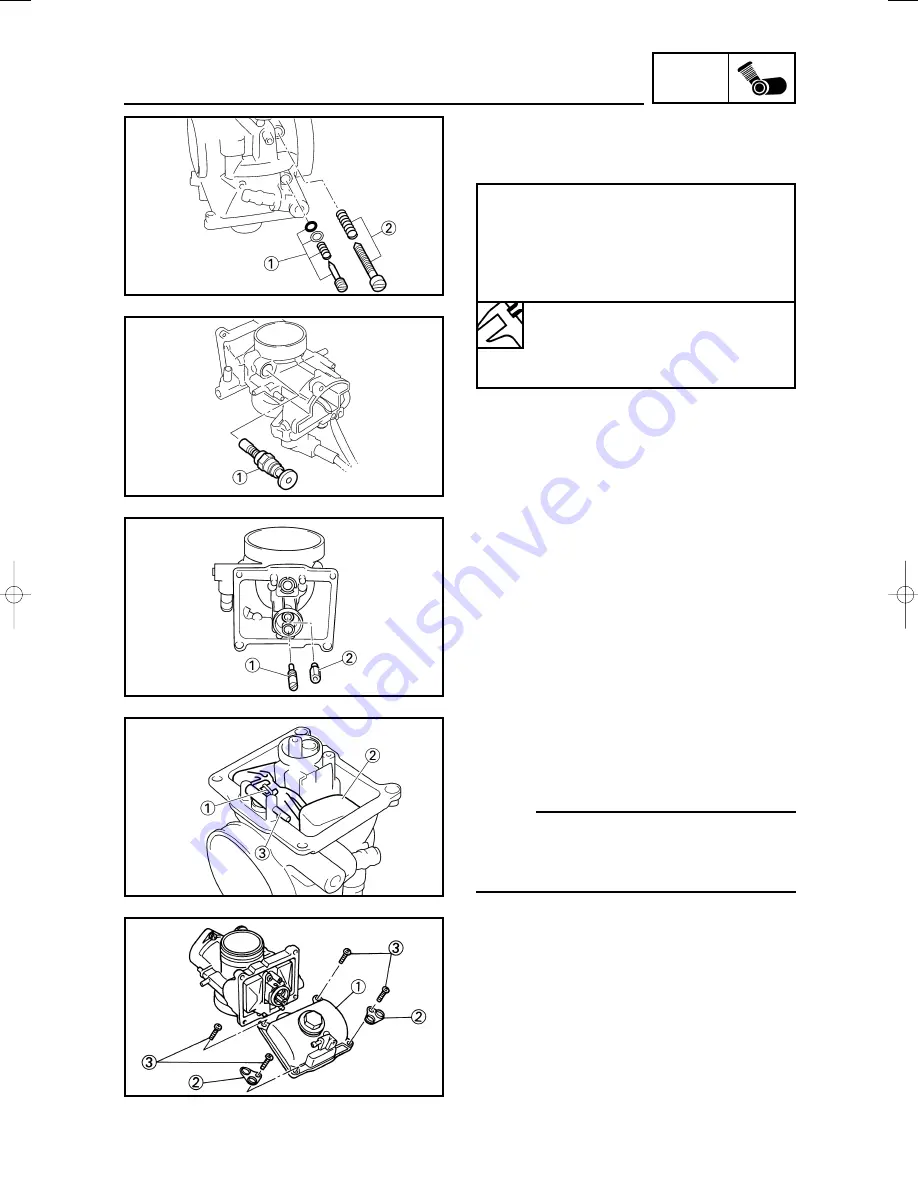
3. Install:
9
Pilot air screw
1
9
Throttle stop screw
2
*For EUROPE
4. Install:
9
Starter plunger
1
4-14
CARBURETOR AND REED VALVE
Pilot air screw:
1 turn out
*1-3/4 turns out
(for reference only)
Note the following installation points:
9
Turn in the pilot air screw until it is lightly
seated.
9
Turn out the pilot air screw by the number of
turns recorded before removing.
5. Install:
9
Pilot jet
1
9
Main jet
2
6. Install:
9
Needle valve
1
9
Float
2
9
Float pin
3
NOTE:
9
After installing the needle valve to the float,
install them to the carburetor.
9
Check the float for smooth movement.
7. Install:
9
Float chamber
1
9
Plate
2
9
Screw (float chamber)
3
5MW-9-30-4A 7/3/00 5:24 PM Page 28


