page 5 – 16
WheatNet-IP BLADE 3
/ July 2018
W H E A T N E T - I P N A V I G A T O R G U I
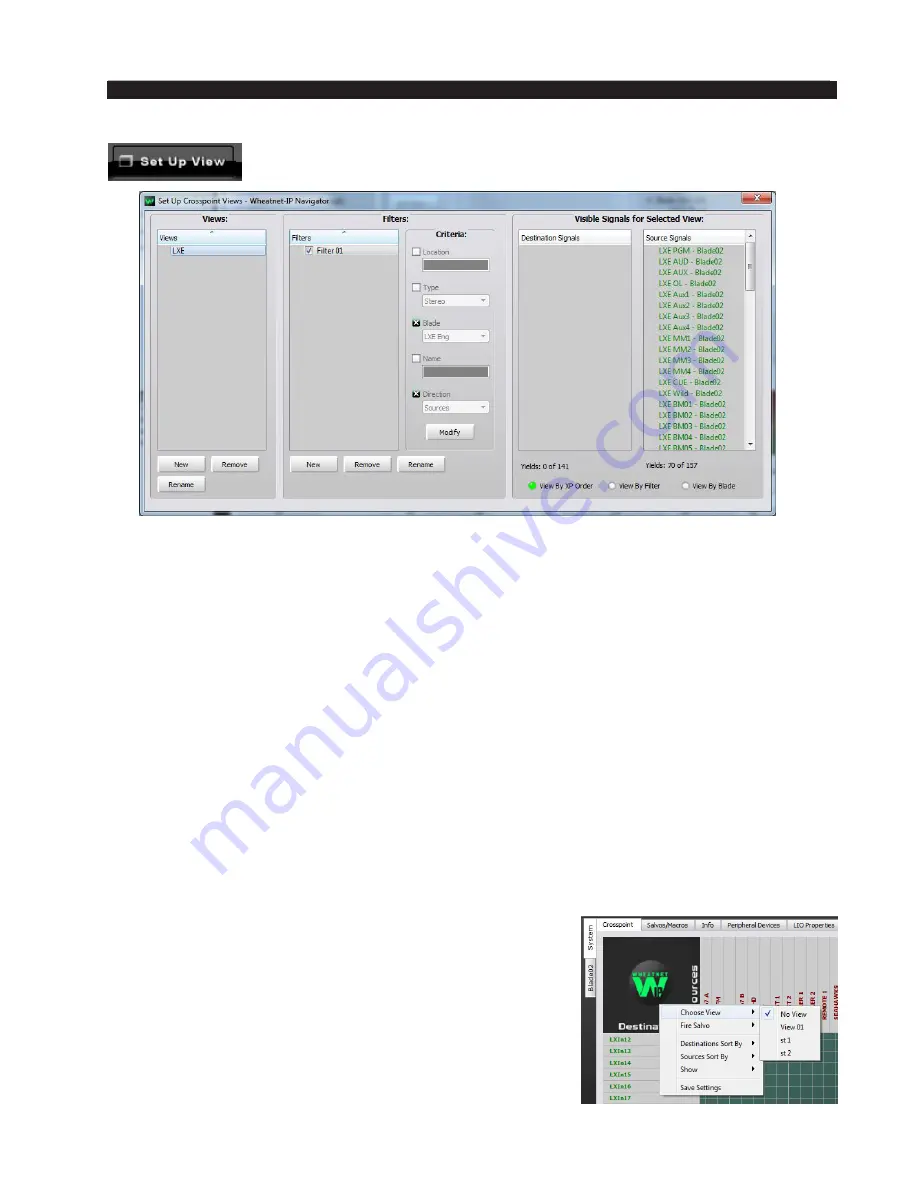
Open the Set Up Crosspoint Views window by clicking on the
Set Up
View button at the top of the screen.
In the window you will notice a list of the currently defined filters, along with some
buttons used to create, rename, or delete them. If the list appears empty, then no filters
have yet been defined. Click on the
New
button and a new filter having a default name is
added to the list. Click the
Rename button to open a dialog box that allows you to rename
the filter. Type a name that will help you recognize the filter later such as “BLADE 3 1”
or “Morning Show,” click
OK, and the window will change to show you the criteria you
can specify for your filter. As you click on various check boxes to specify criteria, notice
how the source and destination signal lists change to reflect the filter’s effect once you’ve
also created a view (see below). Obviously, if you make your filter too exclusive, the sig
‑
nal count will dwindle to zero and the filter will therefore be useless. After all, what good
is a filter that removes all of the signals from view, leaving nothing but a blank screen?
Don’t hesitate to experiment with defining a few filters and seeing how they work. You
can always delete them later.
Once you have created a filter, you need to assign it to a view before you can use it. A
“View” is simply a collection of one or more filters, and is useful for combining filters for
a more complex set of criteria.
Initially, as in filters, no views will show in the list until you have created them. Click
on New to create a view; you can use the Rename button to give it a special name.
Once you have defined one or more views, click on the view name to highlight it. Then,
in the Filters list, click on the check boxes to enable the
desired filter function(s). Enabling the view by right clicking
on the WheatNet‑IP logo on the crosspoint grid will give
you a new crosspoint grid view with the signals reduced to
only those that meet the criteria.
One final note about filters:
If you are having trouble
locating a signal on the crosspoint grid, make sure you
haven’t inadvertently enabled a view that excludes it. Right
click on the WheatNet-IP logo and Choose
View / No View
to be sure.
Содержание WheatNet-IP BLADE3
Страница 2: ...Technical Manual Wheatstone Corporation Jan 2016 Audio Over IP Network WheatNet IP BLADE3 ...
Страница 16: ...Quick Start 12 WheatNet IP BLADE 3 Jan 2016 Figure 4 ...
Страница 274: ...page A 48 WheatNet IP BLADE 3 Jan 2016 A P P E N D I C E S Contents Appendix 4 External Controllers A 49 ...
Страница 290: ...page A 61 WheatNet IP BLADE 3 Jan 2016 A P P E N D I C E S Click Next Click Install ...
Страница 336: ...page A 107 WheatNet IP BLADE 3 Jan 2016 A P P E N D I C E S Contents Appendix 9 Introduction to Screen Builder A 108 ...
Страница 338: ...page A 109 WheatNet IP BLADE 3 Jan 2016 A P P E N D I C E S ...
Страница 365: ...WheatNet IP BLADE 3 June 2018 page A 136 A P P E N D I C E S Some Screen Shots of Various Vendors Configuration Screens ...
Страница 366: ...WheatNet IP BLADE 3 June 2018 page A 137 A P P E N D I C E S ...


