


XR3D-6 Maintenance & Troubleshooting
6-20
EM-XR3D-6-001-EN.D
©2011 VOTI Inc.
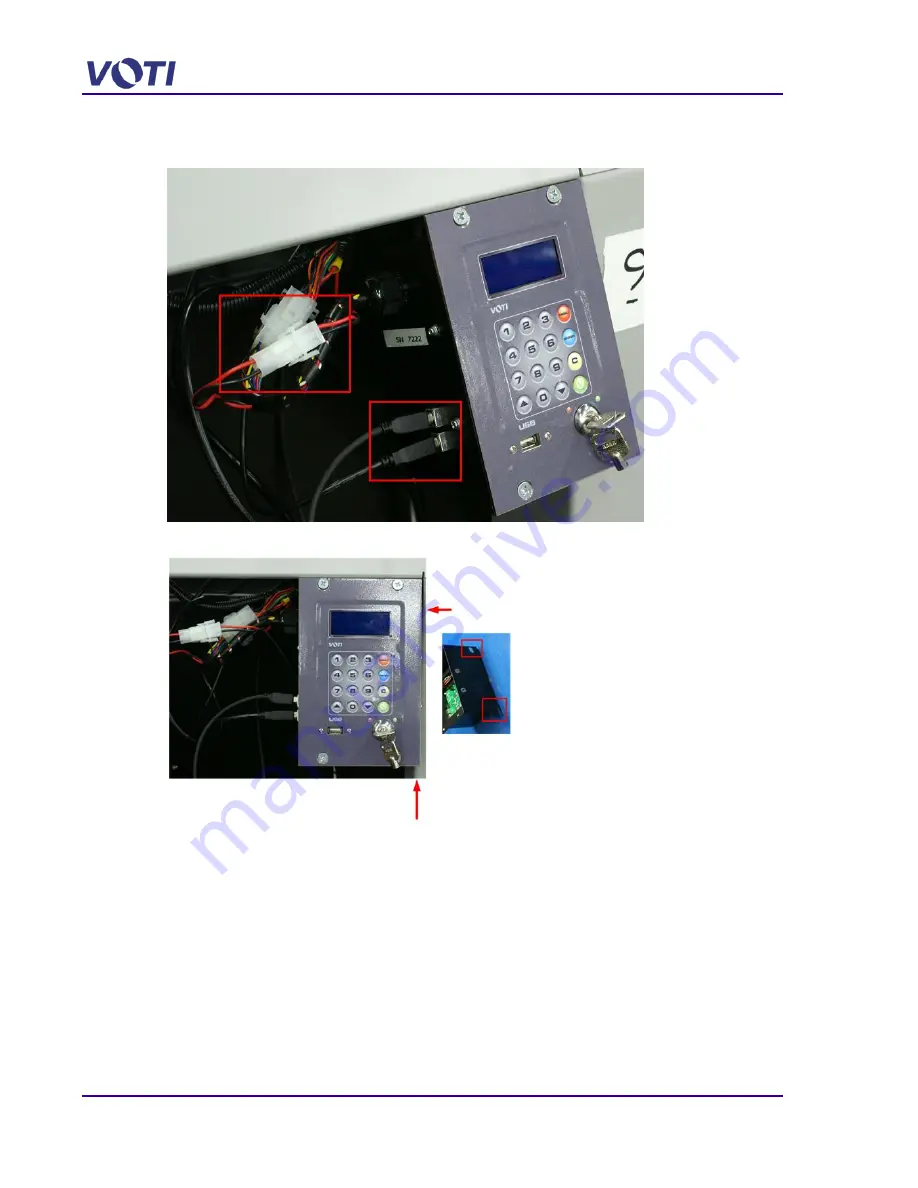
5. Unplug the 15-pin and 2-pin Molex connector and unplug the 2 (Secure USB and the
Computer) connectors.
6. Loosen and remove the 2 bolts securing the Keypad box to the right-side of the XR3D frame.
7. Position a new Keypad control box and secure to the XR3D frame using two (2) bolts.
8. Plug the 15-pin and the 2-pin Molex connectors and the Secure USB and Computer
connectors.
9. Replace and secure the tunnel back (or front) cover, and the top access panels.
10. Turn on the UPS by pressing the power button.
11. Replace and secure the back (or front) access panel using the security screws.
Содержание XR3D-6
Страница 2: ...XR3D 6 Maintenance Troubleshooting ii EM XR3D 6 001 EN D 2011 VOTI Inc...
Страница 5: ...XR3D 6 Maintenance Troubleshooting EM XR3D 6 001 EN D v 2011 VOTI Inc 7 XR3D 6 Safety Features 7 1...
Страница 6: ......
Страница 20: ...XR3D 6 Maintenance Troubleshooting 2 8 EM XR3D 6 001 EN D 2011 VOTI Inc...
Страница 32: ...XR3D 6 Maintenance Troubleshooting 3 12 EM XR3D 6 001 EN D 2011 VOTI Inc...
Страница 48: ...XR3D 6 Maintenance Troubleshooting 3 28 EM XR3D 6 001 EN D 2011 VOTI Inc...
Страница 52: ...XR3D 6 Maintenance Troubleshooting 4 4 EM XR3D 6 001 EN D 2011 VOTI Inc...


