VITEK Industrial Video Products – Transcendent Series NVRs
41
Ø
Start Sequence View
Go to live preview interface and then click
to pop up a window. Set the dwell time in the
window and then click
to start scheme view in sequence. Double click the sequence view
interface to pause the view; double click again to restore the view. Click
to stop the view.
Note:
You can set the secondary output preview if the NVR has dual outputs. Refer to the interface as
shown below.
Check “Dwell” and then set scheme view in sequence of the secondary output. The setting steps
are similar to that of the main output.
Set quick sequence view if “Dwell” is not checked. The setting steps are as follows:
①
Set screen mode by clicking the relevant buttons on the tool bar.
②
Select one window and then double click one camera or group in the list.
③
Click “Apply” to save the settings after adding cameras or groups to the windows.
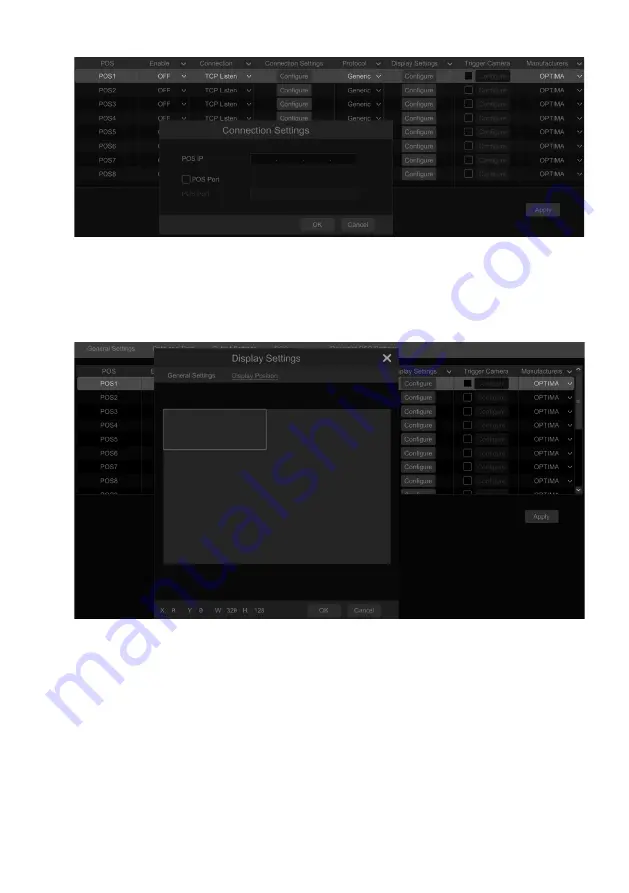
5.3 POS Settings
This function is only available for some models. If your NVR doesn’t support such function,
please skip the following instructions.
①
Click Start
à
Settings
à
Basic
à
POS Settings to go to the interface.
②
Enable POS and click “Configure” under “Connection Settings” to go to the following
interface.
③
Enter IP address of the POS you want to add.
④
Check “POS port” and then enter POS port.
VITEK Industrial Video Products – Transcendent Series NVRs
42
⑤
Click “Configure” under “Display Settings” to set the general settings and the position of
the POS information. Set the start character and the end character and display time-out period
in the general settings interface. Drag your mouse to set the position of the POS information in
the display position interface. Then click “OK” to confirm your settings.
⑥
Check “Trigger Camera” and click “Configure” under it to bind POS to the camera. One
POS can be bound to multiple channels, but one channel can only be bound to one POS.
Содержание VT-TNR1646PF
Страница 185: ...NOTES ...


