


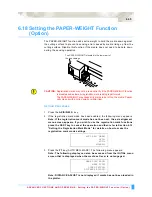


ADVANCED FUNCTIONS AND OPERATIONS : Setting the AXIS OFFSET ADJUSTMENT (Method 2)
6-41
6.21 Setting the AXIS OFFSET ADJUSTMENT
(Method 2) (Option)
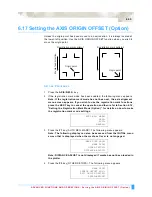
The SENSOR OFFSET ADJ function is used to determine the corrective values
you should input in order to adjust the precision of the registration mark sensor. If
Method 2 is selected, the plotter plots a cross mark using Pen Condition 1, and
then using Pen Condition 1, plots a second cross mark based on the reading of the
first cross mark. The plotter then adjusts for any offset.
S
ETTING
P
ROCEDURE
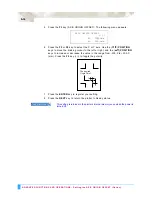
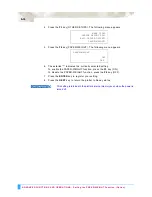
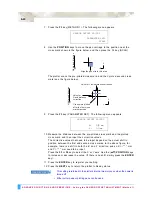
1
Load media in the plotter and mount a black pen in the pen holder.
2
Press the
AXIS/R.M.S.
key.
3
If the registration mark mode has been enabled, the following menu appears.
Note: If the registration mark mode has not been set, the axis alignment
menu screen appears. If you wish to use the registration mark functions,
press the NEXT key to cancel the operation and then refer to Section 6.12,
“Setting the Registration Mark Mode (Option)” for details on how to make
the registration mark mode settings.
4
Press the
F1
key (AUTO REG. MARK). The following menu appears.
Note: DISTANCE ADJUST is not displayed if media has not been loaded in
the plotter.
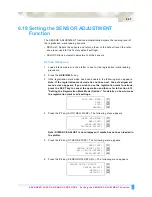
5
Press the
F3
key (OTHER SETUPS). The following menu appears.
6
Press the
F2
key (SENSOR OFFSET ADJ.). The following menu appears.
AUTO REG. MARK>
SKIP>
AUTO>
MANUAL>
MARK SCAN MODE>
MARK TYPE>
OTHER SETUPS>
DISTANCE ADJUST>
MARK SIZE>
SENSOR OFFSET ADJ.>
AXIS ORIGIN OFFSET>
PAPER-WEIGHT>
SENSOR OFFSET ADJUST
SENSOR ADJUST>
METHOD 1>
METHOD 2>
Содержание Q100
Страница 34: ...Cutter Blades and Cutter Pens Adjusting the Blade Length 2 6 ...
Страница 64: ...Pen Setting Conditions Adjusting the Blade Length 4 12 ...
Страница 140: ...ADVANCED FUNCTIONS AND OPERATIONS Selecting the Type of Perforated Line 6 62 ...
Страница 148: ...OPTIONS Pen Offset for 2 pen models only 7 8 ...
Страница 174: ...INTERFACES COMMAND Settings 10 8 ...


