


OPTIONS : Pen Assignment (for 2-pen models only)
7-6
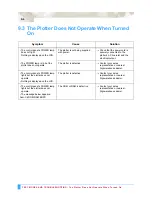
7.3 Pen Assignment (for 2-pen models only)
This function assigns the number of a physical pen for the pen setting in each of
the eight pen condition setting areas. The pen mounted in the pen holder attached
to the pen carriage is PEN 1, and the pen mounted in the pen station is PEN 2.
These two pens can be assigned.
S
ETTING
P
ROCEDURE
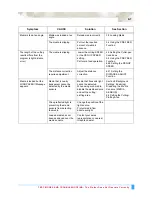
1
Press the
MENU
key, and then press the
NEXT
key until the following menu
appears.
Note: ASSIGN PEN is only displayed for 2-pen models.
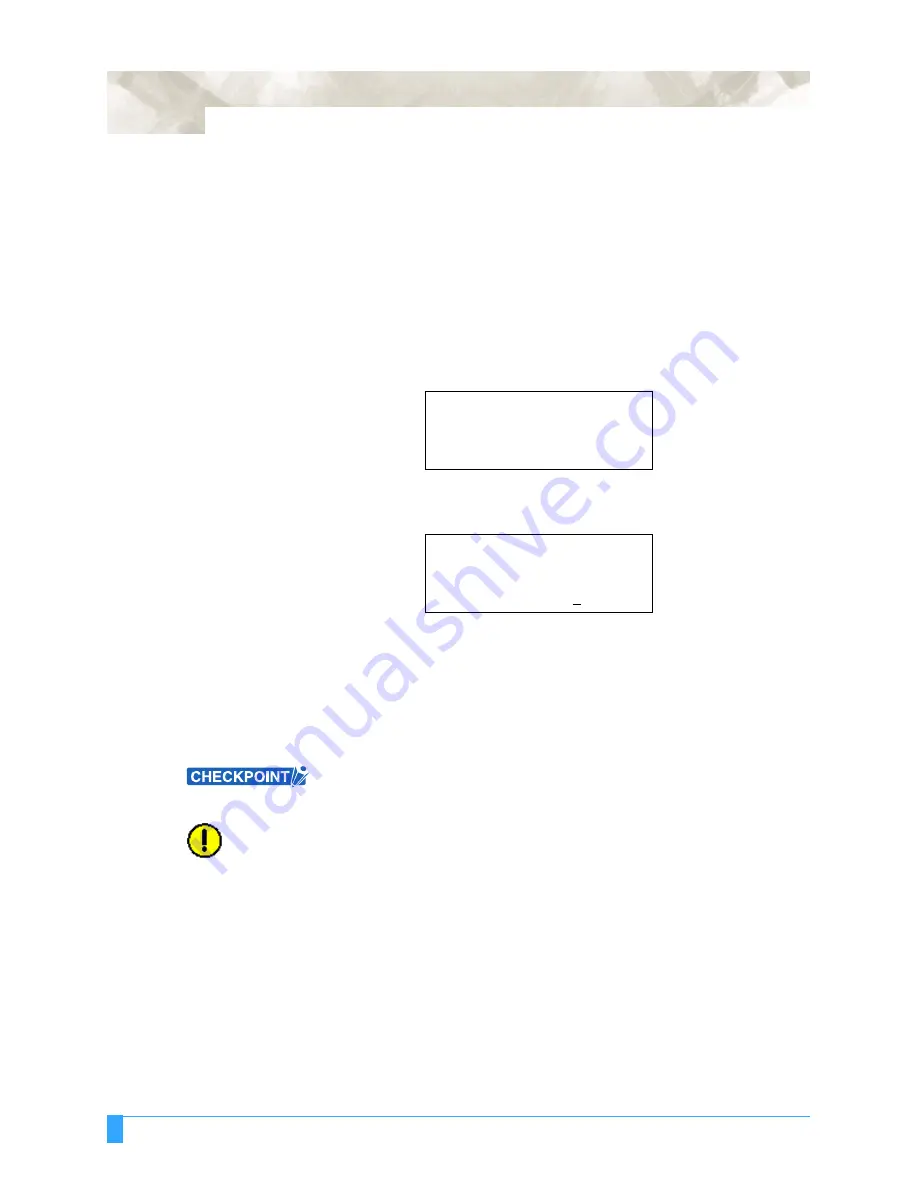
2
Press the
F1
key (ASSIGN PEN). The following menu appears.
3
The numbers at the right of CONDITION are the condition setting numbers 1 to
8. The numbers in the last row are the physical pen numbers. In the above
display, PEN 1 has been assigned to condition number 1 and condition
numbers 3 to 8. PEN 2 has been assigned to condition number 2. Use the
(
)
POSITION
keys to move the cursor to the left or right Use the (
▲▼
)
POSITION
keys to toggle between PEN 1 and 2. Press the
ENTER
key to
register your setting. If you wish to cancel your selection, press the
NEXT
key.
• This setting is retained in the plotter’s internal memory even when the power is
turned off.
•
This menu parameter is not displayed for 1-pen models.
CAUTION:
Only a plotting pen can be mounted in the pen station. Do not mount a cutter
pen there.
ASSIGN PEN>
CROSS CUT>
PRE FEED>
MOVE STEP>
ASSIGN PEN
CONDITION
12345678
PEN
12111111
▲
▼
Содержание Q100
Страница 34: ...Cutter Blades and Cutter Pens Adjusting the Blade Length 2 6 ...
Страница 64: ...Pen Setting Conditions Adjusting the Blade Length 4 12 ...
Страница 140: ...ADVANCED FUNCTIONS AND OPERATIONS Selecting the Type of Perforated Line 6 62 ...
Страница 148: ...OPTIONS Pen Offset for 2 pen models only 7 8 ...
Страница 174: ...INTERFACES COMMAND Settings 10 8 ...


