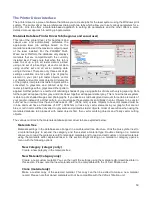
Z-Axis
This control lets you set the Z-Axis table to a specific height. When the auto Z feature is turned on in the
UCP and a Z height is set for a color in the color table, the table moves to the height indicated before
processing the elements in the print job graphic that were mapped to that color. This feature can be used
as a method of focusing by entering the thickness of the material to be processed. This feature requires
that the Z axis be calibrated to the focus lens being used and properly homed prior to running the job.
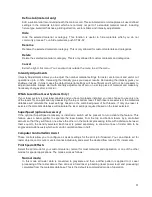
Flow (Computer Controlled Air Assist only)
This feature will not appear if you do not have the Computer Controlled Air Assist option installed. This
setting allows you to choose between Air or Gas inputs on the Computer Controlled Air Assist option or
Off for no air flow.
Flow Rate (Computer Controlled Air Assist only)
This feature will not appear if you do not have the Computer Controlled Air Assist option installed. This
setting allows you to select the flow rate for the air or gas input selected in 25% increments.
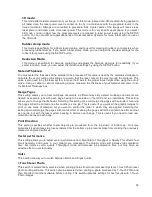
Set Button
After adjusting all of the color based settings for the colors highlighted you must push the SET button to
register the changes to the color table. Also note that the changes will not be permanently saved until the
OK or APPLY buttons are pressed.
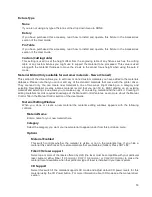
Apply Button
The APPLY button saves all changes made to the printer driver settings.
Default Button
The Default button will reset the driver settings to factory default values. You may abort these changes by
selecting Cancel; selecting OK or APPLY will approve the changes.
Load Button
To recall a snapshot of the printer driver settings that have been previously saved to a .LAS file using the save
button, select on the “Load” button and choose the desired .LAS settings file from the dialog box. The settings
that are currently on screen will be replaced by the settings from the .LAS file. You may abort these changes
by selecting Cancel; selecting OK or APPLY will approve the changes.
Save Button
The save button brings up a dialog box which allows you to save a snapshot of the laser job settings which
you can then reload at a later date. All settings will be stored in a file with “.LAS” extension. Verify that you
have pressed the SET button before you save any .LAS files to ensure that changes to the color table are
properly registered.
OK Button
The OK button saves all changes made to the printer driver settings and closes the printer driver settings
interface window and takes you back to the previous window.
Cancel Button
The Cancel button closes the printer driver settings interface window and takes you back to the previous
window without saving changes made to the settings.
58
Содержание PLS4.75
Страница 1: ...PLS User Guide PLS4 75 PLS6 75 PLS6 150D PLS6MW www ulsinc com Revision August 2012...
Страница 5: ...Chapter 1 Specifications 5...
Страница 8: ...Chapter 2 Safety 8...
Страница 14: ...Tamper Proof Labels Safety Labels...
Страница 15: ...ULS Fiber Laser Cartridge Labels 15...
Страница 16: ......
Страница 17: ...PLS4 Back View 17...
Страница 18: ...PLS6 Front View 18...
Страница 19: ......
Страница 22: ...Chapter 3 Installation 22...
Страница 40: ......
Страница 48: ...Chapter 4 Operation 48...
Страница 83: ...Chapter 5 Accessories 83...
Страница 99: ...Example Connection for PNP mode Example Connection for NPN mode 99...
Страница 111: ...Chapter 6 Maintenance 111...
Страница 119: ...www ulsinc com...


