


MAINTENANCE MANUAL
154
STE 85357
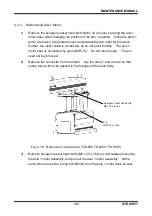
9)
Turn on the power and set up the axis 1 home position to complete axis 1 motor
replacement.
(Check the coordinates of Axes 2 to 4 and set up the home position if necessary.
See “Section 7, Robot Home Point and Position Detector Error”.)
!
CAUTION
• Do not forget to mount the O-ring.
If the O-ring is not mounted, grease will leak from the motor mounted surface.
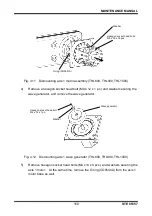
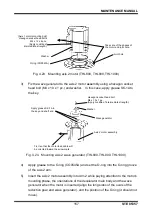
4.4.5
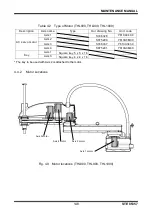
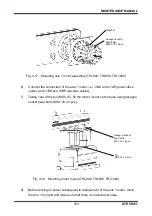
Dismounting Axis 2 Motor
1)
Disconnect the arm 2 cover.
(See “Para. 4.3.1, Arm 2 Cover.”)
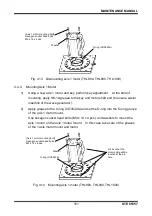
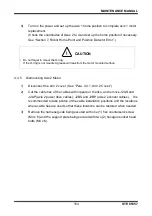
2)
Cut the cable ties of the cables with nippers or the like, and remove J2AS and
J2AP (axis 2 power drive cables), J2BS and J2BP (axis 2 encoder cables). It is
recommended to take photos of the cable installation positions and the locations
where cable ties are used so that these locations can be restored when needed.
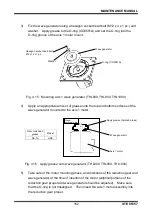
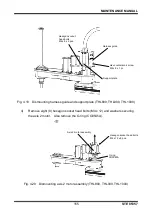
3)
Remove the harness guide being secured with one (1) hex countersunk screw
(M4 x 8) and the support plate being secured with two (2) hexagon socket head
bolts (M4 x 6).