1
2
3
4
5
6
7
8
9
10
11
12
8-24
NETWORK SCANNING FUNCTION (USING THE OPTIONAL PRINTER CONTROLLER)
6
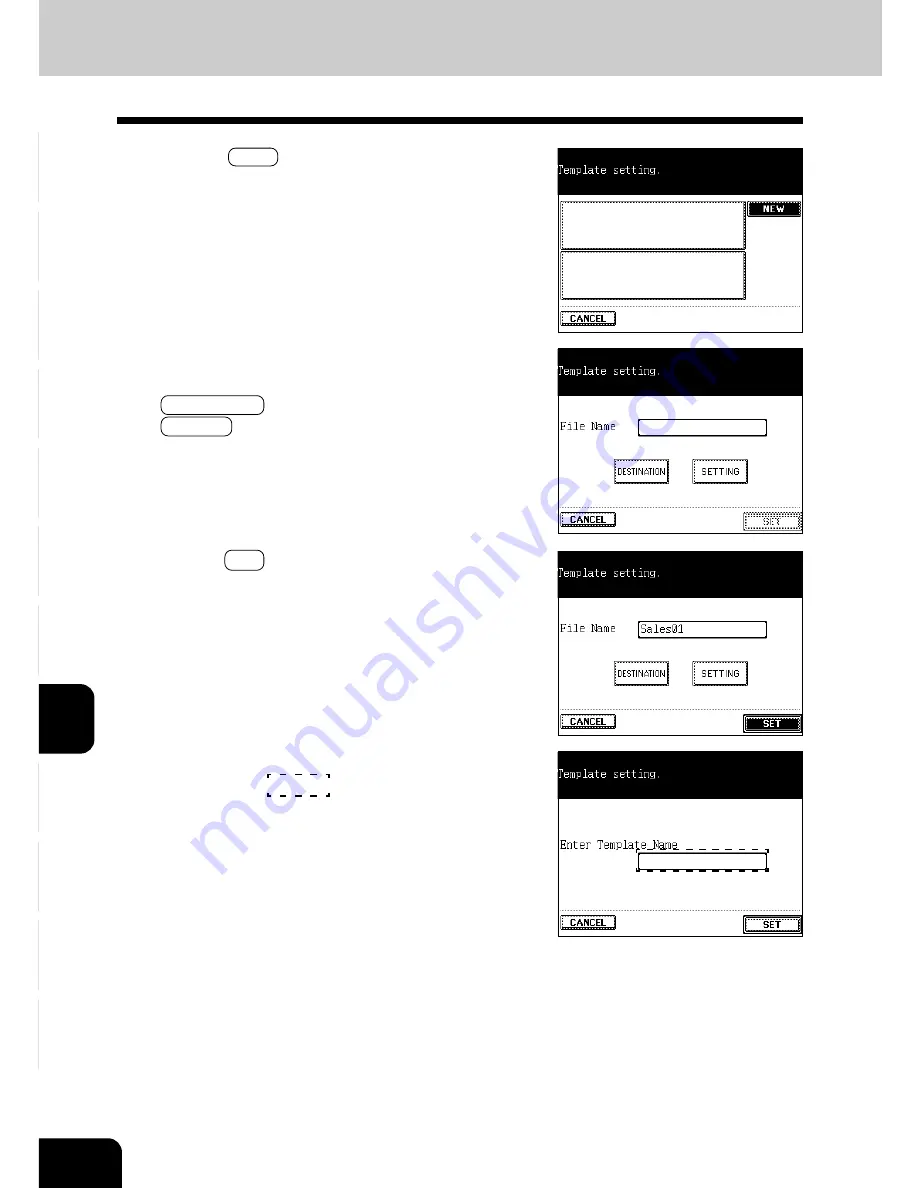
Press the NEW key.
8
Press the SET key when the setting of the template is
completed.
7
Set the template.
- Enter the file name as required, then press the
DESTINATION key to set the destination. Then press the
SETTING key to set the scanning condition. See steps 5
to 13 in page 8-4.
9
Set the template name.
- Press the area
as shown on the screen on the
right to switch to the template name input screen.
3. ABOUT THE SETTING BEFORE SCANNING (Cont.)
Setting by the Administrator (Cont.)
Содержание e-studio 211c
Страница 1: ......
Страница 2: ......
Страница 61: ...1 2 3 4 5 6 7 8 9 10 11 12 3 18 SETTING OF BASIC COPY MODES ...
Страница 71: ...1 2 3 4 5 6 7 8 9 10 11 12 4 10 COLOR EDITING AND ADJUSTMENT ...
Страница 93: ...1 2 3 4 5 6 7 8 9 10 11 12 USING THE EDITING FUNCTIONS 5 22 ...
Страница 129: ...1 2 3 4 5 6 7 8 9 10 11 12 6 36 USING THE SPECIAL FUNCTIONS ...
Страница 199: ...1 2 3 4 5 6 7 8 9 10 11 12 9 30 WHENTHE GRAPHIC SYMBOLS FLASH ONTHETOUCH PANEL ...
Страница 200: ...1 2 3 4 5 6 7 8 9 10 11 12 10 1 10 MAINTENANCE 1 Daily inspection 10 2 2 Simple troubleshooting 10 4 ...
Страница 222: ...1 2 3 4 5 6 7 8 9 10 11 12 11 17 MEMO ...
Страница 223: ...1 2 3 4 5 6 7 8 9 10 11 12 11 18 SPECIFICATIONS OPTIONS MEMO ...
Страница 224: ......
Страница 225: ......


