


Xerox WorkCentre M15/M15i
Quick Start Guide
604P13312
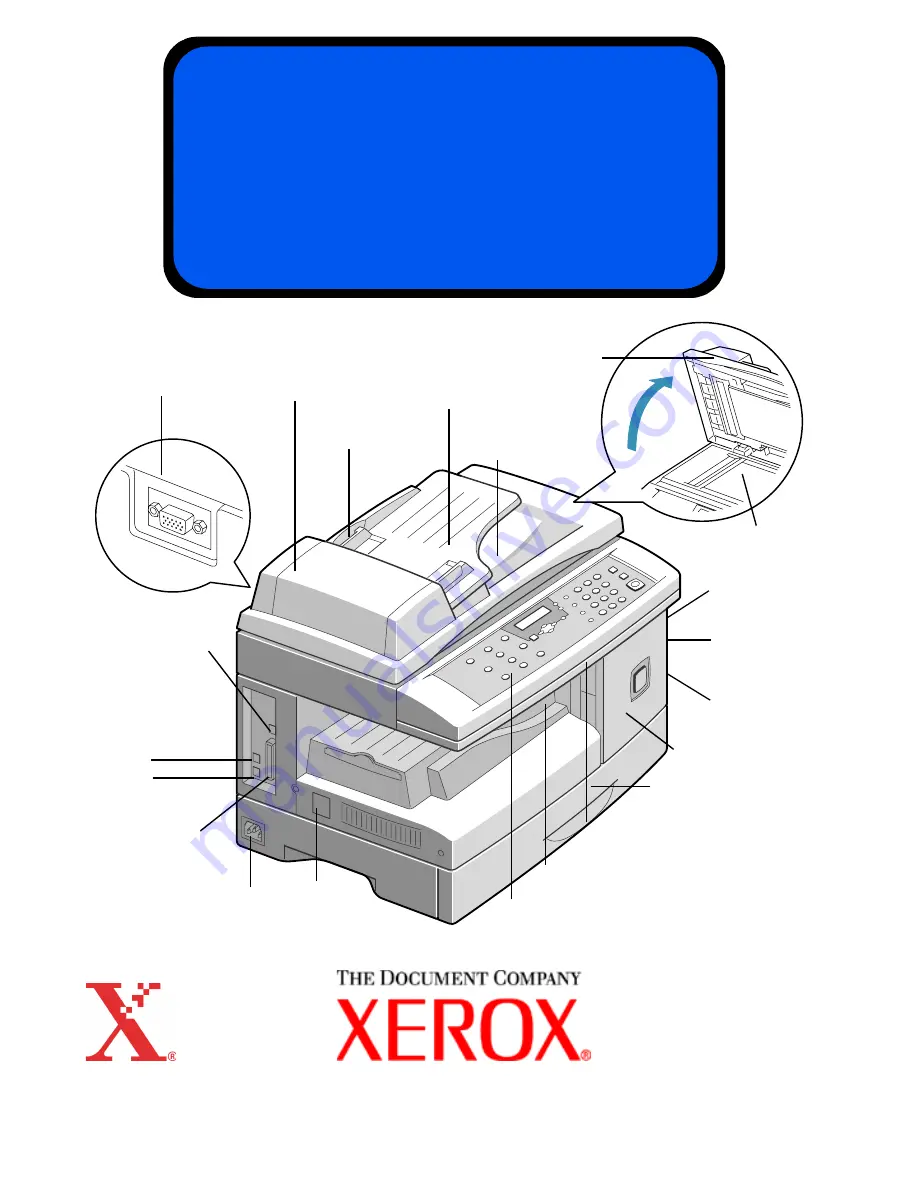
Control Panel
Automatic Document
Feeder
USB Connector
Side
Cover
Front Cover
Bypass
Tray
Parallel
Connector
Telephone
Connections:
EXT.
LINE
Document
Cover
Document
Guides
ADF Connector
Document
Input Tray
On/Off
Switch
Scanner Module
Paper Cassette
Release
Latch
Document
Collate Tray
Document
Glass
AC Power Cord
Connector
Output Tray
Содержание WorkCentre M15
Страница 24: ...Page 24 Notes...


