O
CTOBER
2011
RDX Q
UIK
S
TATION
17
C
ONNECTING
N
ETWORK
AND
P
OWER
C
ABLES
C
ONNECTING
N
ETWORK
AND
P
OWER
C
ABLES
1.
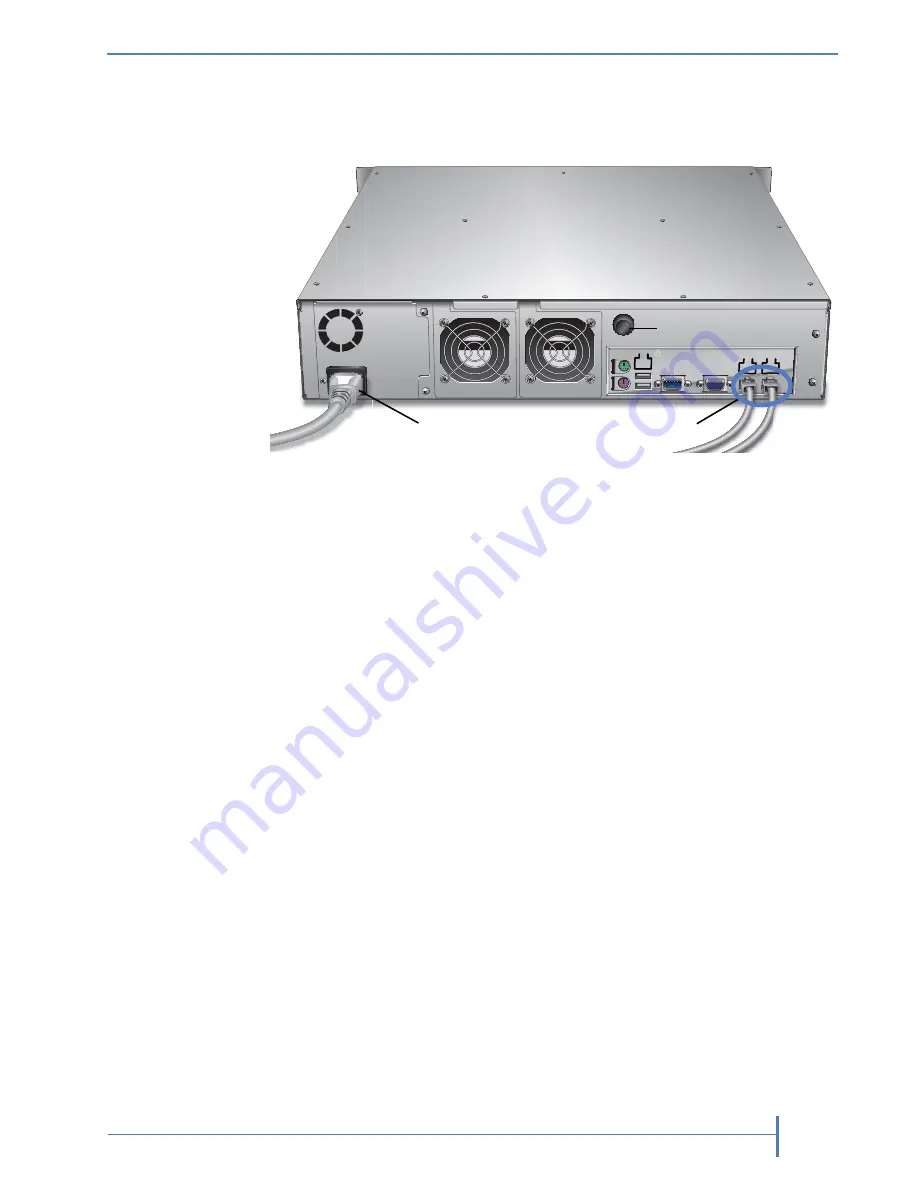
Connect one or two RDX QuikStation ethernet network ports to ethernet
network ports on a switch, hub, or router.
Note:
Two network ports are recommended for failover protection.
(See
page 51
for more information about port configuration options.)
2.
Connect the power cord that is appropriate for your region to the RDX
QuikStation.
3.
Turn the power on by pressing the black power button that is located on the
back of the RDX QuikStation.
Note:
Once the unit is powered on, all eight LCD panels will alternately
display the firmware level, system name, DHCP status, and IP
address. This information continues to display until you log on to the
Remote Management Console and configure the logical device type
for the QuikStation.
4.
Verify that a valid IP address is displayed on the LCD panels. If not, you
must manually configure the IP address for the RDX QuikStation. (See
“Configuring Network Information” on page 18
.)
Figure 2-5
Connecting ethernet and power cables to the RDX QuikStation
power button
power connector
ethernet ports
Содержание RDX QuikStation
Страница 1: ......
Страница 4: ...IV PRODUCT MANUAL 1019786 NOTES...
Страница 18: ...8 PRODUCT MANUAL 1019786 CHAPTER 1 PRODUCT OVERVIEW...
Страница 56: ...46 PRODUCT MANUAL 1019786 CHAPTER 3 ISCSI CONFIGURATION...
Страница 91: ...OCTOBER 2011 RDX QUIKSTATION 81 NOTES...
Страница 92: ...82 PRODUCT MANUAL 1019786 CHAPTER 5 LOGICAL DEVICE MANAGEMENT...
Страница 99: ...OCTOBER 2011 RDX QUIKSTATION 89 cloning job status bar...
Страница 100: ...90 PRODUCT MANUAL 1019786 CHAPTER 6 PHYSICAL DEVICE MANAGEMENT NOTES...
Страница 112: ...102 PRODUCT MANUAL 1019786 CHAPTER 7 SYSTEM MAINTENANCE NOTES...
Страница 120: ...110 PRODUCT MANUAL 1019786 APPENDIX CHAPTER B SPECIFICATIONS NOTES...
Страница 130: ...120 PRODUCT MANUAL 1019786 INDEX Notes...


