background image

45

The Maintenance Menu

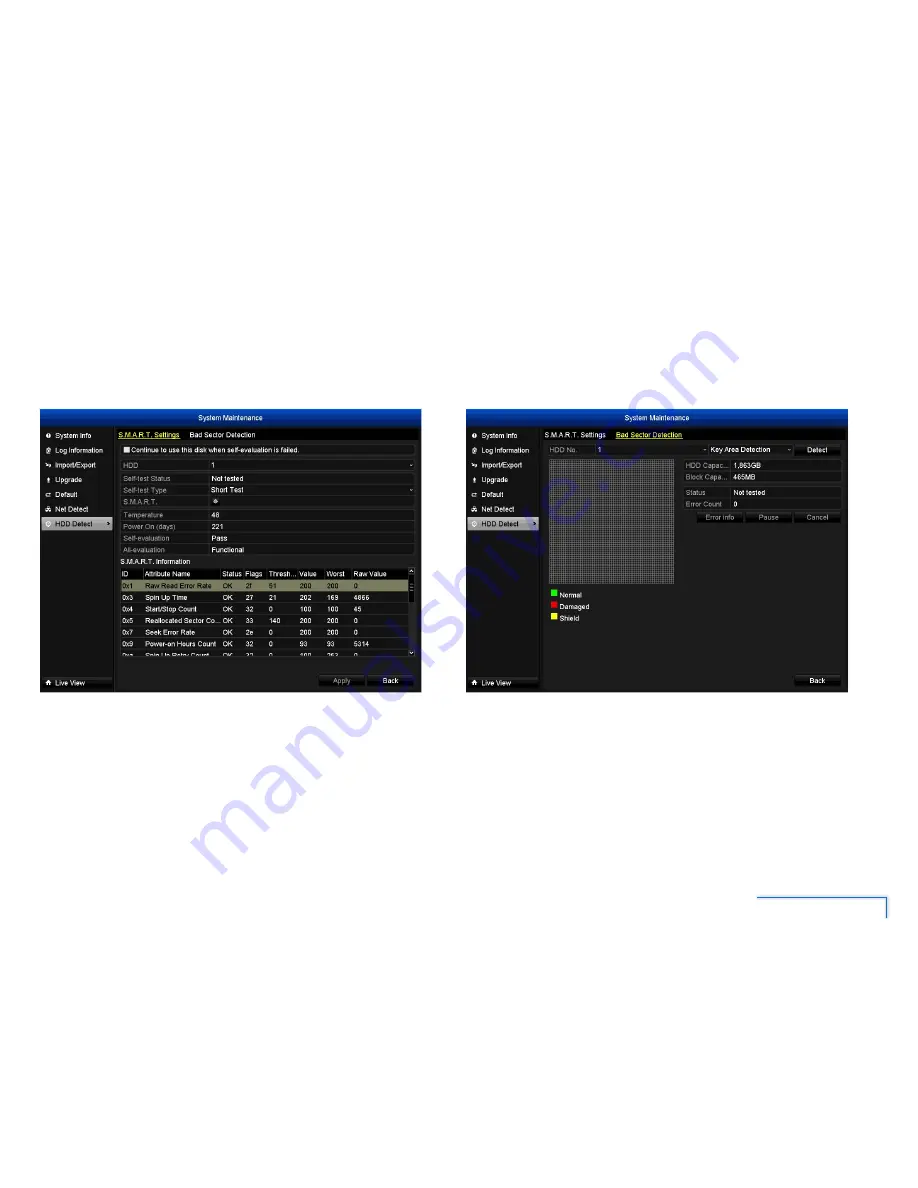
HDD Detect

You can easily check on the conditions of your DVR’s installed hard drive, and 

perform diagnostics to detect errors and bad sectors.

S.M.A.R.T. Settings Tab

S.M.A.R.T. (Self-Monitoring, Analysis and Reporting Technology) is your hard drive’s 

way of telling the DVR how it’s going. The status of each attribute indicates the 

various conditions of the hard drive. It should say “OK”. If it says anything else, this 

indicates there’s a problem with your hard drive. If you’re looking at this screen, 

you’ve probably been directed to do so by Swann Technical Support.

Bad Sector Detection Tab

You can perform a test on the hard drive for bad sectors. If you’re looking at this 

screen, you’ve probably been directed to do so by Swann Technical Support.

Содержание 4500 Series

Страница 1: ...1 Digital Video Recorder EN INSTRUCTION MANUAL ...

Страница 2: ...rding the private conversations of others unless such use is authorized by all of the parties engaging in the conversation WARNING Modifications not approved by the party responsible for compliance could void user s authority to operate the equipment IMPORTANT SAFETY INSTRUCTIONS Make sure product is fixed correctly and stable if fastened in place Do not operate if wires and terminals are exposed ...

Страница 3: ...ideo Quality Diagnostics 14 7 The HDD Menu 15 General 15 How to add a NAS device or IP SAN 15 Advanced 16 How to set a HDD quota for a camera 16 8 The Record Menu 17 Schedule 17 How to change the camera s recording schedule 17 Parameters 18 Record Tab 18 Substream Tab 19 Advanced 20 Holiday 20 9 The Camera Menu 21 OSD 21 Image 22 Motion 23 How to set up the motion detection area 23 Privacy Mask 24...

Страница 4: ...ow to export system information logs 41 Log Export Tab 41 Import Export 42 How to export your current configuration file 42 How to import a configuration file 42 Upgrade 43 Local Upgrade Tab 43 How to upgrade DVR firmware using a USB device 43 FTP Tab 43 How to upgrade DVR firmware by FTP 43 Default 44 Net Detect 44 HDD Detect 45 S M A R T Settings Tab 45 Bad Sector Detection Tab 45 12 Troubleshoo...

Страница 5: ...way to operate the DVR is to use the included USB optical mouse we put together the look and feel of the menu system specifically for mouse friendly navigation Description Left Button Single click to Select an item or confirm a choice Select channel and show the Quick Camera Toolbar Double click to Switch between single and multiviews in live view Right Button Display mouse menu in live view Exit ...

Страница 6: ...s that an alarm event such as motion detection video loss or tampering has occurred Indicates that the DVR is is currently recording video from this camera This icon will be the same whether the recording was scheduled initiated manually or triggered by motion though the Alarm Bell icon will also be present if there s motion detected Optional Event Hint setting must be enabled in the Exceptions sc...

Страница 7: ... your camera appears on the screen or select from one of the preset image modes Close the toolbar Mouse Menu The Mouse Menu lets you adjust the channel display format start recording instantly watch recorded videos from the current day and more It is also where you can access the DVR s Main Menu to configure and manage settings for many of the DVR functionalities 1 2 3 4 5 6 7 8 9 10 11 1 Open the...

Страница 8: ...r DVR s installed hard drive and adjust the settings Record Set up recording schedules for the cameras and customize how the DVR records footage and encodes the files Camera Configure various camera settings such as OSD information display motion detection privacy mask and more Configuration Access general DVR system settings including date and time network live view display exception handling and...

Страница 9: ...double clicking on the camera s screen To return to the multiview display double click on the screen again Calendar Appears when you select Normal playback Highlighted dates indicate recordings are available for viewing on these days from the selected cameras Video Playback Control Panel You can perform various playback operations such as pause slow and reverse forward You can also clip interestin...

Страница 10: ...k the Add Customized Tag button on the right of this button You can add up to 64 tags on a single video 7 Add Customized Tag Enter a name for the tag you are adding 8 Tag Management Edit or delete tags that you have added to the current video 9 Zoom In Enter Digital Zoom mode Use the PIP Picture in Picture screen at the bottom right corner to select a different area to zoom in You can also click a...

Страница 11: ...to learn how to set up smart search areas in the recording How to define Smart Search areas By default all areas of the video screen are highlighted for smart motion detection To define your smart search areas 1 On the toolbar click Delete to clear the red grid boxes on the screen 2 Click and drag to select the area you want to search for motion You will see a grid of red boxes over the selected a...

Страница 12: ...d see screenshot on the right 4 Select the recordings you want to copy and then click Export or to select all recordings click Export All The DVR displays the Export screen 5 In the Device Name list make sure your USB device is the current selection You can also create a new folder in your USB device to store your DVR recordings by clicking New Folder 6 Click Export 7 Select Video and Log and then...

Страница 13: ...riteria when they were recorded and what channel they were recorded see screenshot on the right 4 Select the recordings you want to copy You can preview selected recordings and find details such as file size by clicking Details 5 Click Quick Export The DVR displays the Export screen 6 In the Device Name list make sure your USB device is selected You can also create a new folder in your USB device ...

Страница 14: ...on next to the camera name Note If you reboot your DVR all manual recordings on the cameras will be cancelled Manual Video Quality Diagnostics You can check on the quality of the camera s video signal Simply select the cameras you want to check and then click Diagnose If your camera is performing normally you should see the result as Normal however if the result show up as Blurred Image Abnormal B...

Страница 15: ...Set up and configure details for your NAS drive IP SAN Init If you install a new hard drive in the DVR it must be initialized before it can be used How to add a NAS device or IP SAN 1 Click Add 2 In the Type list select the type of network storage NAS or IP SAN 3 Configure the NAS or IP SAN settings For NAS a In the NetHDD IP Address field enter the IP address b Click Search to search for availabl...

Страница 16: ...ch camera can be allocated a certain amount of space on the HDD How to set a HDD quota for a camera 1 In the Camera list select the camera you want to configure a HDD quota for 2 In the Max Record Capacity field enter the maximum record capacity in Gigabyte GB to be allocated for the selected camera You can also copy the current quota setting of the selected camera to other cameras Simply click Co...

Страница 17: ...want to associate with it See for more information about setting up and configuring Motion Detection None Black The DVR will not record anything How to change the camera s recording schedule 1 In the Camera list select a channel 2a To set a recording mode for a specific time and day first select the mode and then click the corresponding square s in the timeline The colour of the square changes to ...

Страница 18: ...he more space each recording takes up on the hard disk Generally speaking recordings encoded at higher bitrates will be of better quality especially when recording movement Pre record The number of seconds the DVR will record before the scheduled time or event occurs For example setting this to 30 seconds will enable recording for a motion event that occurred at 12 00 00 to actually contain footag...

Страница 19: ... referred to as real time and is 30fps NTSC or 25fps PAL Reducing the number of frames per second will not save hard drive space but potentially will improve the data rate per frame depending how you set the bitrate see the next option Option Description Video Quality The actual amount of data that the DVR uses to record video Options are low medium and high quality The higher the bitrate the more...

Страница 20: ... page 12 Holiday There will be occasions when you don t want the DVR to record using its normal programming Perhaps you require it to record more or less or just at different times The Holiday Settings screen allows you to define periods of time where the DVR will employ an alternate recording mode You can define up to 32 holiday periods These periods can be categorized by date week or month To se...

Страница 21: ...y Week Select whether the current day of the week appears on the screen We strongly recommend leaving this box checked and ensuring that the date is correct For best results use NTP see NTP Tab on page 30 Date Format Select how you want the date to be displayed The default format is MM DD YYYY Time Format Select how you want the time to be displayed The default format is 24 hour Display Mode Selec...

Страница 22: ...ion Contrast Increase the difference between the blackest black and the whitest white in the image Useful if sections of the image grey out but setting the contrast too high will degrade image quality Saturation Alter how much color is displayed in the image The higher the saturation the more bright and vivid colors will appear to be Hue Change the color mix of the image Sharpness How crisp your i...

Страница 23: ...ts or trigger the DVR s internal alarm to sound Sensitivity Move the slider to set a value between L low and H high The closer to H the slider is set the more sensitive the motion detection will be Full Screen Select the entire view area of the camera preview window for motion detection Clear Clear the entire view area of the camera preview window How to set up the motion detection area On the cam...

Страница 24: ...ne may cover up the camera s field of view or if they are attempting to tamper with the video signal Option Description Camera Select the camera you want to configure Enable Enable video tampering monitoring on the selected camera Settings Lets you specify the DVR s actions when it detects tampering on the selected camera Options available are Full Screen Monitoring The affected camera s screen is...

Страница 25: ...tware installed on your computer Send Email If you ve have configured your email account details an alert is sent to your email address Video Quality Diagnostics The DVR can monitor the camera s video signal quality When a deterioration in the video signal conditions such as blurred image abnormal brightness and color cast is detected you can specify what actions the DVR should perform Option Desc...

Страница 26: ...tern Australia Canberra Sydney and Melbourne choose GMT 10 00 whilst the Eastern Time zone in the USA and Canada is GMT 05 00 GMT stands for Greenwich Mean Time it s the baseline that keeps all the different time zones in sync Date Format The format of the date DD MM YYYY or MM DD YYYY and so on System Date This can be edited manually or set to update automatically by using NTP see NTP Tab on page...

Страница 27: ...ell the DVR when it applies to you DST Bias This refers to the difference in minutes between Coordinated Universal Time UTC and the local time Select the time that DST has increased by in your time zone which is typically 60 minutes in many locations More Settings Tab Option Description Device Name The default name of the DVR You can also enter your own name for the DVR Device No The internal devi...

Страница 28: ...count Option Description Enable Enable the DVR to connect to a DDNS service DDNS Type Choose the server that you re using We recommend SwannDVR you can sign up for a free account at www swanndvr net Device Domain Name Enter the host name that you set up in your DDNS service This is the address you use to access your network For example yourhostname swannDVR net User Name Enter the username you hav...

Страница 29: ...55 separated by periods but contain very different numbers In the above example the Subnet Mask might be something like 255 255 255 0 IPv4 Default Gateway This is the address of the way to the Internet to continue the road analogy this is like your local access point to the highway This is an IP address in the same format as the others and is typically very similar to the IP address of the DVR To ...

Страница 30: ... NTP then it is essential that your Time Zone see NTP Tab on page 30 and DST daylight savings time see DST Settings Tab on page 27 are set correctly Option Description Enable NTP Enable the DVR to connect to a NTP server Interval min The amount of time in minutes that will elapse between the DVR updating its internal clock to match that of the NTP server The default period of 60 minutes is recomme...

Страница 31: ...er Enter a name to identify the sender of the email notification Sender Address The address you re sending the email from This will be the username you ve set up for the email server you re using followed by and then the email server For example youraddress gmail com or similar Select Receiver Select an e mail recipient to configure The DVR can send email notifications to up to three receivers Rec...

Страница 32: ... Yes SNMP Tab If your network is setup to use SNMP Simple Network Management Protocol then you can configure it here Option Description Enable SNMP Enable SNMP if it is in use If not then ensure this stays disabled The SNMP protocol can interfere with normal networking functionality SNMP Version The version of SNMP currently being used SNMP Port The SNMP port currently being used This is typically...

Страница 33: ... not enabled or your router does not support this feature you ll need to forward the ports the DVR uses from the router to the DVR since this is a technically challenging process we strongly recommend using UPnP if possible Make sure that the number used for the External Port and Internal Port match otherwise the UPnP function will not work Option Description Mapping Type If Auto is selected you w...

Страница 34: ... IP Multicast IP is a technique for one to many and many to many real time communication over an IP infrastructure in a network The receiver will receive data from that IP without the need to contact individual devices directly In most circumstances this option is not required RTSP Port This port is used to stream real time images through and is the port that will be used to communicate with mobil...

Страница 35: ...tput As the cameras supplied with the DVR do not support audio capture this option is not required Event Output The default output is VGA HDMI Full Screen Monitoring Dwell Time The number of seconds to show an alarm event screen View Tab In Live View you can change the display order of each camera connected 1 Select an available viewing window on the right hand side 2 Double click one of the avail...

Страница 36: ...Internet This may indicate a problem with the DVR s configuration a fault with your network or a problem with your Internet Service Provider ISP IP Conflicted Occurs when the DVR detects another device on the same network with a conflicting IP address Basically it indicates that two devices are trying to use the same IP address This shouldn t occur if you re using DHCP addressing unless one or mor...

Страница 37: ... DVR s operation An Operator user account can access all camera operations including playback and exporting of video recordings with limited access to many menus Any operation that requires changing the DVR or camera setting cannot be performed A Guest user account can only watch live view from the camera and playback camera recordings To add additional users select Add To remove a user select a u...

Страница 38: ...e of the information shown here if you contact Swann Technical Support for assistance Device Tab On this tab you can find out the DVR s default name model serial number firmware version and encoding version Camera Tab On this tab you can check on the status of each camera connected to the DVR You can easily find out which DVR features such as motion detection video tampering etc are being utilized...

Страница 39: ...On this tab you can check on the recording settings for each camera connected to the DVR You can also find out if any camera has a recording in progress Network Tab On this tab you can see a quick summary of your current network settings ...

Страница 40: ...n the DVR s hard drive and can be viewed and exported at any time Log Search Tab On this tab you can search log files for a specific log event How to search for specific system information logs 1 Set the log search criteria including the Start Time End Time Major Type and Minor Type 2 Click Search After a few seconds the DVR displays all the log files matching your search criteria Detailed informa...

Страница 41: ... new folder in your USB device to store your DVR system logs by clicking New Folder 3 Click Export Once this process is finished the following appears The log file that was saved in your USB device is named according to the time it was exported For example 20141031134001logBack txt Log Export Tab You can export all the information logs contained in the DVR s hard drive Simply select the hard drive...

Страница 42: ...he back of the DVR 2 Click Refresh In the Device Name list make sure your USB device is the current selection 3 Click Export to save a copy of the DVR configuration file on your USB device How to import a configuration file 1 Connect the USB storage device containing a previously saved DVR configuration file to the USB port on the back of the DVR 2 Click Refresh In the Device Name list make sure y...

Страница 43: ...e your USB device is the current selection 3 Select the firmware update file and then click Upgrade Once the update is complete the DVR reboots automatically FTP Tab How to upgrade DVR firmware by FTP The firmware can be updated using your computer as a FTP server Make sure that both your computer and DVR are connected to the same Local Area Network LAN Make sure you have a 3rd party FTP software ...

Страница 44: ...l the parameters including network and user settings or you can select the second option which will do the same but will maintain your network and user settings The DVR will reboot after you click OK Net Detect You can check network traffic and to obtain real time information from the DVR such as network detection network status and sending and receiving network traffic ...

Страница 45: ...ing the DVR how it s going The status of each attribute indicates the various conditions of the hard drive It should say OK If it says anything else this indicates there s a problem with your hard drive If you re looking at this screen you ve probably been directed to do so by Swann Technical Support Bad Sector Detection Tab You can perform a test on the hard drive for bad sectors If you re lookin...

Страница 46: ...Some cameras are just more touchy than others some lighting conditions are harder to get the settings right for 3 Adjust your image settings see Image on page 22 Unlike many image adjustment options the DVR pre processes video which means that when the DVR looks for motion it s looking at your already processed images By reducing the amount of video noise in your image you can increase the accurac...

Страница 47: ...g in view of your cameras which is moving or causes the illusion of movement Have a look at Motion on page 23 for some more information The DVR keeps reporting errors such as Video Loss HDD Error or similar There seems to be a hardware or configuration fault with the DVR These are most often caused by a faulty or simply poorly connected connection or cable Check the integrity of your cables and co...

Страница 48: ...anty does not cover any incidental accidental or consequential damages arising from the use of or the inability to use this product Any costs associated with the fitting or removal of this product by a tradesman or other person or any other costs associated with its use are the responsibility of the end user This warranty applies to the original purchaser of the product only and is not transferabl...

Страница 49: ...ll Countries E mail tech swann com Telephone Helpdesk USA Toll Free 1 800 627 2799 USA Parts Warranty 1 800 627 2799 M F 9am 5pm US PT AUSTRALIA 1300 138 324 NEW ZEALAND Toll Free 0800 479 266 UK 0203 027 0979 M48_4500311014E Swann Communications 2014 ...

Отзывы: