11
The Playback Menu
Smart Search
Smart Search
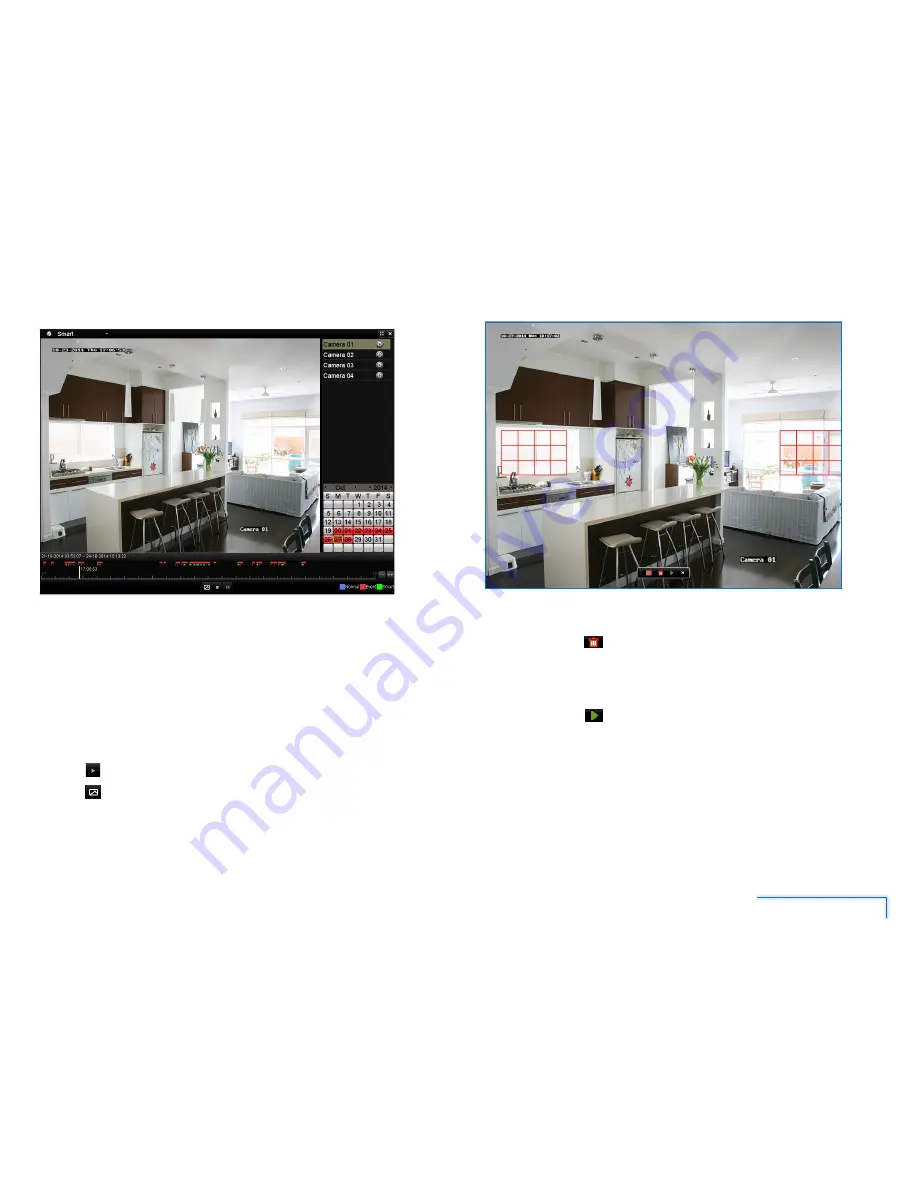
allows you to select an area of the video that may have detected
motion. The DVR will then display these areas of motion with a green highlight on
the timeline (see above). This makes it very easy to navigate to the sections of video
that has motion recording related to that area.
How to use Smart Search?
1. From
Playback Type
at the top left of the Playback Interface, select
Smart
.
2. From
Camera Selection
, select a camera.
3. On the calendar, select a date. Highlighted dates indicate recordings are
available for viewing on these days from the selected camera.
4. Click
Play
to start video playback.
5. Click
Smart
. This displays the Smart Screen Interface. Read the next section
to learn how to set up smart search areas in the recording.
How to define Smart Search areas?
By default, all areas of the video screen are highlighted for smart motion detection.
To define your smart search areas:
1. On the toolbar, click
Delete
to clear the red grid boxes on the screen.
2. Click and drag to select the area you want to search for motion. You will see
a grid of red boxes over the selected area. Repeat this step to highlight more
areas of the screen.
3. On the toolbar, click
Play
to confirm your selection and start playback.
The DVR will fast-forward the video until it arrives at the section where there
is action on the defined smart search areas. After the DVR finishes playing the
smart motion event, it will fast forward the video again until the next smart
search segment, and so on. Alternatively, you can also click any green segments
on the video timeline to quickly skip ahead to any smart motion event .


