17
The Record Menu
Schedule
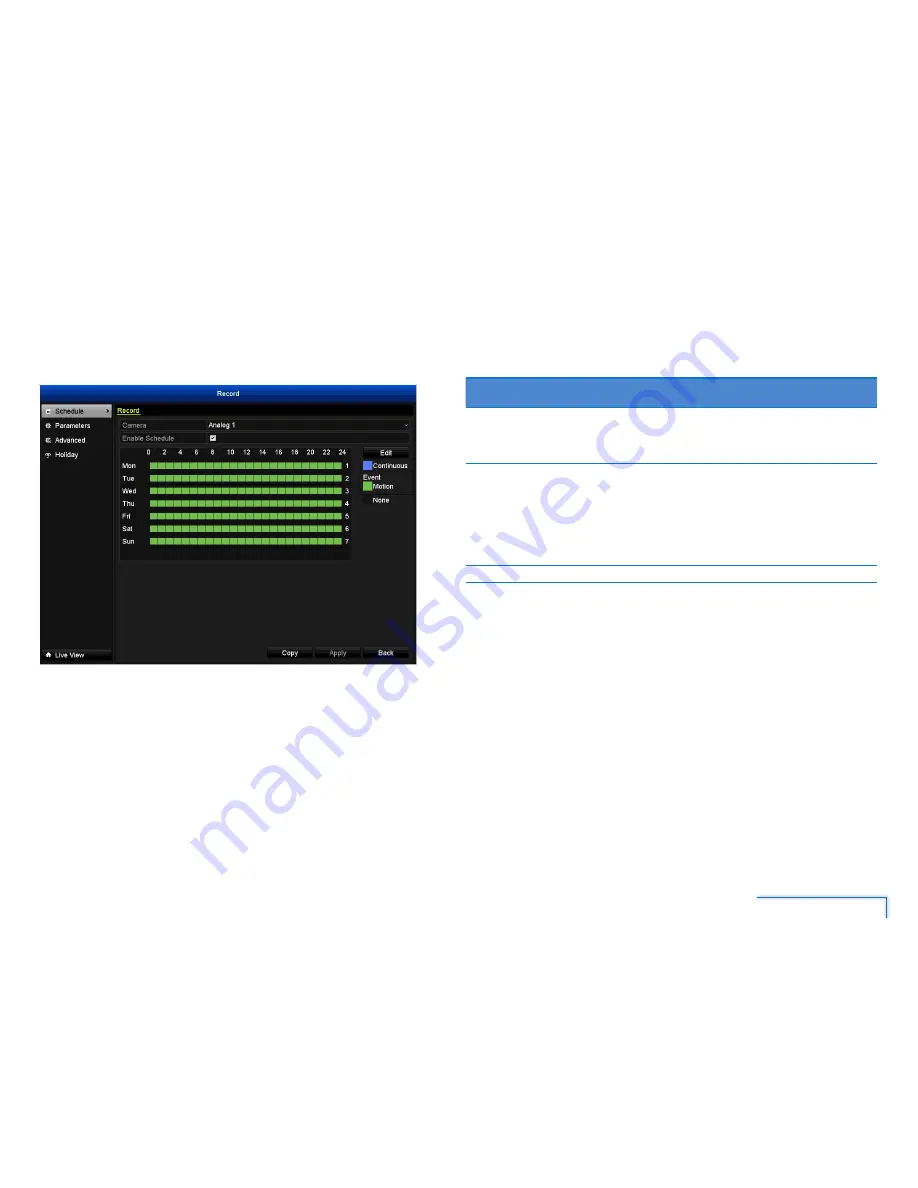
You can specify when the DVR records video and under what modes for each
channel. By default, all channels are armed to use Motion Detection as their
recording mode.
The schedule presented on-screen applies to one channel only over one whole week.
There is a 24-hour timeline for each day of the week. Each square in the timeline
represents an hour in the 24-hour period.
Be careful when programming your schedule. It’s one of the most important aspects of
setting up your DVR, and if it’s wrong in any way, it could lead to disastrous complications
later.
When defining a recording schedule, there are 3 types of recording to choose from:
Recording
Mode
Description
Continuous
(Blue)
The DVR will constantly record for any period. You won’t miss
anything, but constant recording will fill your hard drive very
quickly. Typically, we suggest Motion as a better recording mode
for most users.
Motion
(Green)
The default and recommended recording setting. The DVR
will only record when it detects something moving in front of a
camera, and will then only record footage from the camera(s) that
do detect motion.
It is recommended that Motion Detection is properly configured
for the channel(s) you want to associate with it. See for more
information about setting up and configuring Motion Detection.
None (Black) The DVR will not record anything.
How to change the camera’s recording schedule?
1. In the
Camera
list, select a channel.
2a. To set a recording mode for a specific time and day, first select the mode and
then click the corresponding square(s) in the timeline. The colour of the square
changes to the assigned recording mode. To quickly cover a large portion
of time squares, you can simply click and drag the mouse over the squares
corresponding to your desired days and times.
2b. You can also set up a daily recording schedule by clicking
Edit
. On the Edit
screen, select the day, and then specify up to 8 different time periods the
desired start/end time and the associated recording mode. Repeat this step for
the other days of the week. You can also easily copy the current daily recording
schedule to other days of the week by clicking
Copy
and then selecting number
corresponding to the days of the week. For example, 1 for Monday, 2 for Tuesday,
and so on. Remember to click
OK
to save your settings.
3. (Optional) Use the
Copy
button to quickly assign identical schedule layouts to
multiple channels at once. It copies the schedule from the channel you’re editing
to one or more other channels.
Note:
To disable the recording schedule for a particular channel, simply uncheck the
Enable
box.
The Record Menu
8


