


1-22
91
DV
/D
8 Du
bb
in
g
(D
V
/D8
t
DV
D
)
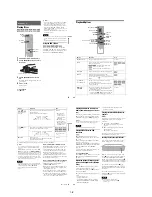
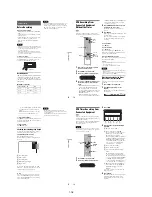
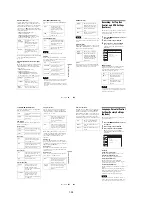
Dubbing From a DV/D8
Format Tape to a DVD
You can record a DV/D8 format tape onto a disc.
The recorder controls the digital video camera.
You can fast forward, rewind, play in slow motion,
and stop the tape to select the scenes using the on-
screen menu.
To simply dub the entire contents of a DV/D8
format tape (One Touch Dubbing), see page 93.
◆
How titles and chapters are created
The dubbed contents on the disc become one title,
and the title is then divided into chapters at either
5 or 15-minute intervals, according to the “DVD
Auto Chapter” setting of “Features” in the “Setup”
display.
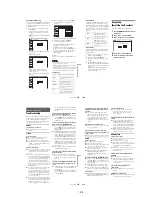
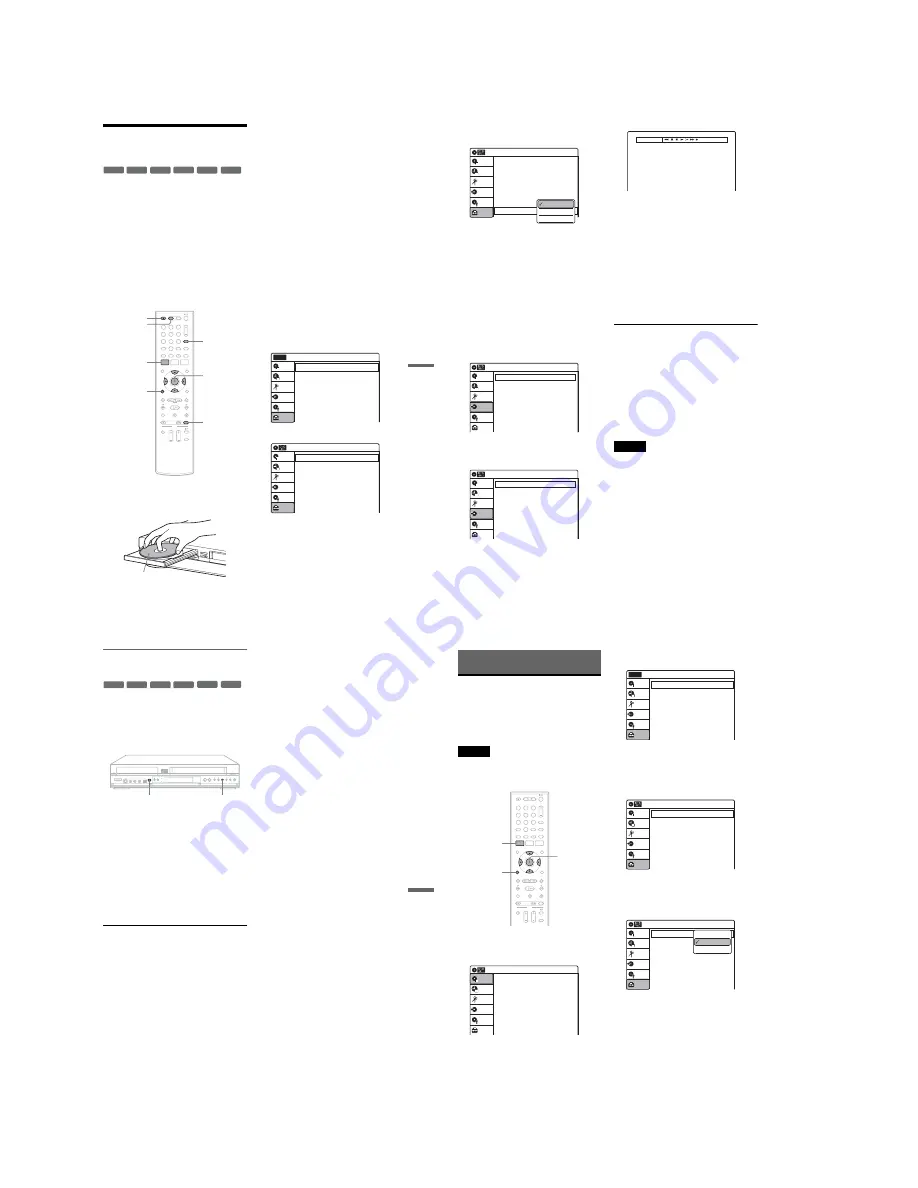
1
Press DVD to operate the DVD recorder.
2
Press
Z
OPEN/CLOSE, and place a
recordable disc on the disc tray.
3
Press
Z
OPEN/CLOSE to close the disc
tray.
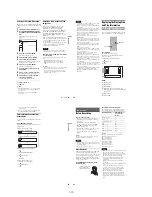
Wait until “LOAD” disappears from the front
panel display.
Unused discs are automatically formatted. For
the DVD-RW/DVD-R’s recording format
(VR mode or Video mode), see “Formatting a
new disc” on page 47.
4
Insert the source DV/D8 format tape into
your digital video camera.
For the recorder to record or edit, your digital
video camera must be set to video playback
mode.
5
Press INPUT repeatedly to select “DV.”
6
Press REC MODE repeatedly to select the
recording mode.
For details about the recording mode, see
page 46.
7
Press SYSTEM MENU while the recorder is
in stop mode.
The System Menu appears.
8
Select “Setup,” and press ENTER.
9
Select “Audio,” and press ENTER.
-RW
VR
-RW
Video
+
RW
+
R
-R
VR
-R
Video
1
1
2
2
3
3
4
4
5
5
6
6
7
7
8
8
0
0
9
9
REC MODE
INPUT
Z
OPEN/
CLOSE
SYSTEM
MENU
M
/
m
/
<
/
,
,
ENTER
O
RETURN
DVD
Recording side facing down
10:10 AM
Clock Set
Video
Audio
Features
Options
Easy Setup
Setup
Disc Setting
Edit
Title List
Timer
Dubbing
Setup
No Disc
Audio
10:10 AM
Digital Out
Downmix
Audio DRC
Audio (HDMI)
Scan Audio
Surround
DV/D8 Audio Input
Line Audio Input
: Dolby Surround
: Standard
: Auto
: On
: Off
: Stereo 1
: Stereo
Setup
Disc Setting
Edit
Title List
Timer
Dubbing
,
continued
92
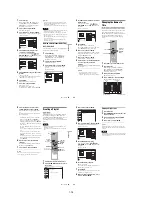
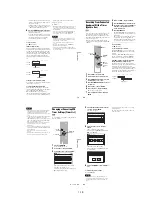
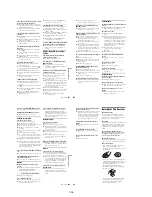
10
Select “DV/D8 Audio Input,” and press
ENTER.
“Stereo 1”: Records original sound only.
Normally select this when dubbing a DV
format tape.
“Stereo 2”: Records additional audio only.
“Mix”: Records original and additional
sounds.
Select “Stereo 2” or “Mix” if you have added
a second audio channel when recording with
your digital video camera. For the details, see
page 100.
11
Select an option, and press ENTER.
12
Press
O
RETURN twice.
13
Select “Dubbing,” and press ENTER.
14
Select “DV/D8 Dubbing,” and press
ENTER.
15
Select “DV/D8 Simple Dubbing,” and
press ENTER.
The following display appears.
If “DV” or “DV Camera Mode” is displayed
instead of “DV Tape Mode,” check that the
digital video camera is correctly connected
and its power turned on, and that its mode is
set for dubbing.
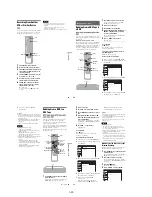
16
Find the dubbing start point on the tape,
and stop or pause playback.
Press
<
/
,
to select
m
,
x
,
X
,
y
,
H
, or
M
on the TV screen and press ENTER to
find the point, and stop or pause with
x
or
X
.
17
Press
,
to select
z
on the TV screen, and
press ENTER.
Dubbing starts.
To stop recording
Select
x
on the TV screen, and press ENTER.
Note that it may take a few seconds for the
recorder to stop recording.
To turn off the display for DV/D8 dubbing
Press INPUT.
z
Hint
If “DV Camera Mode” appears on the screen, you can use
z
on the TV screen to record the camera image directly
on the recorder.
Notes
• If you want to play the disc on other DVD equipment,
finalize the disc (page 88).
• You cannot connect more than one piece of digital
video equipment to the recorder.
• You cannot record the date, time, or contents of a DV/
D8 format tape onto the disc.
• If you record from a DV/D8 format tape with a
soundtrack that is recorded in multiple sampling
frequencies (48 kHz, 44.1 kHz, or 32 kHz), no sound,
or an unnatural sound will be output when playing back
the sampling frequency switch point on the disc.
• The recorded picture may be momentarily affected if
the picture size of the source image changes, or if there
is nothing recorded on the tape.
• Noise may occur when you switch the audio sampling
mode (48 kHz/16 bits
t
32 kHz/12 bits).
Audio
10:10 AM
Digital Out
Downmix
Audio DRC
Audio (HDMI)
Scan Audio
Surround
DV/D8 Audio Input
Line Audio Input
: Dolby Surround
: Standard
: Auto
: On
: Off
: Stereo 1
: Stereo
Setup
Disc Setting
Edit
Title List
Timer
Dubbing
Stereo 1
Stereo 2
Mix
Dubbing
10:10 AM
Simple Dubbing
Program Dubbing
DV/D8 Dubbing
Setup
Disc Setting
Edit
Title List
Timer
Dubbing
DV/D8 Dubbing
10:10 AM
DV/D8 Simple Dubbing
DV/D8 One Touch Dubbing
Setup
Disc Setting
Edit
Title List
Timer
Dubbing
DV Tape Mode
93
DV
/D
8 Du
bb
in
g
(D
V
/D8
t
DV
D
)
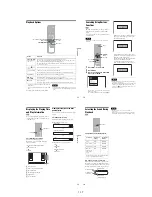
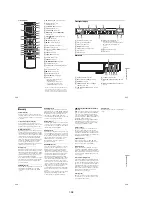
Dubbing an entire DV/D8 format tape
to a DVD (One Touch Dubbing)
You can record the entire contents of a DV/D8
format tape onto a disc with a single press of the
ONE-TOUCH DUBBING button. The recorder
controls the digital video camera for the whole
process, and completes the recording.
1
Follow steps 1 to 11 of “Dubbing From a
DV/D8 Format Tape to a DVD” (page 91),
and press SYSTEM MENU to turn off the
display.
2
Press ONE-TOUCH DUBBING on the
recorder.
The recorder rewinds the tape in the digital
video camera and then starts recording the
tape contents from the beginning.
When playback of the tape stops, One Touch
Dubbing ends automatically.
To stop recording
Press
x
(stop).
Note that it may take a few seconds for the
recorder to stop recording.
z
Hint
You can also perform One Touch Dubbing when you
select “DV/D8 One Touch Dubbing” and press ENTER
in step 15 of “Dubbing From a DV/D8 Format Tape to a
DVD” on page 91. Follow the instructions appearing on
the TV screen.
-RW
VR
-RW
Video
+
RW
+
R
-R
VR
-R
Video
ONE-TOUCH DUBBING
x
94
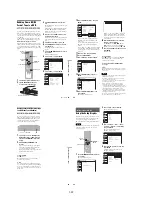
Settings and Adjustments
Using the Setup Displays
By using the setup displays, you can make various
adjustments to items such as picture and sound, as
well as select a language for the subtitles.
The setup displays are used in the following way.
Note
Playback settings stored on the disc take priority over the
setup display settings, and not all of the functions
described may work.
1
Press SYSTEM MENU while the recorder is
in stop mode.
The System Menu appears.
2
Select “Setup,” and press ENTER.
The “Setup” display appears.
3
Select “Clock Set,” “Video,” “Audio,”
“Features,” “Options,” or “Easy Setup,”
and press ENTER.
The selected setup display appears.
Example: “Video” setup
4
Select the item you want to set up, and
press ENTER.
Available options for the item appear.
Example: “TV Type”
M
/
m
/
<
/
,
,
ENTER
1
1
2
2
3
3
4
4
5
5
6
6
7
7
8
8
0
0
9
9
SYSTEM
MENU
O
RETURN
10:10 AM
Title List (Original)
Press ENTER :
Title Menu for DVD Title List.
Setup
Disc Setting
Edit
Title List
Timer
Dubbing
10:10 AM
Clock Set
Video
Audio
Features
Options
Easy Setup
Setup
Disc Setting
Edit
Title List
Timer
Dubbing
Setup
No Disc
Video
10:10 AM
TV Type
HDMI Resolution
Video (HDMI)
Black Level
Picture Control
Progressive
: 4:3 Letter Box
: Auto
: Y Cb Cr
: On
: Standard
: Off
Setup
Disc Setting
Edit
Title List
Timer
Dubbing
Video
10:10 AM
TV Type
HDMI Resolution
Video (HDMI)
Black Level
Picture Control
Progressive
: 4:3 Letter Box
: Auto
: Y Cb Cr
: On
: Standard
: Off
Setup
Disc Setting
Edit
Title List
Timer
Dubbing
16:9
4:3 Letter Box
4:3 Pan Scan
Содержание RDR VX555 - DVDr/ VCR Combo
Страница 62: ...2 22 2 22E MEMO ...
Страница 64: ...3 4E MEMO ...
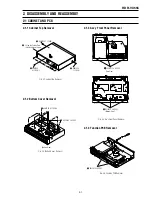
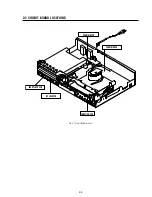
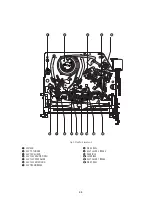
Страница 66: ...4 1 DVD Main PCB 4 4 4 3 COMPONENT SIDE ...
Страница 67: ...4 6 4 5 CONDUCTOR SIDE ...
Страница 68: ...4 8 4 7 4 2 VCR Main PCB COMPONENT SIDE ...
Страница 69: ...4 10 4 9 CONDUCTOR SIDE ...
Страница 70: ...4 12 4 11 4 3 Function PCB COMPONENT SIDE COMPONENT SIDE ...
Страница 71: ...4 14 4 13 4 4 Front Jack PCB COMPONENT SIDE CONDUCTOR SIDE ...
Страница 72: ...4 16E 4 15 4 5 DV Jack PCB COMPONENT SIDE COMPONENT SIDE ...
Страница 74: ...5 4 5 3 5 1 S M P S VCR Main PCB ...
Страница 75: ...5 6 5 5 5 2 Power VCR Main PCB ...
Страница 76: ...5 8 5 7 5 3 Logic VCR Main PCB ...
Страница 77: ...5 10 5 9 5 4 A V VCR Main PCB ...
Страница 78: ...5 12 5 11 5 5 Hi Fi VCR Main PCB ...
Страница 79: ...5 14 5 13 5 6 MPEG Decoder DVD Main PCB ...
Страница 80: ...5 16 5 15 5 7 A V Decoder DVD Main PCB ...
Страница 81: ...5 18 5 17 5 8 In Out DVD Main PCB ...
Страница 82: ...5 20 5 19 5 9 DV HDMI DVD Main PCB ...
Страница 83: ...5 22 5 21 5 10 Front Timer Front Jack PCB DV Jack DV Jack PCB ...
Страница 84: ...5 24E 5 23 5 11 Function Function PCB ...
Страница 127: ...MEMO ...


