


1-10
43
DV
D
Pl
ay
bac
k
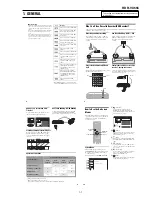
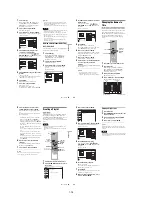
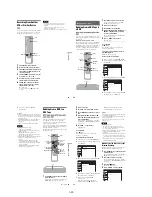
Enjoying a slide show with sound
When a disc contains both MP3 audio tracks and
JPEG image files, you can enjoy a slide show with
sound.
1
Press DVD to operate the DVD recorder.
2
Insert a DATA CD/DATA DVD containing
both the MP3 audio tracks and JPEG image
files.
The display for selecting a media type
appears.
3
Select “Mix,” and press ENTER.
The “Music” display appears.
4
Select an album, and press ENTER.
5
Select a track, and press ENTER.
Playback starts from the selected track, and
the display asks for confirmation.
6
Select “Yes,” and press ENTER.
The “Photo” display appears.
7
Select the folder you want to view, and
press ENTER.
8
Press
H
PLAY to start the slide show.
The “Slideshow Speed” menu appears.
9
Press
<
/
,
to select the slide show
speed, and press ENTER.
The slide show starts with sound.
To stop the slide show
Press
x
STOP.
z
Hints
• When playing JPEG images, you can also use the on-
screen menu. For details, see “Playing JPEG image
files” (page 42).
• The slide show is played repeatedly until MP3
playback stops.
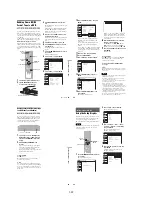
About MP3 audio tracks and JPEG
image files
MP3 is audio compression technology that
satisfies the ISO/IEC MPEG regulations.
JPEG is image compression technology.
You can play back DATA CDs (CD-ROMs/CD-
Rs/CD-RWs) or DATA DVDs (DVD-ROMs/
DVD+RWs/DVD-RWs/DVD+Rs/DVD-Rs)
recorded in MP3 (MPEG1 Audio Layer 3) and
JPEG format.
However, this recorder only plays DATA CDs
whose logical format is ISO9660 Level 1/Level 2
or Joliet, and DATA DVDs of Universal Disk
Format (UDF).
See the instructions supplied with the disc drives
and the recording software (not supplied) for
details on the recording format.
Note
The recorder may not be able to play some DATA CDs
or DATA DVDs created in the Packet Write format.
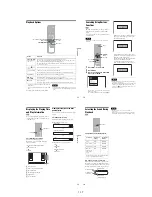
MP3 audio tracks or JPEG image files that the
recorder can play
The recorder can play the following tracks and
files:
– MP3 (MPEG1 Audio Layer 3) audio tracks.
– MP3 audio tracks with the extension “.MP3.”
– JPEG image files with the extension “.JPEG” or
“.JPG.”
z
Hints
• If you add numbers (01, 02, 03, etc.) to the front of the
file names, the files will be played in that order.
• Since a disc with many trees takes longer to start
playback, it is recommended that you create albums
with no more than two trees.
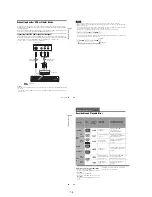
10:10 AM
Photo
Music
Press ENTER :
Mix
Music menu for this disc.
,
continued
44
Notes
• Some DATA CDs or DATA DVDs cannot be played
on this recorder depending on file format.
• Only one session of a multi-session DATA DVD can
be played back.
• Only alphabet and numbers can be used for album or
track names. Anything else is displayed as an asterisk.
• The recorder will play any data with the extension
“.MP3,” even if they are not in MP3 format. Playing
such data may generate a loud noise which could
damage your speaker system.
• The recorder does not conform to audio tracks in
MP3PRO format.
• The recorder can recognize up to 499 MP3 audio tracks
within a single album. The recorder may not recognize
some discs depending on the recording device used for
recording or the disc condition.
• The recorder can play MP3 audio tracks recorded in the
following sampling frequencies: 32 kHz, 44.1 kHz,
48 kHz.
• ID3 tags cannot be displayed.
• If you add the extension “.JPG” or “.JPEG” to data not
in JPEG format, a message appears indicating that the
format is not supported.
• Depending on the disc or the size of image files,
playback may take some time to start.
• The recorder can recognize up to 999 JPEG image files
within a single folder. The recorder may not recognize
some discs depending on the recording device used for
recording or the disc condition.
• Progressive and lossless compression JPEG image files
are not supported.
• The image size that the recorder can display is limited
to width 32 - 7680 pixels by height 32 - 8192 pixels.
• JPEG image files that conform to the DCF* image file
format are not supported.
* “Design rule for Camera File system”: Image standards
for digital cameras regulated by JEITA (Japan
Electronics and Information Technology Industries
Association).
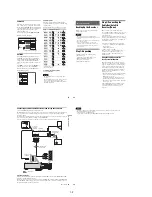
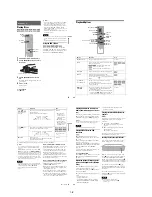
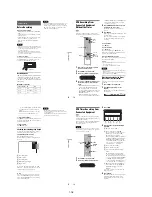
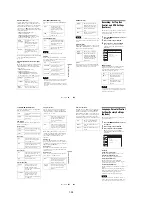
Displaying the Playing Time
and Play Information
You can check disc information, such as playing
time, recording mode, and remaining disc space.
Press DISPLAY.
The information display appears.
Each time you press the button, the display
changes as follows:
Disc and tape information/date and time
m
Disc information only
m
No display
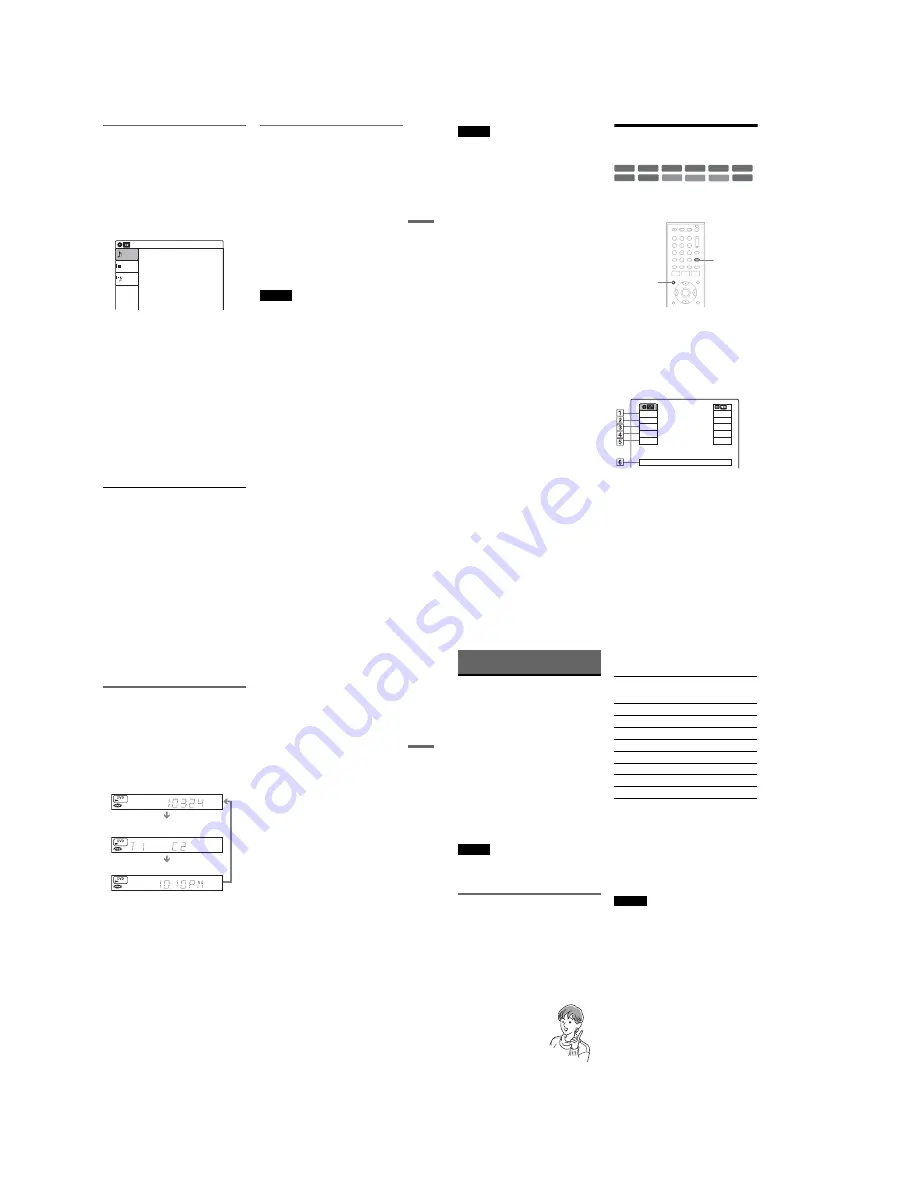
◆
DVD
A
Playing status
B
Playing time
C
Recording mode
D
Remaining disc space (in stop mode)
Remaining time of the current title (during
playback
*1
)
E
Input source
*2
F
Date and time
+
R
DVD
VCD
CD
-RW
VR
-RW
Video
+
RW
DATA CD DATA DVD
RAM
-R
VR
-R
Video
1
1
2
2
3
3
4
4
5
5
6
6
7
7
8
8
0
0
9
9
TIME/TEXT
DISPLAY
Stop
0:30:00
SP
Rem 01:30
Line1
Wed May 02. 2007
10:10 AM
Play
0:05:30
HQ
Rem 00:25
Original
45
DV
D
Pl
ay
bac
k
*1
Also appears in stop mode with Resume Play
activated (page 38).
*2
Title type (original or Playlist) for DVD-RWs (VR
mode)/DVD-Rs (VR mode)/DVD-RAMs.
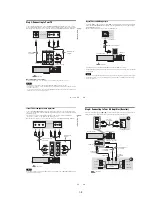
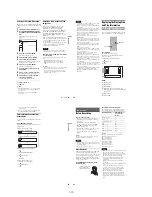
Viewing information on the front
panel display
You can view the information on the front panel
display.
Press TIME/TEXT repeatedly.
The displays differ depending on the disc type or
playing status.
Example: When playing a DVD
Example: When a DVD is stopped
Example: When playing a CD
Playing time of the current title
Current title number and current chapter
number
Clock
Clock
m
Current title and chapter number
m
Remaining disc space
m
Input source
Playing time of the current track
m
Current track number
m
Clock
46
DVD Recording
Before Recording
Before you start recording…
• This recorder can record on various disc types.
Select the disc type according to your needs
(page 30).
• Check that the disc has enough available space
for the recording (page 44). For DVD+RWs or
DVD-RWs, you can free up disc space by
erasing titles (page 57).
• Check that the recorder is connected to a tuner
such as a cable box or satellite receiver
(page 12). See also the tuner’s instruction
manual.
z
Hint
To play a disc recorded with this recorder on other
equipment, finalize the disc (page 88).
Notes
• Timer recordings will start with or without the recorder
turned on. The recorder automatically turns off after a
recording has finished.
• This recorder records at ×1 speed.
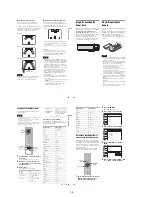
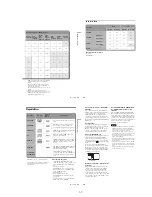
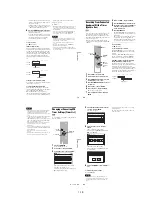
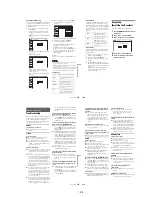
Recording mode
Like the SP or EP recording mode of VCRs, this
recorder has eight different recording modes.
Select a recording mode according to the time and
picture quality you need. For example, if picture
quality is your top priority, select “HQ” (high
quality). If recording time is your priority, “SLP”
can be a possible choice.
Press REC MODE repeatedly to switch the
recording modes.
Recording mode and recording time
The following table is an approximate guide for
the recording time on a single DVD (4.7 GB).
z
Hint
The approximate recording time for DVD+R DL
(Double Layer) discs is as follows:
HQ: 1 hour 48 minutes
HSP: 2 hours 42 minutes
SP: 3 hours 37 minutes
LSP: 4 hours 31 minutes
ESP: 5 hours 25 minutes
LP: 7 hours 14 minutes
EP: 10 hours 51 minutes
SLP: 14 hours 28 minutes
Notes
• When in a recording mode other than HQ, the recorder
compresses the audio/video data before recording.
Since the compression rate needs to decrease for fast-
moving images or if picture noise is present, recorded
data size increases, and available recording time
becomes shorter. When recording such pictures, a
recording mode offering longer recording time is
recommended.
• Situations below may cause inaccuracies with the
recording time.
– Recording fast-moving or images containing picture
noise.
– Recording a program with poor reception, or a
program or video source of low picture quality
– Recording on a disc that has already been edited
– Recording only a still picture or just sound
• Since the recording mode for recorded titles is
calculated after sampling the recorded data during
playback, it may be displayed differently from the
mode you selected when recording. However, the
actual recording itself is correctly made in the selected
mode.
I want to record with the
best possible picture
quality, so I’ll select HQ.
Recording mode
Approximate
recording time
(minute)
HQ (High quality)
60
HSP
R
90
SP (Standard mode)
120
LSP
r
150
ESP
r
180
LP
r
240
EP
r
360
SLP (Long duration)
480
Содержание RDR VX555 - DVDr/ VCR Combo
Страница 62: ...2 22 2 22E MEMO ...
Страница 64: ...3 4E MEMO ...
Страница 66: ...4 1 DVD Main PCB 4 4 4 3 COMPONENT SIDE ...
Страница 67: ...4 6 4 5 CONDUCTOR SIDE ...
Страница 68: ...4 8 4 7 4 2 VCR Main PCB COMPONENT SIDE ...
Страница 69: ...4 10 4 9 CONDUCTOR SIDE ...
Страница 70: ...4 12 4 11 4 3 Function PCB COMPONENT SIDE COMPONENT SIDE ...
Страница 71: ...4 14 4 13 4 4 Front Jack PCB COMPONENT SIDE CONDUCTOR SIDE ...
Страница 72: ...4 16E 4 15 4 5 DV Jack PCB COMPONENT SIDE COMPONENT SIDE ...
Страница 74: ...5 4 5 3 5 1 S M P S VCR Main PCB ...
Страница 75: ...5 6 5 5 5 2 Power VCR Main PCB ...
Страница 76: ...5 8 5 7 5 3 Logic VCR Main PCB ...
Страница 77: ...5 10 5 9 5 4 A V VCR Main PCB ...
Страница 78: ...5 12 5 11 5 5 Hi Fi VCR Main PCB ...
Страница 79: ...5 14 5 13 5 6 MPEG Decoder DVD Main PCB ...
Страница 80: ...5 16 5 15 5 7 A V Decoder DVD Main PCB ...
Страница 81: ...5 18 5 17 5 8 In Out DVD Main PCB ...
Страница 82: ...5 20 5 19 5 9 DV HDMI DVD Main PCB ...
Страница 83: ...5 22 5 21 5 10 Front Timer Front Jack PCB DV Jack DV Jack PCB ...
Страница 84: ...5 24E 5 23 5 11 Function Function PCB ...
Страница 127: ...MEMO ...


