


29
10601034 Rev. B
LENS Integrated System
Operations/Service Manual
Customize the System
Customize the System
The System is shipped with a default configuration. The System’s default
settings can be customized and saved for any procedure. Navigate to
the
System Configuration icon on the MAIN MENU and press Select to
open the SELECT SYSTEM CONFIGURATION MENU screen.
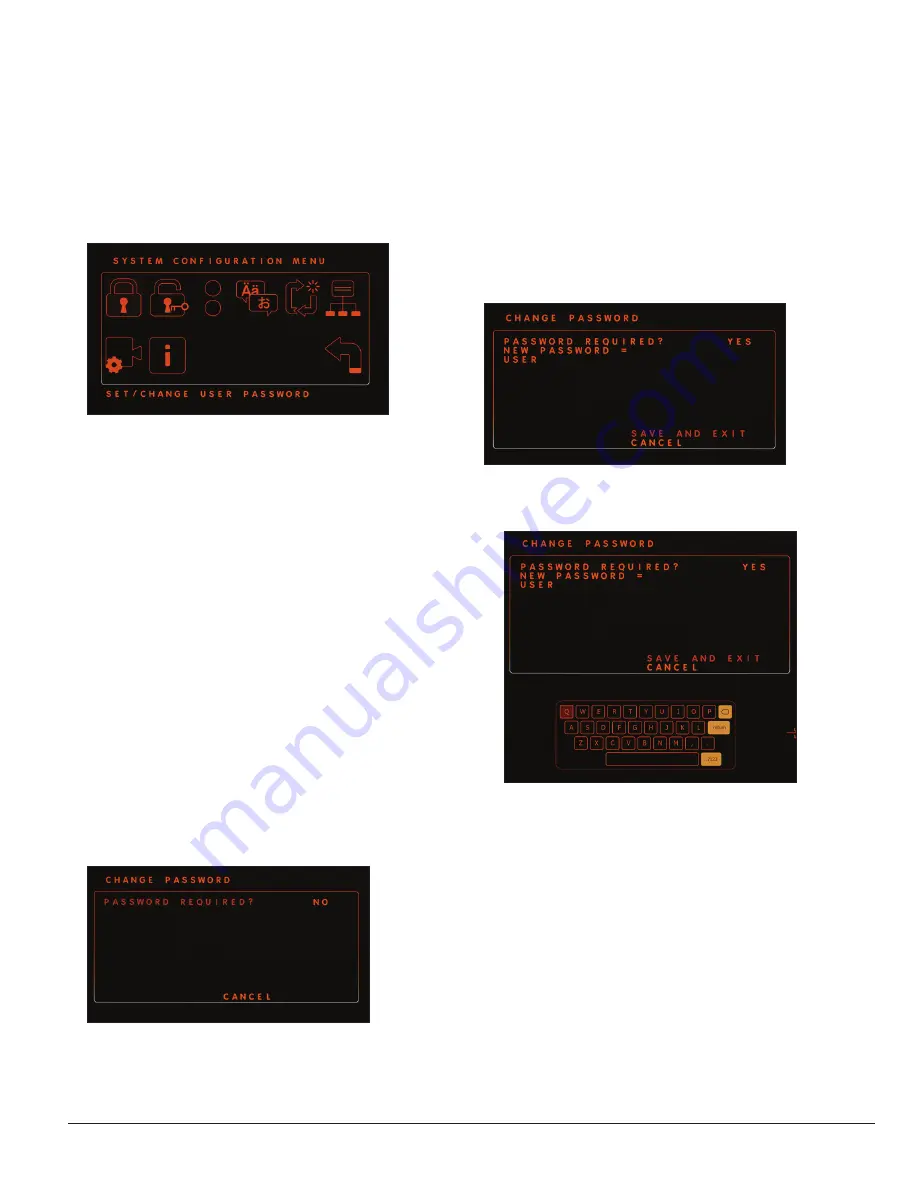
1. From the MAIN MENU, select the
System Configuration icon to
open the SYSTEM CONFIGURATION MENU screen (Figure 21).
Figure 21 .
The SYSTEM CONFIGURATION MENU contains the following icons:
Set/Change Password Protection
Set/Change Admin Password . The default password for all LENS
control units is “ADMIN.”
Configure Accessory Ports
Language
Reset Factory Defaults
Network
Advanced Settings
Versions. Lists software versions of attached devices.
Exit
2. Navigate to the icon representing the feature to be customized and
press
Select .:
Set/Change Password Protection
A user password enables an individual to change and protect the
settings for all the custom procedures. No one else will be able to
access that procedure’s settings.
To set or change an individual’s user password:
1. Select the
Set/Change Password Protection icon on the SYSTEM
CONFIGURATION MENU screen to open the CHANGE PASSWORD
screen (Figure 22).
PASSWORD REQUIRED is blinking. The default is
set to
NO.
Figure 22 .
2. Select
PASSWORD REQUIRED . The current setting (YES or NO) will
blink.
3. Use the
Up and Down arrows on the control unit or the left and right
camera head buttons to switch between
YES or NO.
4. Press
Select to select either Yes or NO. To save the setting,
navigate to
SAVE AND EXIT and press Select. To return to the
System Configuration menu without saving any changes, select
CANCEL.
If
Yes is selected, a blinking NEW PASSWORD = option appears on the
screen (Figure 23).
Figure 23 .
5. Press
Select to select NEW PASSWORD =. An OSD keyboard
appears below the CHANGE PASSWORD menu (Figure 24).
Figure 24 .
6. Use the
Up and Down arrows on the control unit or the left and
right camera head buttons to navigate to the desired letters on the
keyboard.
– A short press moves the highlighted cursor left or right.
– A long press moves the cursor up or down from line to line.
– To select a letter, number, or symbol, press
Select.
– To exit the keyboard, navigate to the
Return key and press
Select.
7. To save the changes and exit the CHANGE PASSWORD screen,
select
SAVE AND EXIT to return to the SYSTEM CONFIGURATION
MENU screen. To exit the screen without saving any changes,
navigate to
CANCEL and press Select to return to the SYSTEM
CONFIGURATION MENU screen.
Содержание LENS Integrated System
Страница 1: ...LENS Integrated System Operations Service Manual...
Страница 2: ......
Страница 45: ......
Страница 46: ......
Страница 47: ......


