


23
10601034 Rev. B
LENS Integrated System
Operations/Service Manual
Operation
Operation
During a procedure, the user can access any of the functions available
in the system either through the camera head button mappings or via
the
Select/Menu Access button on the front panel of the control unit.
Any settings changed during the procedure will be temporarily saved
until the system is powered down. To customize procedures and save
settings permanently, refer to the “Customize the System” section of
this manual. Refer to the menu maps for an overview of how to access
System screens.
When setup is complete and safety checks have been performed, the
System is ready for the surgeon to use. The list below sumarizes the
initial portion of the operative case:
1. Obtain a sterile camera head.
2. Plug the camera head into the control unit.
3. Connect the light guide to the appropriate light guide recepticle on
the front of the control unit.
4. Turn on the illumination by pressing the
Illumination button
5. White Balance from within the sterile field.
For detailed information about how to operate the System, read this
“Operations” section.
Select a Procedure
To select a procedure, use the
Up and Down arrow buttons or the
left and right camera head buttons to highlight the desired procedure.
Press the
Select button. The default procedure is the High Definition
procedure.
To change the default procedure, refer to the “System Configuration”
section of this manual. To customize a procedure, refer to the
“Customize a Procedure” section of this manual.
To access the MAIN MENU screen, select the
Menu Access icon on the
STARTUP screen (Figure 12).
Figure 12 .
MAIN MENU
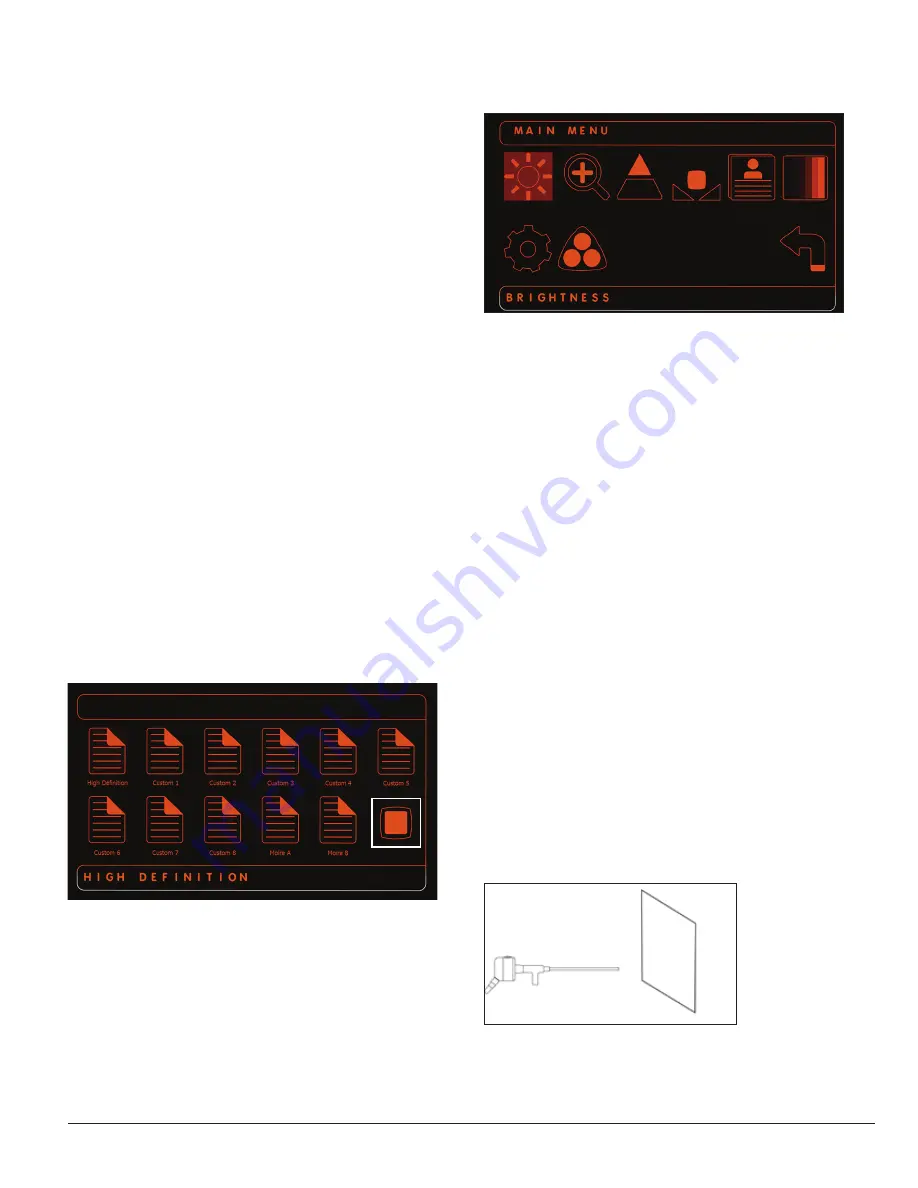
The MAIN MENU screen (Figure 13) allows the user to access and
change settings for the various features and functions of the System.
Use the
Up and Down arrows on the control unit or the left and right
camera head buttons to navigate to the desired feature or function.
Note: Settings changed directly from the MAIN MENU are temporary
settings and will not be saved after the system is powered down or
another procedure is selected. To save settings permanently, refer to the
“Customize Procedure Settings” section of this manual.
Figure 13 . MAIN MENU screen
Brightness
To adjust Brightness, navigate to the
Brightness icon and press Select.
Use the
Up and Down arrows on the control unit or the left and right
camera head buttons to adjust Brightness to the desired level.
Zoom
To adjust Zoom, navigate to the
Zoom icon and press Select. Use the
Up and Down arrows on the control unit or the left and right camera
head buttons to adjust Brightness to the desired level.
Enhancement
To adjust Enhancement, navigate to the
Enhancement icon and press
Select. Use the Up and Down arrows on the control unit or the left and
right camera head buttons to adjust Enhancement to the desired level.
White Balance
To perform a White Balance, a camera head and scope must be
connected to the front of the control unit. Point the end of the scope at a
white object (a 4” x 4” gauze pad or flat white piece of paper) and focus
(Figure 14). Fill as much of the screen as possible with the white object,
but do not hold the scope close enough to touch the white object. Press
the
White Balance button at the upper right corner of the camera head
connector (Figure 1). When the camera completes the White Balance
process, the message “White Balance Complete” appears briefly on the
screen, and a long tone sounds to indicate that the White Balance is
complete. If the White Balance fails, a chirping tone will sound.
Note: Each time the White Balance button is pressed, a single tone will
sound. Press
Select to return to the MAIN MENU.
Note: When a procedure is chosen from the STARTUP screen, the
camera automatically performs a White Balance.
Figure 14 .
Содержание LENS Integrated System
Страница 1: ...LENS Integrated System Operations Service Manual...
Страница 2: ......
Страница 45: ......
Страница 46: ......
Страница 47: ......


