190
191
Troubleshooting
Troubleshooting
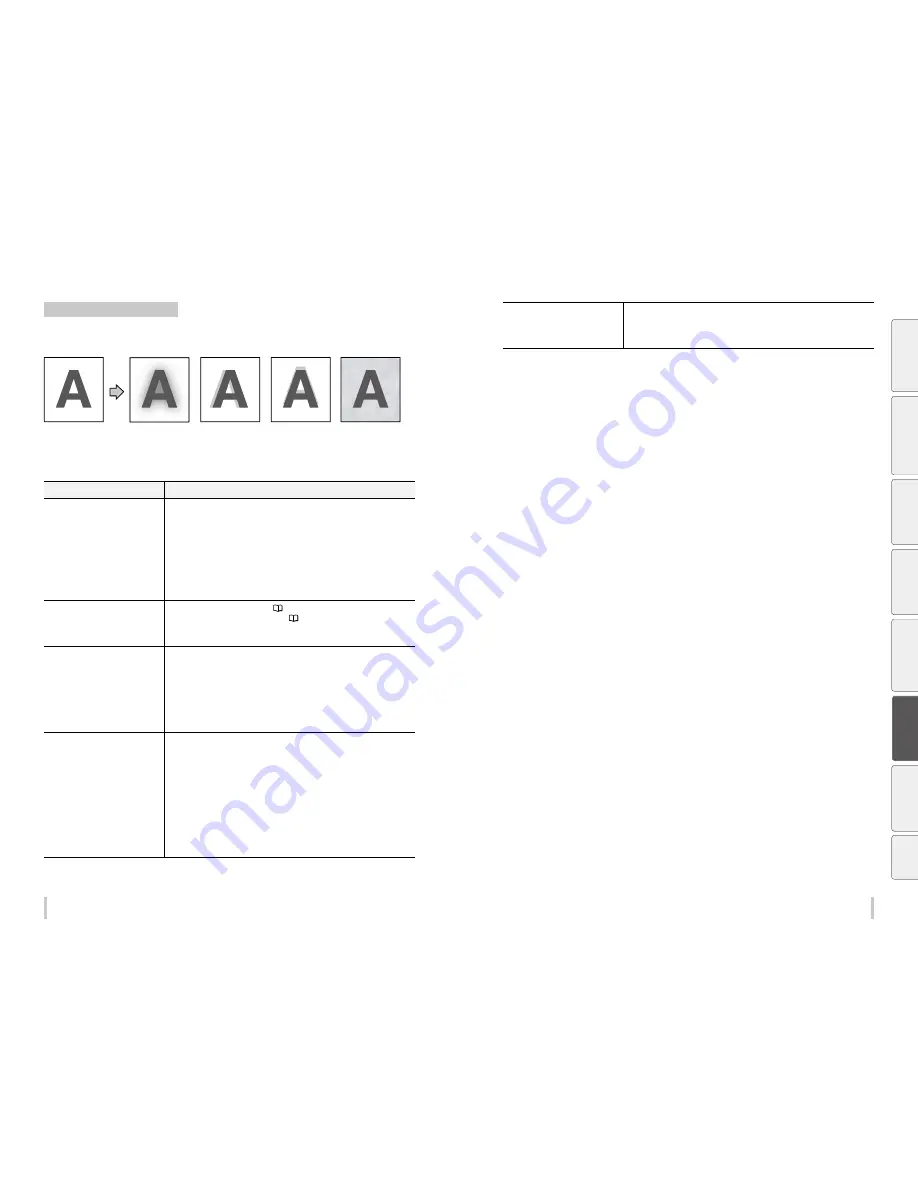
Contours of objects are blurred.
[Symptom A]
Basic image
[Symptom B]
[Symptom C]
[Symptom D]
[Cause]
The ink dries too slowly.
The ink is ejected
excessively.
[Cause]
The print head position
is misaligned.
The bidirectional print
position is misaligned.
[Cause]
The media advance
compensation is not
proper.
[Cause]
The static electricity
accumulated on the
media
Cause
Solution
[Symptom A]
The ink dries too slowly.
The ink is ejected excessively.
(1) Decrease the temperature of all three heaters by 5°C. *
1
* Before starting the print, ensure that the heater temperatures have been decreased to
the target temperature.
(2) Change to a more suitable print mode, or set the carriage speed to SLOW.
*
1
*
2
*
3
(3) Print in unidirectional mode. *
2
(4) If printing in high density, print in normal density.
(5) Use proven media.
(6) With the RIP software, apply the profile with a low ink amount to be ejected.
* Note that the hue may change if the ejected ink amount decreases.
[Symptom B]
The print heads positions are misaligned.
The bidirectional print position is
misaligned.
(1) Adjust the print heads positions. (
page 59
)
(2) Adjust the bidirectional print position. (
page 66
)
(3) If bidirectional adjustment has been performed automatically, perform it again
manually.
[Symptom C]
The media advance adjustment value is
incorrect.
Correct the media advance adjustment value. If media advance adjustment has been
performed automatically, perform it again manually.
- The adjustment value differs depending on the winding mode, tension or loose.
- Be sure to adjust the media advance adjustment value again after changing the suction
fan power.
- Be sure to adjust the media advance adjustment value again after changing the pressure
roller lever position.
- If the ionizer is set to ON, set it OFF.
- If automatic adjustment has been performed, perform manual adjustment.
[Symptom C]
The media advance accuracy is poor, or
is not stable.
(1) Check that the media was installed properly in the conditions below.
- The installed media is installed parallel to the printer.
- The operation panel shows the media type correctly.
- The media winding mode is optimal for the installed media.
- If the media is curled or wrinkled, see the description on the problem, The media is
curled or wrinkled.
(2) Adjust the pressure on the media with the pressure roller lever. *
1
(3) Change to a more suitable print mode, or set the carriage speed to SLOW.
*
1
*
2
*
3
(4) Check that the media is correctly stretched between the paper roll and the pressure roller.
* If the media is loose when performing the media advance adjustment, the value will be
incorrect.
(5) If the ionizer is set to ON, set it OFF.
[Symptom D]
Print defect caused by media static electricity
/ Ink sprayed over white portions of the
media.
(1) Set the ionizer to ON. *
4
(2) Change to a more suitable print mode, or set the carriage speed to SLOW.
*
1
*
2
*
3
(3) Use proven media.
*1 Adjust the media advance adjustment value again.
*2 Note that the print speed differs depending on the mode selected.
*3 Be sure to adjust the bidirectional adjustment value again after changing the carriage speed.
*4 Set the ionizer to OFF with media where no print defects caused by static electricity occur.
Be
fo
re
p
rin
tin
g
Lo
adi
ng
the
m
edi
a
A
dj
us
tm
ent
M
ai
nt
enan
ce
A
dv
an
ce
d
op
er
ati
on
s
Trou
ble
sh
oo
tin
g
M
enu
tr
ee
Ap
pe
nd
ix
Содержание IP-6620
Страница 112: ...222 ...


