98
99
Maintenance
Maintenance
2
MAINTENANCE
2
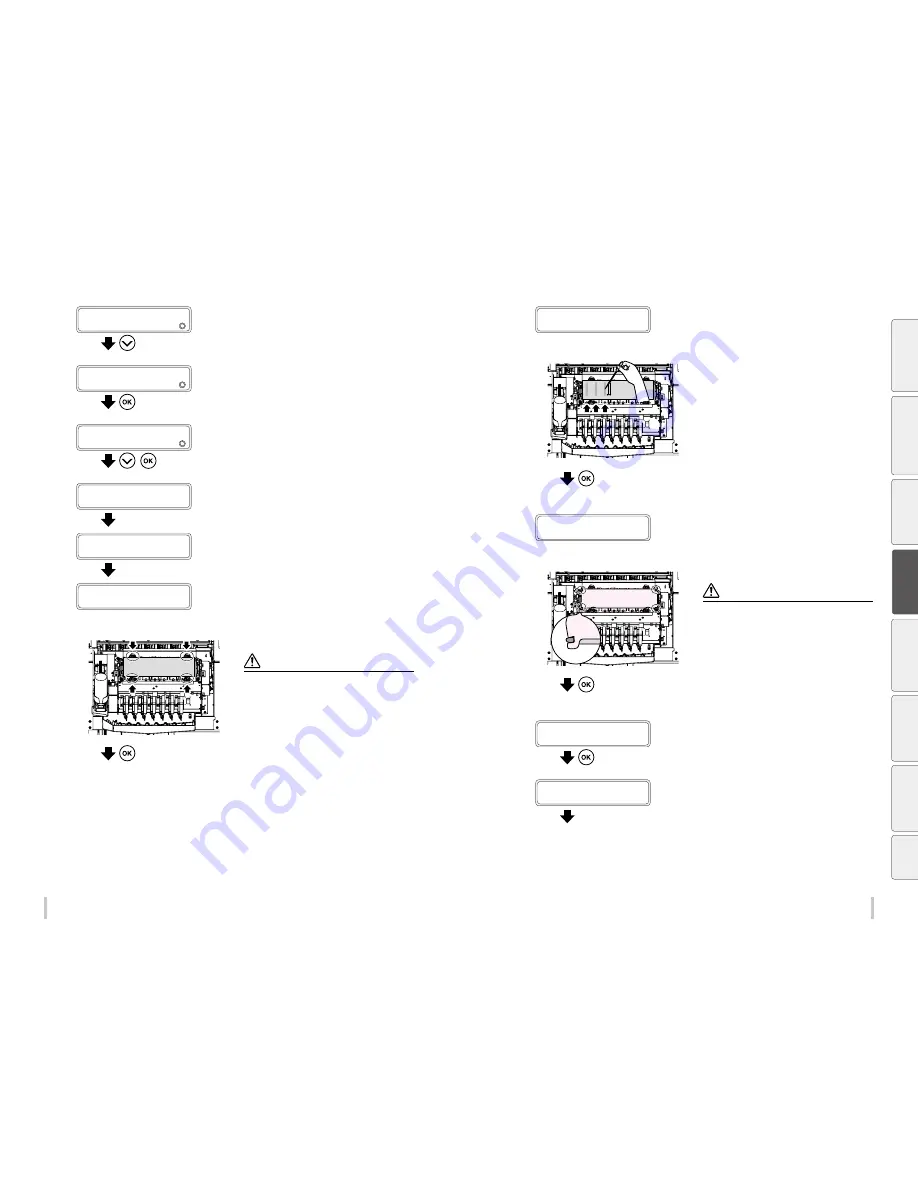
START MAINTENANCE
Press the
Down
key to select
PH
MAINTENANCE
.
3
MAINTENANCE
2
PH MAINTENANCE
Press the
OK
key.
4
PH MAINTENANCE
2
SHEET MOUNT CLNG
,
Press the
Down
key to select
SHEET MOUNT
CLNG
, and then press the
OK
key.
CARRIAGE IS MOVING
PLEASE WAIT
Carriage stops moving.
The carriage moves to the maintenance position.
5
OPEN COVERS
Open the front cover, and then the
maintenance cover.
6
INSTALL GRAY SHEET
Place the gray sheet (cap cleaning sheet) to
cover all seven caps.
Note
Do not place the sheet onto the 4 rollers indicated by
the arrows in the figure on the left. Otherwise this may
decrease the cleaning effectiveness.
Press the
OK
key.
7
DRIP CLEANING LIQUID
ON GRAY SHEET
Apply 1 cc of cleaning liquid twice to the
sheet for each cap.
Draw 1 cc of sheet mount cleaning liquid with the dropper
(use the gradations), and apply 2 cc to the gray sheet (cap
cleaning sheet) for each color.
Apply the liquid in the vertical direction starting from each
color tube indicated by the arrows twice in parallel.
For the 6 color specifications printer, apply the liquid on the
sheet only for the six first caps starting from the left.
(For the 7 color specifications printer, apply the liquid for
the seven caps.)
Press the
OK
key.
8
INSTALL PINK SHEET
Place the pink sheet (head cleaning sheet)
over the gray sheet and attach the hooks.
Note
Securely attach the four hooks. Otherwise the sheet may
detach when entering into contact with the print heads,
which decreases the effectiveness of the cleaning.
The four hooks are placed at the four corners of the
capping unit as shown in the figure to the left.
Press the
OK
key.
9
CLOSE COVERS
Close the capping cover and the front cover.
CARRIAGE IS MOVING
PLEASE WAIT
Carriage stops moving.
The carriage moves to the home position.
Be
fo
re
p
rin
tin
g
Lo
adi
ng
the
m
edi
a
A
dj
us
tm
ent
M
ai
nt
enan
ce
A
dv
an
ce
d
op
er
ati
on
s
Trou
ble
sh
oo
tin
g
M
enu
tr
ee
Ap
pe
nd
ix
Содержание IP-6620
Страница 112: ...222 ...


